Reduce PNG File Size to 20, 50,100, 200KB as You Want
PNG is an image format that contains graphics with hard edges, transparent backgrounds, and text. As it stores so much data, many people want to reduce PNG file size to 20/50/100KB. It is a compressible file type that can also handle 16 million colors, like JPEG. But since it holds a lot of image information, PNGs are generally large files that consume too much space on your device. To help you with this matter, this post will be your guideline for the best PNG file size reducer.
Guide List
Part 1: Use AnyRec to Reduce PNG Size to 20/50/100KB [Online] Part 2: 3 Ways to Shrink PNG File Size into 20/50/100KB [Windows/Mac] Part 3: FAQs about Reducing PNG File SizePart 1: Use AnyRec to Reduce PNG Size to 20/50/100KB [Online]
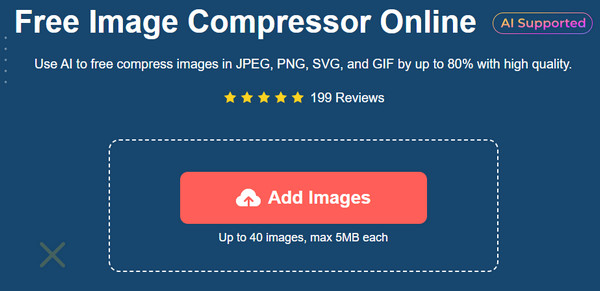
AnyRec Free Image Compressor Online is a web-based program that provides a free service to compress various pictures. This PNG file size reducer supports popular image types, including JPEG, BMP, TIFF, GIF, and so on. It has a straightforward interface that can be navigated easily by a beginner or pro. It also allows you to upload multiple files with different formats but compress them in a quick process. AnyRec Free Image Compressor Online is a convenient tool for PNG without interruption from promotions, popups, and advertisements.
Features:
- Have a robust compression algorithm to reduce PNG image size to higher quality.
- Compress images up to 80% with no visual difference between the original.
- Optimize photos without applying a watermark for the compressed image files.
- Automatically delete the uploaded files to protect the user’s privacy.
Step 1.Go to the official website of AnyRec and look for the Free Image Compressor from the product list. Click the "Add Images" button to choose a PNG file and select it.
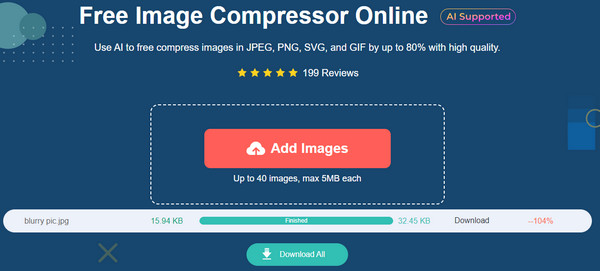
Step 2.The online tool will automatically start compressing the uploaded image. Import more files from your folder to save time. Each picture has a loading process beside them.
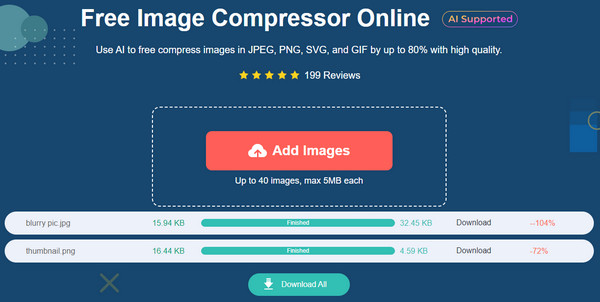
Step 3.Once you have imported all the PNGs from your computer, click the Download All button to save the compressed files to a folder. Maximize the uploads up to 40 files with 5MB each.
Part 2: 3 Ways to Shrink PNG File Size into 20/50/100KB [Windows/Mac]
If you haven’t known, some tools on your computer can compress PNG images to 20/50/100KB and are effective for a simple compress. This part will show three different compressor methods from popular software on Windows and Mac.
1. Photoshop on Windows and Mac
Photoshop is the perfect third-party app for Windows and Mac to reduce PNG file size into 20/50/100 KB and other sizes. It has a powerful image compressor with better controls to adjust resolution, quality, and other settings. Adobe Photoshop is the home for many professional editing features. For one, Photoshop is not free; you must purchase the pro version to maximize practice navigating it.
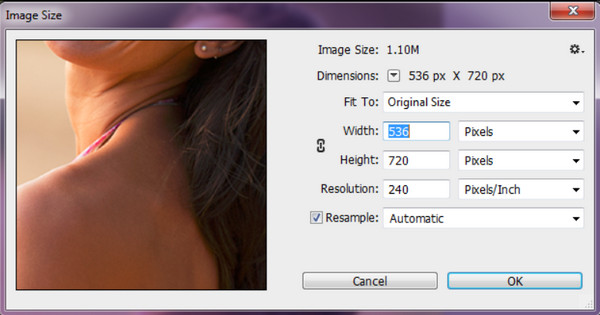
Step 1.Launch the app and navigate to the File menu at the top part of the interface. From the Open option, browse and choose the PNG file. Once uploaded, go to the Image menu and select the Image Size option. Alternatively, press Ctrl+ Alt+I to open the function.
Step 2.From the dialog box, adjust the value from Height and Width. Tick the checkbox for Constraining the Proportions. Select Resample and choose the Bicubic Sharper option to keep the photo's sharpness during compression. Click the OK button to save the changes.
2. Microsoft Paint on Windows
The Paint app is a default tool for Windows. It is the home for resizing, drawing, flipping, mirroring, and many features for creation. Aside from its PNG file size reducer, which compresses images easily, Paint has many editing functions. The Paint app also provides various export formats, such as converting PNG to BMP, TIFF, and HEIC, which is another way to compress large file image files. Now, let’s see the demonstration on how to use the Paint app on Windows to shrink PNG file size.
Step 1.Browse the picture in your local folder and right-click on it. From the menu, hover the cursor on the Open With tab to open the submenu. Choose the Paint app. Another way to upload the PNG file is to open the app first and go to the File menu to choose PNG files.
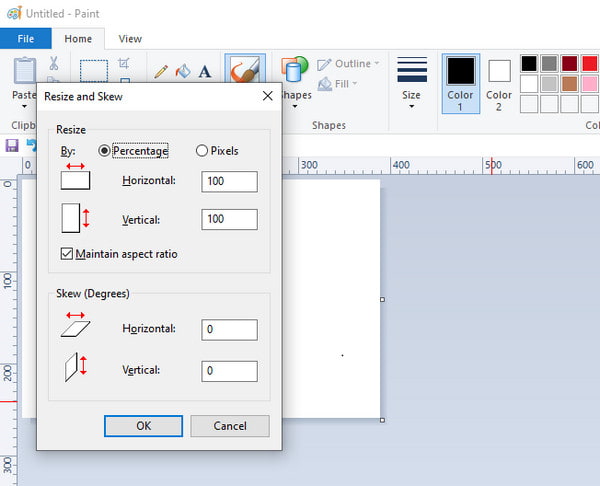
Step 2.Once the picture is on the interface, click the Resize button from the toolbar. You can also activate this function by pressing "Ctrl" and "W" keys on your keyboard. Resize the picture by changing the dimension in pixels and percentages. Once done, click the "OK" button.
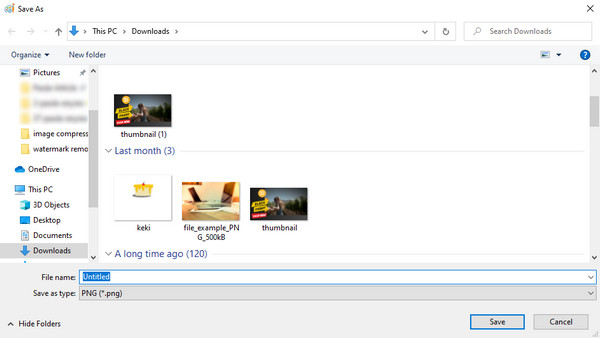
Step 3.After editing, navigate to the File menu and click the "Save As" button. Choose the output format or rename the resized image. Click the "Save" button to finish the task. Check the file’s information to see the new file size.
3. Preview on Mac
Preview is the built-in feature of Mac, where all photos can be viewed and edited. The photo viewer has editing tools that crop, merge, draw, cut, flip, and rotate pictures without losing quality. You can also use it for PNG compression. Its PNG file size reducer is a simple feature that resizes images by dimensions. You can change the aspect ratio by percentage, width, and height, which helps to minimize the file size accurately. Moreover, you can edit multiple pictures to adjust the file sizes on your Mac.
Step 1.Go to Finder and browse for the photo you want to compress. Right-click on it to open the drop-down menu. From the "Open With" tab, choose the "Preview" app to open the picture on the photo viewer.
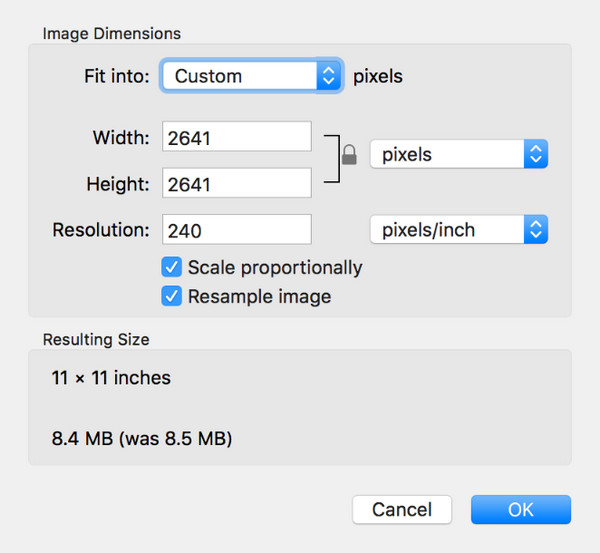
Step 2.Once the file is opened, head over to the Tools menu at the top part of the interface. Click the "Adjust Size" button from the list and choose "Resample Image". Input the desired smaller value in the "Resolution" box.
Part 3: FAQs about Reducing PNG File Size
-
1. How to reduce PNG file size on iPhone?
Open the Photos app and select the picture you want to change the file size. From the Share menu, tap Mail. Enter your own email address and tap Send. A popup window will appear. Choose the desired size for the picture. Launch the Mail app, and download the email with the photo.
-
2. How much should I reduce from PNG file size?
Mostly, you cannot control the compression level to the desired file size. However, other options to reduce file size are to lessen the depth of colors to 24-bit or 8-bit or remove the transparency. If you want to make PNG smaller without losing quality, then you better focus on reducing the image dimensions with lossy compression tools.
-
3. What is the best format to reduce PNG file size?
When it is based on compression with good image quality, then convert PNG to WEBP. It is a good choice for lossless photos because it has 41% compression efficiency. It is also supported universally with different web browsers and software. However, WEBP requires higher CPU usage, which is a drawback if you want to decode it.
Conclusion
With all the recommended tools for Windows and Mac, reducing PNG file size will not be a problem, even if you own Windows or macOS. The default tools on your computer are helpful at times like this, but Photoshop gives you more control to adjust the image dimension to make photos HD. Unfortunately, the third-party app has a challenging learning curve, and getting familiar with its interface takes time. So, AnyRec Free Image Compressor Online will reduce PNG file size with easy navigation and for free. Visit the official website and see more useful functions from AnyRec.
Related Articles:
About Our Author


