Hot
AnyRec Screen Recorder
Capture every moment. Record like a pro.
Secure Download
4 Ways to Take High-Resolution Screenshots on Windows/Mac
A good picture with clear content helps attracts more readers to your articles or presentations, especially when writing a complex tutorial or delivering a professional technique. Hence, high-quality pictures are significant for tutoring materials. But your screenshots for the articles always look blurry or pixelated. This article elaborates on the facts that will influence your screenshot's quality and helps you fix this blurry issue. You can also see the detailed guide on how to take high-resolution screenshots on computers. Continue reading to see the full content.
Guide List
Part 1: Essential Factors for High-Resolution Screenshots Part 2: How to Take High-Resolution Screenshots on PC and Mac Part 3: FAQs about Taking High-Resolution ScreenshotsPart 1: Essential Factors for High-Resolution Screenshots
Three major factors will influence your screenshot's resolution. Check the brief explanation below and see if you can do anything to save your blurry screenshots and take high-resolution screenshots on your computer.
Display Resolution: One of the most important factors that result in high-resolution screenshots is the display resolution of your computer. If your screen has a better resolution, there are more pixels per inch. So the screen can deliver more details, and your screenshots will look sharper.
Snipping Tools: The tool you used for screen capture also matters. Bad snipping tools might compress the screenshots and save your screenshots in lousy quality.
Screenshot Format: By default, most capturing tools save the screenshots in PNG, which is good because PNG uses lossless compression. Especially when you capture an area full of text, PNG is much better than JPEG or JPG format.
Resize Screenshots: If you enlarge the screenshot after taking it, you will stretch the pixels and look pixelated. Hence, the best way to avoid this is to capture screenshots in the size you want to use later.
Transfer Methods: The way to send the screenshots across devices will also cause quality loss. For example, if you send screenshots via email from one computer to another, your screenshot's quality will drop.
Part 2: How to Take High-Resolution Screenshots on PC and Mac
Based on the factors above, you can easily change them to grab a high-resolution screenshot on your computer. Therefore, the following content lets you know how to take high-resolution screenshots with the best snipping tools and display resolution.
Default Methods
Before using the default methods to capture windows on your computer, you can adjust the display resolution to capture small icons on the screen with the best quality.
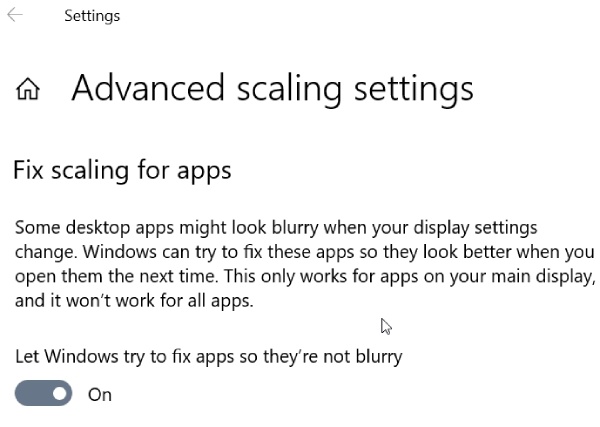
Windows: Go to Settings, find System, and click Display. Then, choose 300% from the Scale dropdown option. This will temporarily enlarge everything on your desktop. Then, go back to Display and click Advanced scaling options, turn on the Fix scaling for apps option, and your screenshots will look much better.
How to take high-resolution screenshots on Windows
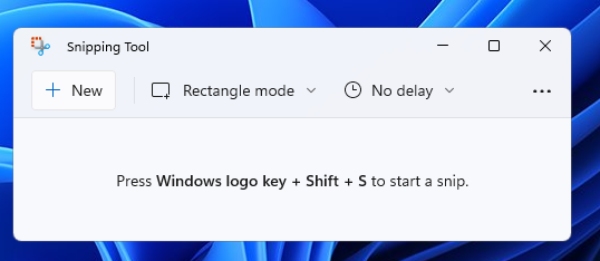
Step 1.
Step 2.You can capture the screen with Free-from Snip, Rectangular Snip, Window Snip, and Full-Screen Snip.
Step 3.After capturing, you can crop the screenshot on Windows with Paint.
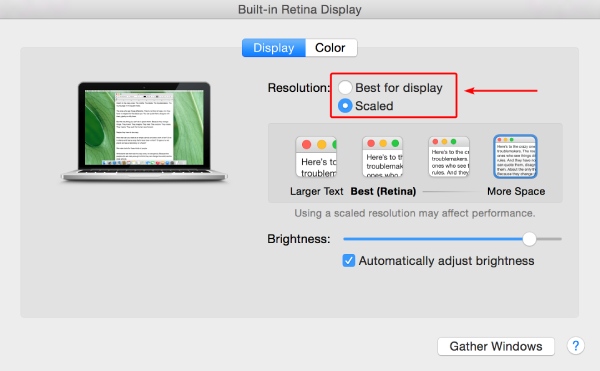
Mac: Go to "System Preferences" on your Mac and find the "Display" option. Next, choose the "Large Text" for your display resolution. Or you can use the recommended "Best" option.
How to take high-resolution screenshots on Mac
Step 1.Use the following shortcut combinations to capture snapshots on your MacBook Air and Pro computers.
- Command, Shift, and 3: capture the entire screen.
- Command, Shift, and 4: capture a random screen area.
- Command, Shift, and Space: capture an active window.
- Command, Shift, and 5: activate the capture toolbar.
Step 2.By default, Mac stores your screenshots on the desktop. You can also click the thumbnail to edit the screenshot after capturing it. Then, save it on your Mac in PNG format.

AnyRec Screen Recorder [Recommended]
AnyRec Screen Recorder is a more powerful alternative to the default snipping tools on Windows and Mac. With more screenshot features, this snipping tool is also easy to operate. You can customize the hotkeys for a quick snapshot, capture the whole webpage with scrolling mode, and record your computer or phone.
Taking a high-resolution screenshot is easy with this software. You can preview and edit the screenshot and save it later in formats, including PNG, JPEG, BMP, TIFF, etc.

Make annotations on the screen during recording.
Record phone screens remotely on Windows and Mac.
Continue the previous recording task with Last Recorder.
Scroll the window to capture the full content on the screen.
Secure Download
Secure Download
How to take a high-resolution screenshot with AnyRec Screen Recorder
Step 1.Download and install this recorder on your computer. Then, launch it, and you can use the default hotkeys (Ctrl, Shift, and C) to capture the screen. Or, click the camera icon on the main interface to capture a random area.
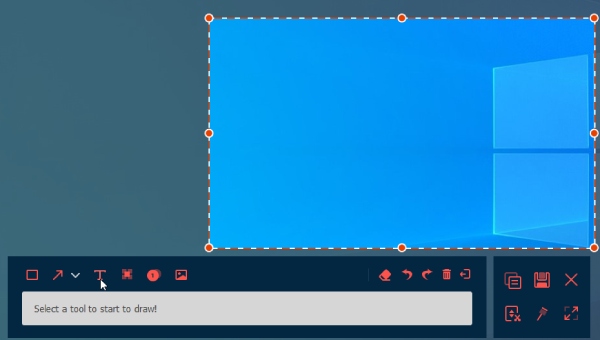
Step 2.After capturing, you will see a toolbar and use the tools there to blur private information, add text, make marks, or do nothing. Then, you can get a high-resolution screenshot and click the Save button to save it on your computer.
ShareX [Windows]
ShareX is another alternative snipping tool for Windows. The biggest advantage of ShareX is that it is free. Although it costs not a penny, there are still various excellent features. For example, the ORC tool enables you to capture the text from a picture via a screenshot. You can capture a random area; this snipping tool will extract the text. You can also upload the screenshots to online servers like Imgur, Google Photos, Twitter, etc. Most importantly, there is no quality loss for screen capture in ShareX.
- Pros
- Pick and copy colors from other screenshots.
- Combine screenshots horizontally or vertically.
- Collaborate with Google image search and Bing visual search.
- Cons
- The scrolling capture is lousy and complex.
- You can't resize the screenshot during capturing by default.
How to take a high-resolution screenshot with ShareX
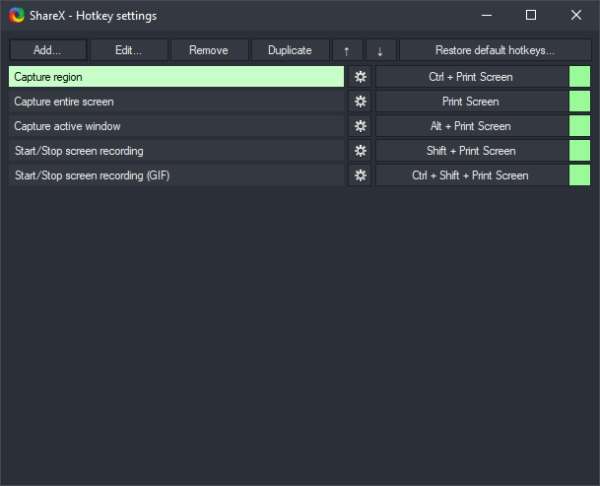
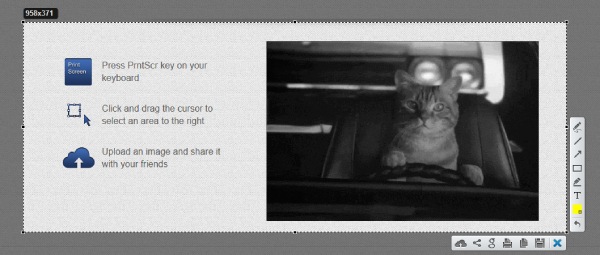
Step 1.Download ShareX from its official site. Install and launch the tool on your computer. The default hotkeys to screenshot part of the screen are "Ctrl" and "Print Screen". Press the two keys to capture the screen.
Step 2.ShareX automatically saves your screenshots under the Documents folder. Meanwhile, you can also edit the screenshot after capturing it. You can apply stickers, erase sensitive information, highlight content, etc.
Lightshot [Windows & Mac]
Lightshot is another free snipping tool that can take high-resolution screenshots on Windows and Mac. This free snipping tool offers multiple after-capturing tools for you, including uploading to online servers, searching for similar images, sharing on social media, printing, etc. As a versatile screenshot program, Lightshot enables you to edit screenshots easily and immediately.
- Pros
- Colorful image editing tools.
- Keep screenshot history for easy review.
- Take screenshots in browsers with the add-on/extension.
- Cons
- There is no interface but a small icon.
- You can't take long screenshots.
How to take a high-resolution screenshot with Lightshot
Step 1.Download, install, and launch Lightshot on your computer.
Step 2.To take a high-resolution screenshot, press the Print Screen key on Windows (Command and L keys on Mac).
Step 3.Select the area you want to capture and press "Enter" to take the screenshot.
Part 3: FAQs about Taking High-Resolution Screenshots
-
How to take high-resolution screenshots of websites in Chrome?
Yes, you can. By using the Developer tools and screenshot shortcuts, you can easily get a high-resolution screenshot in Chrome. Choose Device mode, select Responsive in Preset, set DPR to 3.0, and press Ctrl, Shift, and P. Then choose Capture Fullsize Screenshot.
-
Can I take a 4K screenshot on the computer?
The screenshot resolution is basically the same as your display resolution. Unless your computer has a 4K screen, you can't take a 4K screenshot on computers with lower display resolution.
-
How can I make my screen 4K?
You can go to the "Display" settings and change the "Display Resolution" to 3840×2160, which is 4K. Then, when you take a screenshot on the screen, you will get a 4K screenshot.
Conclusion
With the proper settings, the right snipping tools, and high-quality screens, you will undoubtedly take high-resolution screenshots on Windows and Mac. All the above snipping tools offer editing features. But if you want to capture the whole web page or a long document, AnyRec Screen Recorder is the best choice for its simplicity and efficiency.
Related Articles
About Our Author


