3 Ways to Screen Record on Surface Pro with Audio
Whether you want to capture tutorials, gameplay, or online meetings, knowing how to screen record on Surface Pro is incredibly useful. However, some users run into frustrating recording problems like a black screen, no sound, etc. Therefore, today's guide covers not only the three best ways to screen record on Microsoft Surface Pro but also practical fixes for common recording issues. Dive into the following now and get your device recording right away.
Guide List
How to Screen Record on Surface Pro Laptop with AnyRec Screen Recorder How to Screen Record on Microsoft Surface Pro with Xbox Game Bar How to Record Screen on Surface Pro with Snipping Tool Can't Record on Surface Pro? See Those Solutions FAQs about Surface Pro Screen RecordingHow to Screen Record on Surface Pro Laptop with AnyRec Screen Recorder
AnyRec Screen Recorder provides complete control over recording via 7 different recording modes and editing tools. You can record, edit, save and share any video on your Surface Pro device smoothly, even during long and high-resolution recordings. Thus, for a complete and hassle-free screen recording experience on Surface Pro devices, the program is a reliable solution that fits beginners and advanced users perfectly.

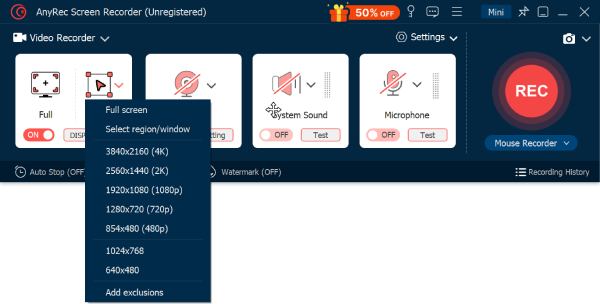
Can record full-screen, window mode, or a custom region on Surface Pro.
Save recording in multiple formats like MP4, MOV, WMV, AVI, and more.
Supports high-quality output up to 60 FPS and HD/4K resolution.
Offers real-time annotation tools like arrows, text, lines, drawings, etc.
Secure Download
Secure Download
Step 1.Launch AnyRec Screen Recorder on your Surface Pro device. You will be in the default "Video Recorder" mode. Set the capture area as full or custom.
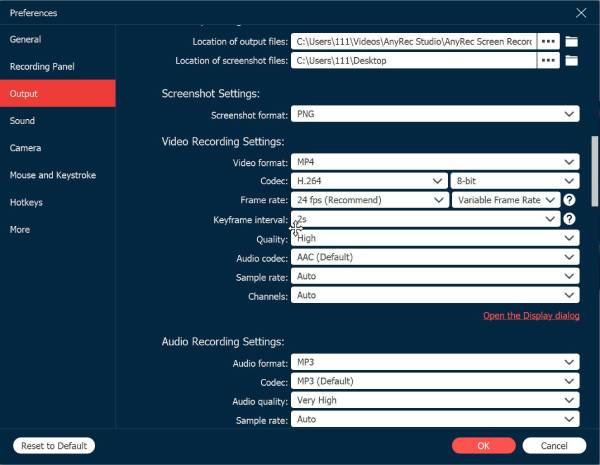
To adjust output quality, format, frame rate, and more to your liking, click the "Settings" button, then go to the "Output" section.
Step 2.Next, depending on the type of recording you want, toggle the following options: System Sound, Microphone, and Webcam.
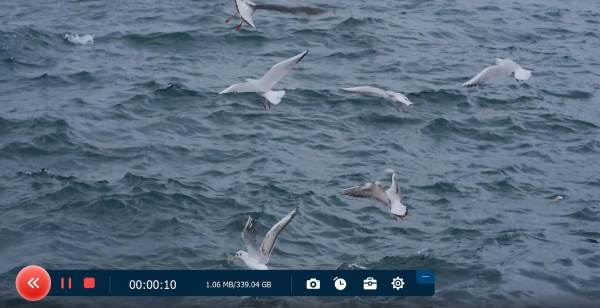
Step 3.Click the "REC' button to begin recording, then perform the activity on-screen you wish to capture. You can use the simple floating toolbar to pause, resume, or annotate your recording.
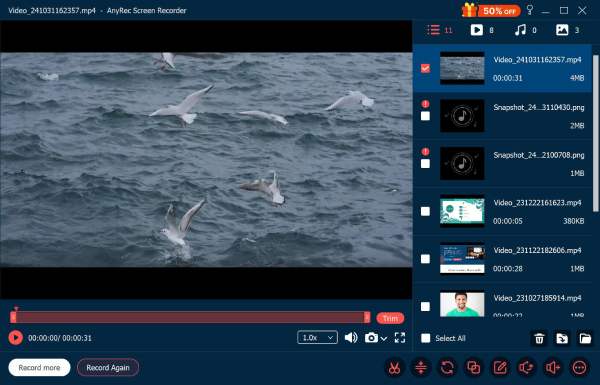
Step 4.Later, once done, click the "Stop" button. A preview window will show up where you can watch your Surface Pro recording and trim it as needed. Save it to your desired folder.
Secure Download
Secure Download
How to Screen Record on Microsoft Surface Pro with Xbox Game Bar
It is worth trying the built-in Xbox Game Bar, which comes preinstalled, to screen record on Windows Surface Pro. This tool works conveniently as it does not need any installation and functions smoothly for most apps and programs.
Cons
Cannot capture system apps like File Explorer due to restrictions; no webcam overlay.
Step 1.Press the "Windows + G" keys on your Surface Pro keyboard to access the Xbox Game Bar. Once it appears, click the "Record" button from the "Capture" widget.

Step 2.To add narration, enable "Microphone" before starting. Once recording begins, use your screen as usual with the small floating toolbar showing recording duration.
Step 3.Press the "Windows + Alt + R" keys to stop recording, or click the "Stop" button on the toolbar. Then, your recording will be saved in "File Explorer" to the "Videos" folder, then in "Captures".
How to Record Screen on Surface Pro with Snipping Tool
As Windows continues to evolve, the Windows 11 Snipping Tool can still works to screen capture on Surface Pro. It is effortless to use, with a minimal toolbar ideal for quick demonstrations, short clips, app previews, and more.
Cons
Cannot record system audio; limited to basic recording tasks; not perfect for long recordings.
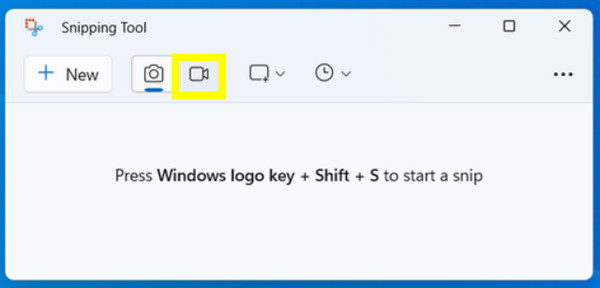
Step 1.To open the app, press the "Windows + Shift + S" keys. From there, switch to the "Record" tab at the top of the Snipping Tool window. Click "New", then drag your pointer to choose the screen area you wish to record.
Step 2.Click the "Start" button to start recording after the countdown. Perform the actions you wish to record on the Surface Pro screen.
Step 3.Later, click the "Stop" button on the small floating toolbar to stop the recording. Then, a preview window will show up, and click the "Save" button to store the video in your desired folder.
Can't Record on Surface Pro? See Those Solutions
Done with all the Surface Pro screen recorders. It's time to know the most common recording issues that users may face when recording on a Surface Pro laptop. Included here are such problems as Game Bar not opening, black screen recording, missing audio, or failing to save that come from simple restrictions or overloaded processes.
See the table below to identify quick troubleshooting steps to get your Surface Pro recording smoothly again.
| Recording Problem | Quick Solutions |
| Xbox Game Bar Not Opening | Enable the Game Bar in Settings; restart your device, update Windows, or run Xbox Game Bar as administrator. |
| No Sound Recording | Check Sound Settings; enable mic permissions, and ensure to turn on System Sound in the recorder. |
| Black Screen | Avoid recording restricted apps; use window mode instead of full-screen capture, and try to update graphic drivers. |
| Recording Won’t Save | Change the save location, and make sure you have at least 2 to 4 GB of free space. |
| Choppy Video | Lower the resolution or frame rate and close unnecessary apps during recording. |
| Recording Stops Automatically | Lessen workload on Surface Pro; lower recording quality, and ensure to close heavy applications in the background. |
FAQs about Surface Pro Screen Recording
-
Why can't I screen record the Surface Pro using Game Bar?
There are a few reasons why you cannot use Game Bar to record. It may be due to disabled Game Bar settings, restricted apps like File Explorer, or outdated Windows system updates. To avoid these issues, you can try switching to another effective recorder for Windows.
-
How to fix no audio when recording on my Surface Pro device?
Ensure the system sound or microphone is enabled in the recorder you're using. Also, you can check the audio device in the Settings, then go to System, and then Sound, and there ensure permissions for the microphone are turned on.
-
Can I record system audio on my Surface Pro with the Snipping Tool?
Unfortunately, no. The Snipping Tool is limited to capturing visuals only, and no system audio or microphone input support. If you need a high-quality screen and audio recording, you can rely on other professional tools.
Conclusion
Once you know the right tool to use, it is easy to record screen on Surface Pro. Even if recording issues may appear along the way, such as black screens, no audio, or recordings won't save, today's guide offers you fixes to get back on the recording track right away. But for the most reliable, feature-rich, and high-quality solution to record Surface Pro screen, AnyRec Screen Recorder is the best choice to get the recording experience to the next level.
Secure Download
Secure Download


