Hot

AnyRec Screen Recorder
Screenshot on Windows in full screen, scrolling, and custom region.
Secure Download
How to Take Full/Partial/Long Screenshots on Windows 11
Learn the following 6 efficient ways to take screenshots on Windows 11. No matter you want to capture the full screen, partial area, or scrolling pages, you can find the suitable ways:
- AnyRec Screen Recorder: Capture all kinds of screenshots on Windows with high quality.
- Windows + Shift + S: Take screenshots to clip board and do more editings.
- PrtSc: Simply take the screenshots on Windows 11 of the full screen.
- Alt + PrtSc: Quickly capture the current window with no editing features.
- Ctrl + Alt + PrintScreen: Able to take scrolling screenshots of webpages on Windows 11.
- Snipping Tool: Default capture program on Windows 11 to take screenshots with 3 modes.
Secure Download
Secure Download
Sometimes, you may want to take screenshots on your Windows 11 of a favorite movie line, lyrics, conversation, video chat, meme, and more. Fortunately, it’s really easy with the default screen capture. You will be able to capture them in full screen, window screen, or a particular area. Keep reading to learn the 6 efficient ways to take screenshots on Windows 11 with detailed steps.
Guide List
Best Way to Take Screenshots on Windows 11 of Desired Area 4 Ways to Take Screenshots on Windows 11 through Shortcuts Use Snipping Tool to Take Screenshots on Windows 11 FAQs about Taking Screenshots on Windows 11Best Way to Take Screenshots on Windows 11 of Desired Area
Suppose you are looking for a tool that will help you take a screenshot on Windows 11 OS in full screen, window screen, or a part of your screen. In that case, AnyRec Screen Recorder is the most recommended app for you. Moreover, you can add drawings, texts, arrows, and lines to your screenshots if you want to. You don't need to worry about the screenshots quality, since it also provides customizable outpur settings.
Take a screenshot on Windows 11 in full screen, window, or part of the screen.
Save screenshots into different formats, such as JPG, BMP, GIF, PNG, or TIFF.
Add drawings, arrows, texts, lines, shapes, and more to your screenshots.
Provide customized hotkeys to take screenshot on Windows 11/10/8/7 quickly.
Secure Download
Secure Download
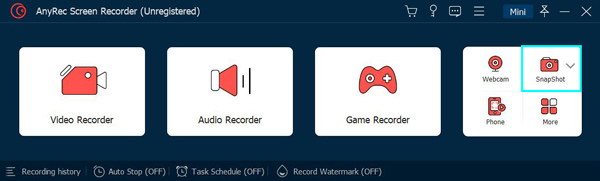
Step 1.To start with, launch the AnyRec Screen Recorder on your Windows 11. After that, click the "SnapShot" button on the main interface.
Step 2.Just move the mouse to where you want to take a screenshot on Windows 11, then left-click it to take a screenshot. You can capture the full screen or a selected area.
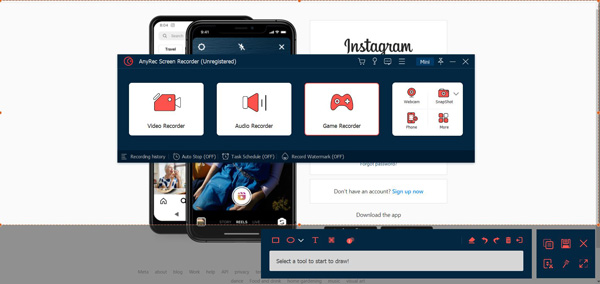
Step 3.Once clicked, you can further set the capture area and do more editings. Finally, click the "Save" button to save it on local folder.

Secure Download
Secure Download
3 Ways to Take Screenshots on Windows 11 through Shortcuts
Do you know that there are also default shortcuts for you to take screenshots on Windows 11? But you should note that these tools can only capture the fixed screen of your computer with no advanced editing features. Please keep reading and know more.
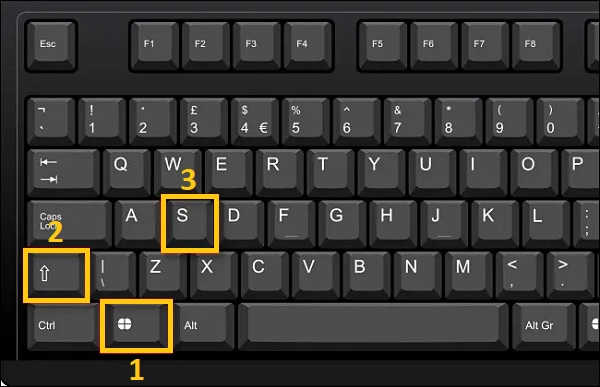
1. Press Windows + Shift + S
The first shortcut in taking screenshots on Windows 11 you must know is "Windows + Shift + S". This method will allow you to take screenshots on Windows 11 by grabbing the screen with the help of your mouse as the cursor. You can also take a screenshot in Freeform Snip, Window Snip, and Fullscreen Snip.
The screenshots will be saved in the clipboard, and you can open tools like Paint to copy them. You can also send the screenshots to your friends through social apps directly.
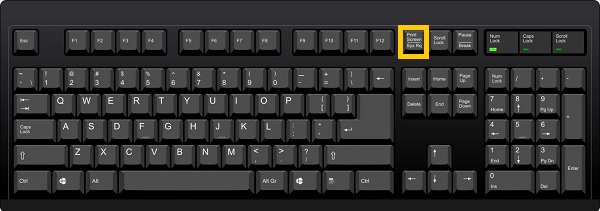
2. Press PrintScreen (PrtSc)
One of the fastest methods in taking a screenshot is pressing "PrintScreen (PrtSc)" on your keyboard. It lets you screenshot on Windows 11 with the entire screen. With that being said, you will not be able to choose a part of the screen unless you edit and crop it. But where do screenshots go on Windows? Through this way, you can only find them in the clipboard and then choose to save them.
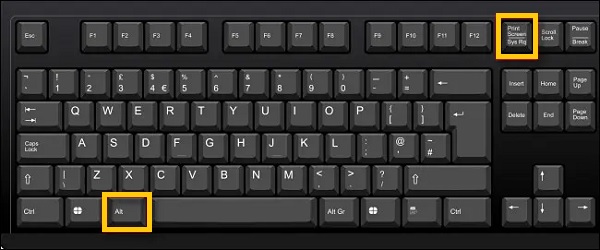
3. Press Alt + PrintScreen (PrtSc)
When you press "Alt + PrintScreen" (PrtSc) on your keyboard, this will allow you to take a screenshot on Windows 11 of your current window. So, this method is perfect for those who open many windows and want a quick way of capturing their present window.
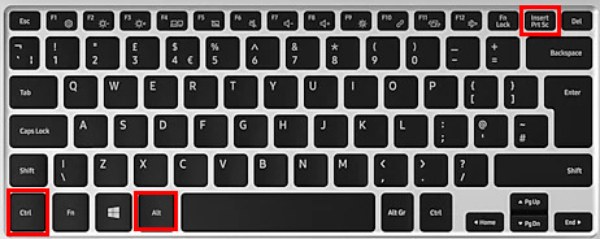
4. Press Ctrl + Alt + PrintScreen (PrtSc)
You can also capture the scrolling screenshots of webpages on Windows 11. Just press and hold the "Ctrl + Alt" buttons, and then press the "PrtSn" button to enter the full screen. Now, you can hold your left mouse to capture long screenshots.
Note: After taking screenshots on Windows 11, the screenshots will be saved automatically on your PC. Just find them from "This PC", "Pictures", and then "Screenshots" folder.
Detailed Steps to Take Screenshots on Windows 11 with the Snipping Tool
Snipping Tool is a built-in screenshot app on Windows 11. This tool will allow you to take screenshots using a Free-form Snip, Rectangular Snip, Window Snip, or Full-screen Snip. It also has a delay feature that automatically screenshots on Windows 11 after the timer. So, without further ado, follow the steps below.
Steps to Follow:
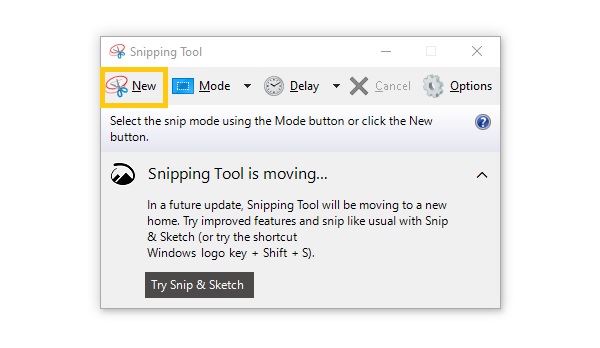
Step 1.Firstly, search Snipping Tool on Windows 11. Then, open the tool and click the "New" button. Or you can use Windows Snipping Tool Shortcuts as well
Step 2.After that, select the screen that you want to crop a screenshot of on Windows 11. Then, you may choose to add drawings to it.
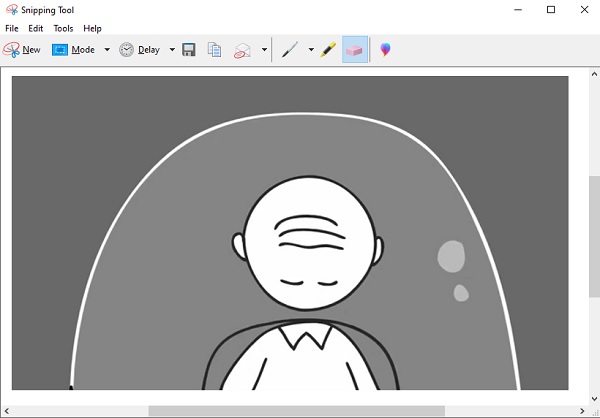
Step 3.Lastly, when you’re done editing the photo, you can now go to the "File" section and choose the "Save As" button to save it to your files.

Secure Download
Secure Download
Further Reading
FAQs about Taking Screenshots on Windows 11
-
1. How to screenshot on Windows 11 using Xbox Game Bar?
Xbox Game Bar is another built-in screenshot tool on Windows 11 OS that is specifically made to capture gameplay. But you can also utilize it in capturing any part of your screen. To use it, you can search Xbox Game Bar on your Windows or simply press Windows + G on your keyboard. Then, click the Camera button to take a screenshot on your Windows 11.
-
2. How to crop screenshots on Windows 11/10/8/7?
If you press the built-in PrtSc button on you keyboard to take screenshots on your Windows 11/10/8/7, the screenshots will be in full-screen. Since you can’t find the screenshot on the local folder, you should open the Paint app and paste it to start cropping to the desired size.
-
2. How to take screenshots on Windows 11 laptop?
Fortunately, Windows 11 computers and laptops have the same way of capturing screens. So, you can just follow the outlined steps above on how to take screenshots on Windows 11 to help you take a snap on your laptop.
Conclusion
There you have it! That's all for our discussion on how to screenshot on Windows 11. You can directly used the default shortcuts or snipping tool to capture your screen easily. But most of them don't provide many editing functions, even the selected region. In this case, you'd better rely on AnyRec Screen Recorder and use it to take screenshots on Windows 11/10/8/7. If you still have questions, we encourage you to send us your message.
Secure Download
Secure Download


