Hot
AnyRec Screen Recorder
Capture every moment. Record like a pro.
Secure Download
How to Record System Audio on Mac? Top 6 Solutions for You
While recording system audio on Mac can be tricky due to some restrictions, the right tools can make it simple. Whether it is music, a tutorial, a podcast, or online audio, a reliable tool to record system audio on Mac ensures the best results for these purposes. Therefore, today's guide offers two standout tools with step-by-step instructions to record audio coming from your Mac, and four more macOS tools that stand out for their uniqueness. Choose the right recorder today!
Guide List
Best Way to Record External/Internal Audio on Mac How to Use QuickTime Player to Record Audio on MacBest Way to Record External/Internal Audio on Mac
There are many programs to help you record desktop audio on Mac; however, not all offer the convenience and features you like for audio recording. Thus, here comes AnyRec Screen Recorder as a simpler and more efficient solution for recording high-quality system audio. This software features an intuitive interface, perfect for effortless audio capture, whether it is the system sound, mic input, or both. Made ideal for content creators, podcasters, and anyone seeking precise control over their recordings, this software promises to give you professional-quality results.

Can record system audio on Mac and mic either together or separately.
Easily adjust volume levels and output settings to achieve clearer audio.
Save audio recordings in MP3, AAC, M4A, and more popular formats.
Includes noise reduction and enhancement tools for improved recording.
Secure Download
Secure Download
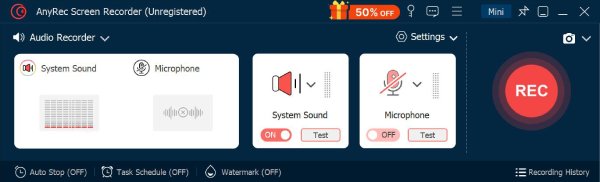
Step 1.Launch AnyRec Screen Recorder on your Mac and select "Audio Recorder" from the main dashboard.
Enable "System Sound" to capture your Mac's internal audio, and switch on "Microphone" too to record your voice. You can select which one to use and adjust both volumes to have a balanced sound..
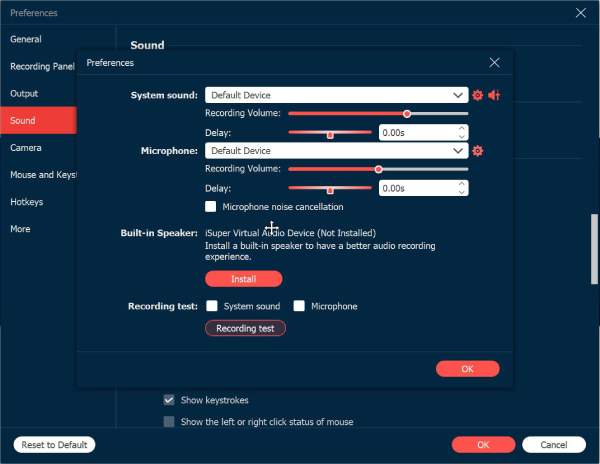
Step 2.Before recording, click the "Settings" button and navigate to the "Sound" tab. Check the "Noise Cancellation" box to lessen background noises and have a cleaner recording. Click the "OK" button to apply changes.
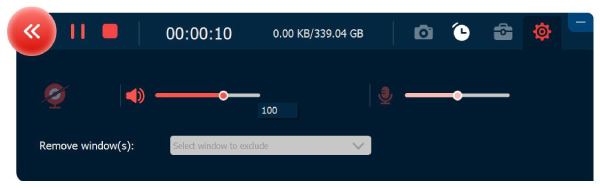
Step 3.When all settings are good, click the "REC" button. A small floating toolbar will appear, allowing you to pause, stop, or adjust volume levels in real-time while capturing both audio and your voice.
Step 4.Once your recording is complete, click the "Stop" button to finish. You can preview the audio right away, trim any sections, and then click the "Save" button to export a high-quality audio file on Mac.
Secure Download
Secure Download
How to Use QuickTime Player to Record Audio on Mac
QuickTime Player is a built-in Mac application that lets you record high-quality audio effortlessly. With its simple interface, anyone who needs a quick QuickTime screen recording with audio can start right away! You can record your voice, system audio, or both simultaneously. Also, besides recording Mac computer audio, it lets basic trimming to remove extra sections before finalizing, and gives you format options to make sharing and editing on other platforms simple.
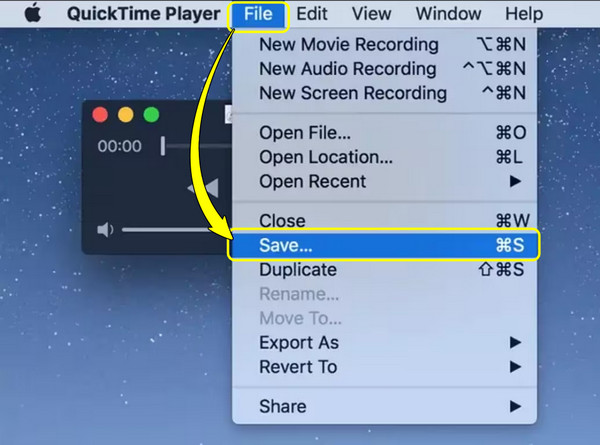
Step 1.Launch QuickTime Player from your "Applications" folder. Then, in the top menu, click on "File" and select "New Audio Recording".
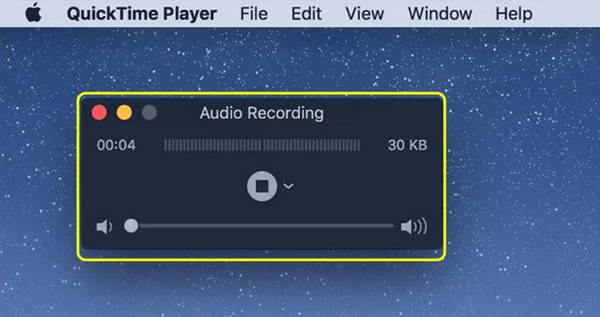
Step 2.From the recording window, click the small arrow beside the Record button to choose your "Microphone input" or a device for system audio. Adjust the volume if needed.
Step 3.Next, click the "red Record" button to begin. Speak or play the audio you wish to capture. Click the "Stop" button once done. Then, go to "File", then "Save" to get your audio recording.
1. GarageBand - Studio-Quality Audio Recording with Effects
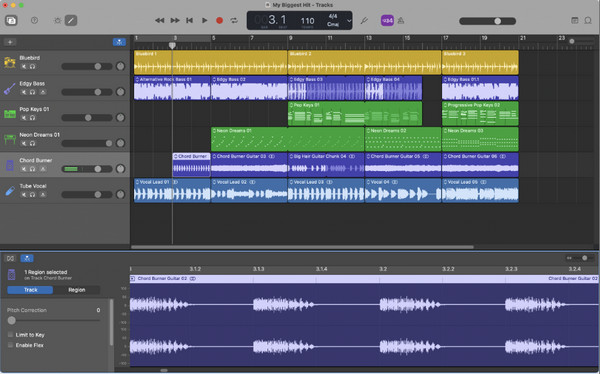
For more options to record system audio on Mac, GarageBand is here! It is Apple's native audio workstation that mixes both simplicity and professional-grade features. With its multi-track recording, you can layer vocals, instruments, and various effects flawlessly. Furthermore, this app comes with a collection of loops, virtual instruments, and sound effects that help enhance GarageBand audio recordings.
2. Audacity - Open-Source Customization and Editing
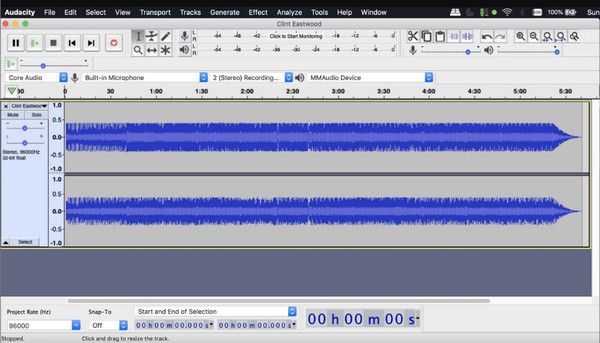
Audacity is a famous open-source Mac audio recorder and editor. You can record multiple tracks here and manipulate audio afterward. The popular audio effects are noise reduction, equalization, and compression. Unlike GarageBand, Audacity works cross-platform and is fully customized. you can expand functionality with Audacity plugins, such as Muse FX, MFreeFXBundle, and more. But you need to install a virtual audio driver to record computer audio in Audacity on Mac, such as BlackHole, SoundFlower, and more.
3. Adobe Audition - Professional-Grade Audio Production
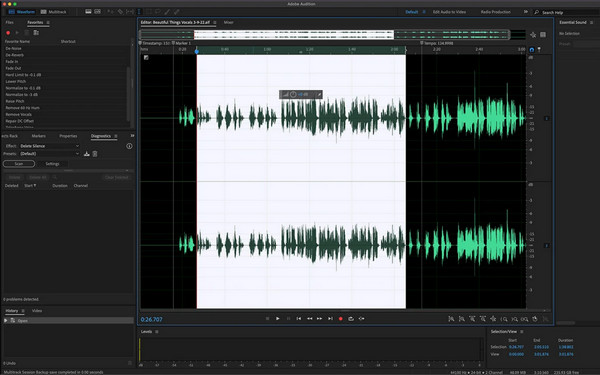
Adobe Audition brings polished workflows for audio recording and editing on Mac. You can capture vocals, instruments, and internal audio on Mac with advanced mixing tools and multi-track recording environments. Adobe Audition also comes with noise reduction and audio restoration, which makes it a go-to place to record system audio on Mac, especially for music production, podcasts, and post-production audio for video projects.
4. Logic Pro - Advanced Music Production and Compositions
For musicians and composers who opt for deeper control, the last Mac audio recorder, Logic Pro, offers a complete professional music production suite. It builds upon GarageBand's interface but with extra tracks, a massive library of loops, virtual instruments, and more. Besides recording audio on Mac, here you can have precise controls over mixing and mastering, giving you a professional-quality recording from start to finish.
Conclusion
Using the right tools, you can record system sound on Mac for music, podcasts, tutorials, or any other audio projects with high quality and minimal effort. From simple recorders like QuickTime Player to studio-grade software such as Logic Pro, you can find the perfect tool that fits your needs and skill levels here! Among all the options, AnyRec Screen Recorder shines as an all-in-one solution. This tool records system audio and mic input at once, with noise cancellation, customizable settings, and more exciting features. Regardless of your skill level, you can record browser audio, app audio, online streams, playlists, and all kinds of audio on Mac easily.
Secure Download
Secure Download
Related Article
About Our Author


