Hot
AnyRec Screen Recorder
Capture every moment. Record like a pro.
Secure Download
How to Screen Record on Windows 11 with Windows Media Player
To record with Windows Media Player needs an add-on - Windows Media Encoder. What’s more, Xbox Game Bar and OBS can replace this complicated software. But to quickly capture high-quality screens on Windows without limitations, AnyRec Screen Recorder is best for you.
- AnyRec Screen Recorder: record screen, audio ,game, webcam, etc with editing features.
- Windows Media Player: basic recording but unable to use without an add-on.
- OBS: advanced recording features but has difficult operation steps.
- Xbox Game Bar: basic features with time limits to at most 4 hours.
Secure Download
Secure Download
Is it possible to record on Windows 11 with Windows Media Player? Yes. Windows Media Player is more than a video player on Windows 11 but also provides the recording components. It means you have to download an add-on for recording on-screen activities. Learn more about how to capture videos via Windows Media Player from the article. Moreover, when you need to screen record on Windows 11 without extra add-on or difficulty, here are 2 more methods to get the recording.
Guide List
How to Record on Windows 11 with Windows Media Player How to Record on Windows 11 via Xbox Game Bar Detailed Way to Record on Windows Media Player Alternative How to Record on Windows 11 with Freeware [OBS Studio] FAQs about Recording Video and Audio on Windows 11How to Record on Windows 11 with Windows Media Player
Windows Media Player is the default video player on Windows 11 and has no recording features. You will need a related program – Windows Media Encoder to record the screen on Windows 11. Since Microsoft has already removed the Windows Media DRM, you can search for x64 Edition or previous ones.
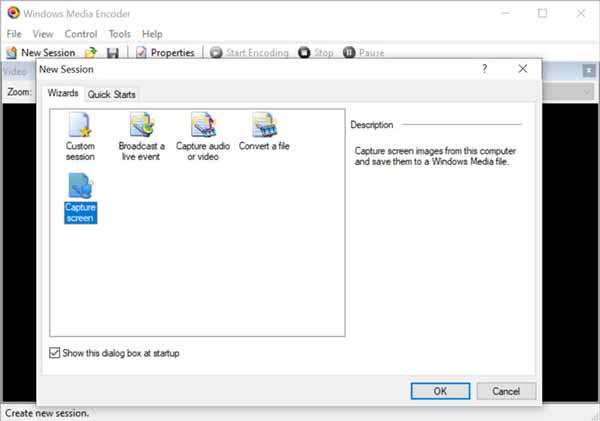
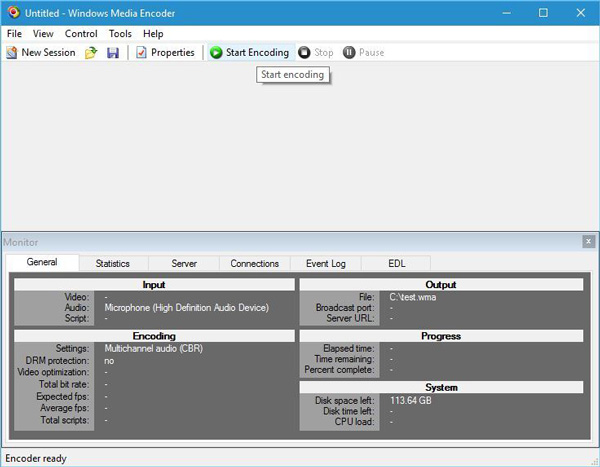
Step 1.Install Windows Media Encoder add-on for Windows Media Player and launch the program. Click the "New Session" button under the File menu to click the "Capture audio or Video" button.
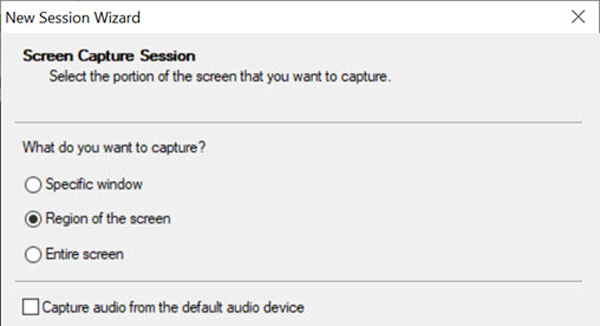
Step 2.Click the "Region of the screen" button to customize the recording area. When you want to record a video with audio files, you should click the "Capture audio from the default audio device" button.
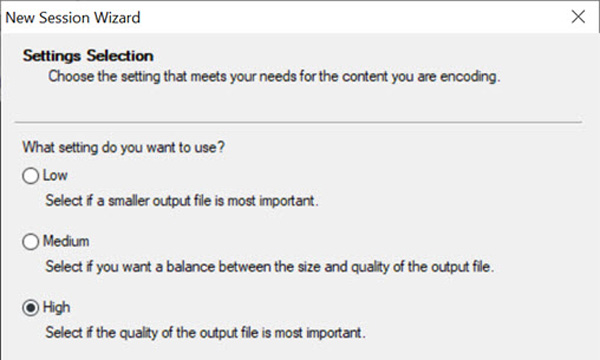
Step 3.After that, you can click the "Browse" button to choose the destination folder for the recordings on the computer. Click the "High" button to encode media files at the highest quality with a large size. (Check to see how to reduce video file size.)
Step 4.Click the "Start Encoding" button or even click the "Begin capturing screens when I click Finish" button to screen record on Windows 11. Once you have captured the desired files, you can preview them in WMV.
Further Reading
How to Record on Windows 11 via Xbox Game Bar
Since you can’t directly record on Windows Media Player but need an extra add-on, you can use the alternative default app like Xbox Game Bar to capture the screen on Windows 11. But there are some limitations, such as lacking the full-screen mode, cannot record more than 4 hours, and frequent breakdown.
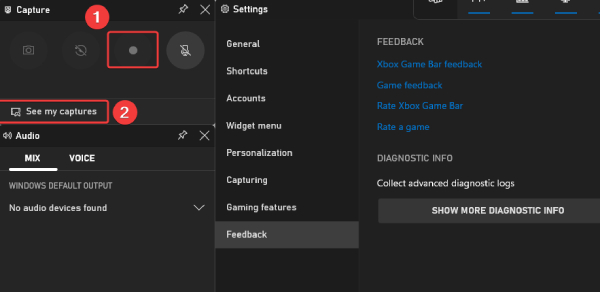
Step 1.Press both the "Windows" and the "G" key to launch the Game Bar control on your computer with Windows 11. Click the "Microphone" button to enable external audio recording.
Step 2.Click the "Record" button to start recording on Windows 11. When you need to record a video with audio files, you can switch your external microphone on and off.
Step 3.When you are done, you can click the "Stop" button to save the recording. After that, you can go to the This PC menu and click the "Captures" button from the Videos folder to get the files. Or view the recording video directly by clicking the "See My Capture" button.
Further Reading
Detailed Way to Record on Windows Media Player Alternative
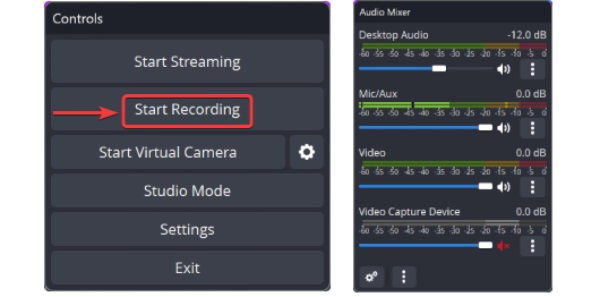
When you need to capture all onscreen activities, AnyRec Screen Recorder is a versatile screen recorder on Windows and Mac. It has 7 different modes to capture video and audio files from computer and the connected devices. You can schedule the recording, tweak the audio/video formats, set up the hotkeys, and edit the recordings.

Record screen video, system sound, microphone, and webcam footage.
Tweak the video codec, frame rate, audio codec, and more other settings.
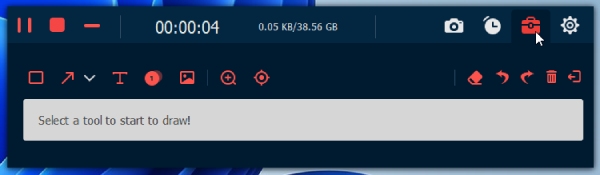
Add annotations, shapes, callouts, arrows, lines, and even draw on the file.
Edit the recordings, trim the videos, and share them on social media sites.
Secure Download
Secure Download
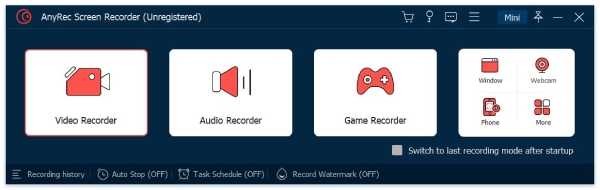
Step 1.Once you have installed the screen recorder, you can launch the program on your computer and choose the desired recording mode, such as the Video Recorder menu. It enables you to record the movies on Windows Media Player.
Step 2.Click the "Custom" button to choose the recording area, click the "System Sound" button to record the internal audio, and click the "Webcam" button to add the webcam footage. After that, you can click the "REC" button to start recording on Windows 11.
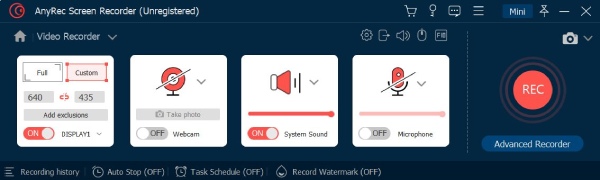
Step 3.During the recording process, you can add annotations, take some snapshots (screenshot on Windows 11), adjust the audio volume, or even switch to different audio resources. Once you have captured the desired file, you can click the "Stop" button to save the recording.
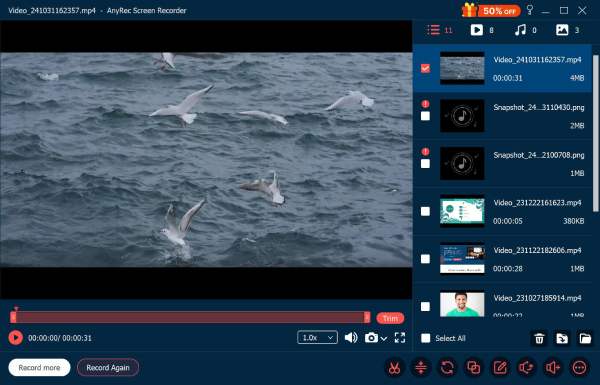
Step 4.Preview the recording within the built-in media player. After that, you can trim the desired part with the start point and the endpoint. Click the "Done" button to save the file, and you can share the file on social media websites or manage the files within your computer.
Secure Download
Secure Download
How to Record on Windows 11 with Freeware [OBS Studio]
OBS Studio is an open-source free screen recorder with no watermark. On your Windows 11 computer, you can easily record videos on Windows Media Player, games, live streaming, etc. During recording, utilize the advanced audio mixer to deliver better sound quality or achieve fun effects. Although OBS Studio is freeware, there is no time limit on your recording length, and it requires a few system resources.
How to Record Video on Windows Media Player with OBS Studio
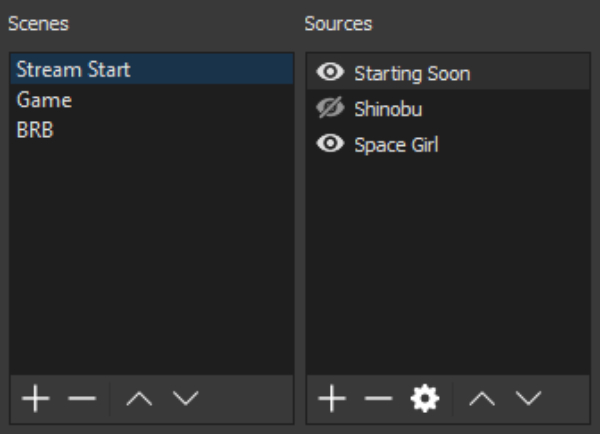
Step 1.Get a free download from the OBS official website. Then, install and launch it on your Windows 11 PC. In the meantime, play the video on Windows Media Player and prepare it for recording. Add a scene in the Scenes panel and rename it.
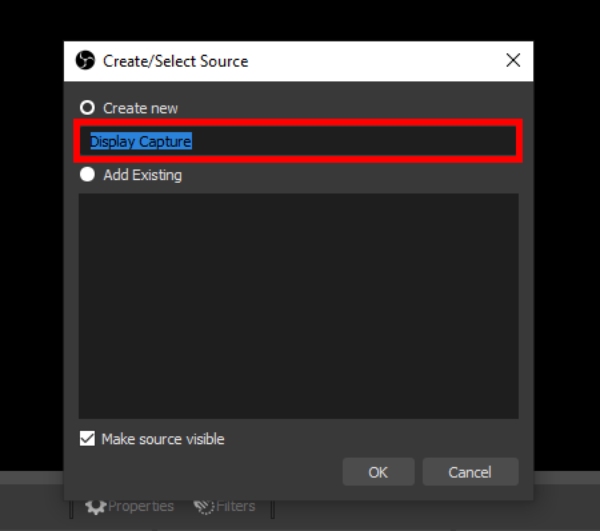
Step 2.Right-click the blank central area and hover your mouse over the "Add" button. Then, click the "Display Capture" button.
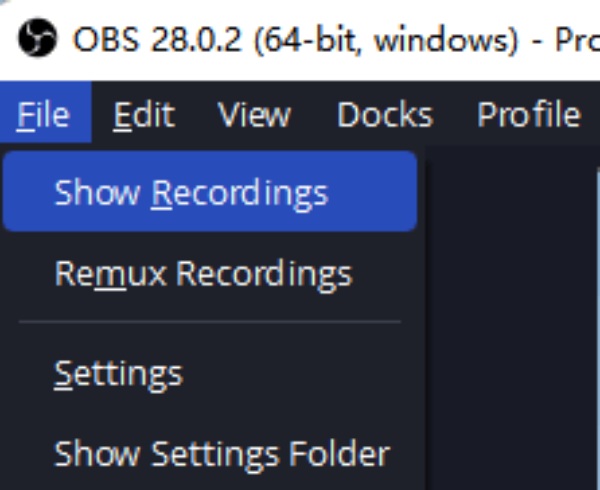
Step 3.Click the "Start Recording" button on the right to record the video on Windows Media Player. You can adjust the audio recording in the Audio Mixer.
Step 4.Once finished recording, you can click the "File" button on the left corner and click the "Show the Recording" button to see your recorded video in the local folder.
FAQs about Recording Video and Audio on Windows 11
-
Is it possible to capture the screen with Windows Media Player?
Yes. Once you have launched Windows Media Encoder, you can choose the Capture screen icon to take snapshots from the computer and save them to a Windows Media file. You can use a photo editor to crop the screenshot on Windows.
-
How to fix a DirectX prompt for installing Windows Media Encoder?
If you cannot install Windows Media Encoder to record on Windows 11 with Windows Media Player, you have to manually extract the contents of the WMEncoder64.exe file with a command-line prompt. It should be difficult to install if you were a beginner.
-
What is the best WMP alternative to record on Windows 11?
VLC Media Player is another method to screen record on Windows 11. But it only provides the basic recording features. When you record screen videos with VLC Media Player, you also need to edit the files or even enhance the videos after recording.
Conclusion
Here are the 3 most frequently used methods to record on Windows 11. When you need to record screen videos with Windows Media Player, you have to install Windows Media Encoder beforehand. Of course, you can choose Xbox Game Bar as the free alternative or AnyRec Screen Recorder as the all-in-one solution.
Secure Download
Secure Download
Related Article
About Our Author