Hot
AnyRec Video Converter
120× faster video conversion and editing. No waiting.
Secure Download
A Hassle-Free Guide to Adding Subtitles in iMovie Easily
Adding subtitles in iMovie not only helps viewers understand the video content in a noisy environment but also enhances the accessibility of the video. When you plan to use iMovie to edit your videos before sharing them, you can definitely use the basic subtitle function provided by Apple to improve the watchability of your videos. However, for beginners, this process is not always intuitive and easy to understand. This guide will step-by-step introduce how to add subtitles in iMovie, whether for editing on a Mac or on a mobile device.
Guide List
How to Add Subtitles in iMovie on Mac How to Add Subtitles in iMovie on iPhone/iPad A More Effortless Way to Add Subtitles Than iMovieHow to Add Subtitles in iMovie on Mac
Adding subtitles in iMovie on a Mac is straightforward. Instead of using a dedicated subtitle track, iMovie relies on text titles and the timeline to complete the task. Therefore, if you are dealing with relatively short videos, this method provides you with basic control over appearance and timing. You can follow the steps below to add subtitles in iMovie on your Mac.
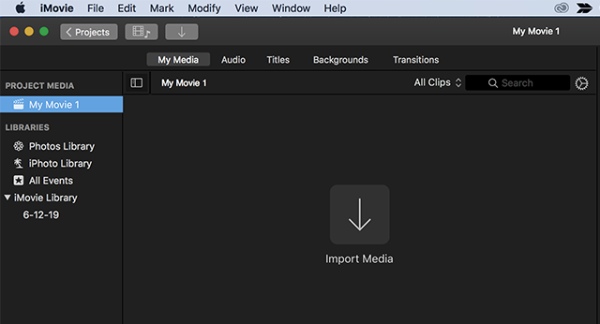
Step 1. Launch iMovie on your Mac, click the "Import Media" button under the "File" tab to import the video file.
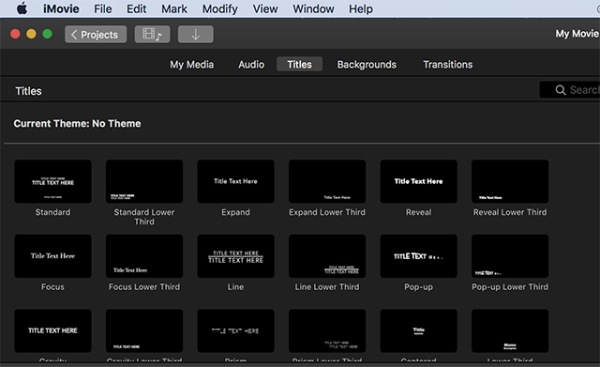
Step 2. To start editing your video, drag your video into the timeline. Click the "Titles" button to select the font style.
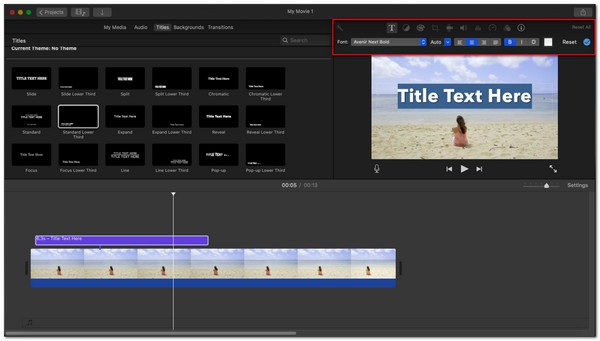
Step 3. Drag the title into the timeline to present it as the subtitle in iMovie. This title can also be added as a watermark in iMovie.
How to Add Subtitles in iMovie on iPhone/iPad
On iPhone and iPad, iMovie offers a simplified approach to adding subtitles that is designed for quick edits rather than long-form projects. Subtitles are still added through text titles, but the workflow is adapted to a touch-based interface. This makes it convenient to add text to the video, especially for short clips. However, timing requires more manual effort when working on smaller screens.
Step 1. Open iMovie on your iPhone and tap the "Movie" button to start a new project.
Step 2. Tap the "Media" button and select the video you want to edit. Tap the "Create Movie" button.

Step 3. Tap the "Title" button and select the font style you like. Tap the title to edit the content to add subtitles in iMovie.
Step 4. Once finished, tap the "Done" button to save the project. You can preview the effect before exporting iMovie to MP4.

A More Effortless Way to Add Subtitles Than iMovie
Although you can use the built-in "Title" function in iMovie to add subtitles and meet basic editing needs, its manual frame-by-frame operation process will quickly become inefficient, especially when dealing with longer videos or content with frequent dialogues. For these videos, you will need a professional video editing tool to complete this task more efficiently. AnyRec Video Converter offers a significantly smoother alternative. AnyRec does not rely on placing text titles on the timeline, but allows adding subtitles as a separate subtitle track, or directly importing subtitles from existing files (such as SRT, ASS, or SSA). This method significantly reduces repetitive work and improves overall accuracy.
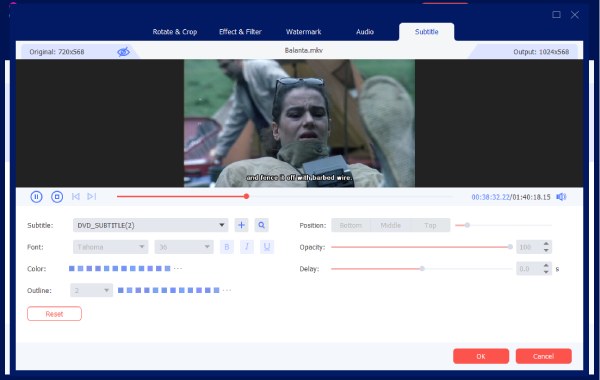
In addition to adding or importing subtitles, AnyRec Video Converter also supports you to further precisely control the display time, font style, size, color, and position of the subtitles. All these can be set in a single preview window. And global adjustments are supported in these settings, rather than line-by-line adjustments, which is particularly helpful for maintaining consistent formats throughout the video. For those creators who often add subtitles for ease of use, you won’t need an iMovie for Windows, this method can save time.

Adjust various parameters of the subtitles, such as font, color, etc.
Preview is used to check the effect of subtitles in the video.
Adding subtitles will not affect the quality of the video's picture.
Wide support for various video formats to ensure compatibility.
Secure Download
Secure Download
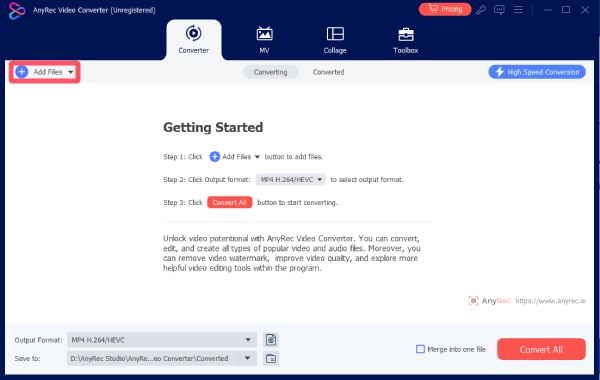
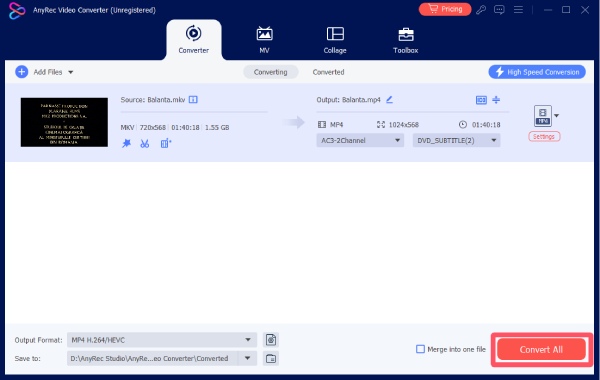
Step 1. Launch AnyRec Video Converter on your device and click the "Add Files" button to import the video you want to add subtitles to.
Step 2. Click the "Edit" button to summon a new window. Under the "Subtitle" tab, you can add the built-in subtitle or add your own subtitles and further edit them.
Step 3. After adding subtitles to your video, you can preview to check the effect. Finally, click the "Convert All" button to save the video.
Conclusion
Adding subtitles in iMovie is entirely possible on both Mac and iPhone or iPad, but the process requires patience and careful timing, especially for longer videos. iMovie's title-based approach works well for simple projects. For users who need a professional workflow, you can download and try AnyRec Video Converter for free, making a noticeable difference in efficiency and final presentation.
Secure Download
Secure Download
Related Articles:
About Our Author