
Hot

AnyRec Screen Recorder
Capture every moment. Record like a pro.
Secure Download
Get the Best OBS Recording Settings and Top Alternative

Default OBS recording settings are famous for making high-end PCs perform like old ones. If your recording keeps coming out blurry, worry not, as it is just waiting for the right instructions. From getting the ideal recording to mastering the best settings, adjusting OBS does not have to feel like a total headache. Here is a straight-to-the-point guide to the best OBS settings for recording and the best alternative for when you just want to hit record and play.
Guide List
Quick OBS Recording Setup Checklist Best OBS Recording Settings Best OBS Encoder Settings Best OBS Rate Control Settings Best OBS Recording Resolution and FPS Best OBS Audio Recording Settings Best OSB Alternative for Low-end PCQuick OBS Recording Setup Checklist
Start knowing the OBS Studio best recording settings by diving headfirst into deep customization menus. You can think of this as your go-to sheet for getting your lag-free footage easily. Here's a quick setup checklist to quickly upgrade your video quality:
- • Output Mode. Set this to Advanced to unlock the actual settings you need to control your video quality.
- • Recording Format. Use MKV or MOV. If OBS crashes, your file stays safe, and you can easily change it to MP4 later.
- • Recording Path. Save your files to a fast internal SSD as cloud-synced folders and external drives will cause skipped frames.
- • Encoder. Choose one from NVIDIA NVENC, AMD AMF, or Intel QuickSync if available to let your GPU handle everything.
- • Rate Control. Switch to CQP or CRF to ensure steady video quality.
- • CQP/CRF Target Value. Aim between 18 and 20 for crisp footage without blowing up your storage.
- • Keyframe Interval. Set this to 2 seconds for smooth playback.
- • Canvas Resolution. Keep this set to your monitor’s native resolution to match your display.
- • Output Resolution. Use the same Canvas resolution unless you need to downscale for performance.
- • Downscale Filter. Choose Lanczoz for your sharpest detail preservation.
- • FPS Value. Set 60 FPS for gaming or 30 FPS for tutorials. (Get 60 FPS screen recorders here.)
- • Audio Sample Rate. Set to 48 kHz to match your modern hardware.
- • Audio Bitrate. Use up to 256-320 Kbps for your crystal-clear audio.
- • Audio Track Assignments. Triple-check that your mic, system audio, and game are set to separate tracks.
Best OBS Recording Settings
Now that you have the quick checklist, unpack the core OBS recording settings. Adjust the following four toggles in "Settings" to the "Output" menu to ensure your recordings stay smooth.
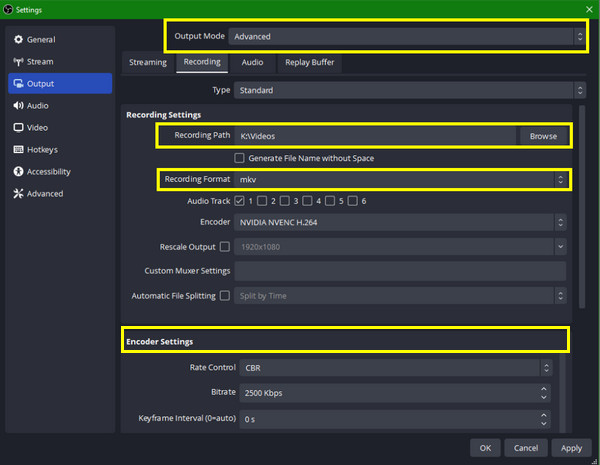
- 1. Output Mode. Switch it to Advanced to get total control over your video quality, encoder selection, and multi-track audio routing.
- 2. Recording Format. Go with MKV, so your file remains fully intact even if it crashes. You can then change it to Mp4 from File to Remux Recordings in just two seconds.
- 3. Recording Path. Choose your output folder to a fast internal SSD and avoid saving it to flash drives, external hard drives, and cloud-synced folders.
- 4. Video Encoder. Always select the following hardware encoders: NVIDIA, AMD, or Intel.
Best OBS Encoder Settings
Your choice of video encoder is one of the most important OBS settings for recording that balances your video quality and system performance. Here's how to match the best OBS encoder settings to your setup:
| Hardware | Recommended Encoder |
| NVIDIA CPU | NVENC (H.264, HEVC, or AV1) |
| AMD GPU | AMD AMF (AMD HQ H.264, HEVC, or AV1) |
| Intel GPU | Quick Sync Video (Intel QSV) |
| No supported hardware encoder | X264 (CPU software encoding) |
Best OBS Rate Control Settings
With your encoder locked in, the next major OBS recording setting is choosing the right Rate Control. This tells OBS how to balance crisp visuals against file size and your CPU load. Take a look at how the top rate control works to pick the right one:
- 1. CQP (Constant Quality). Best for NVIDIA and AMD GPUs. When nothing shows on your screen, it uses less storage, while during intense action, it keeps up the bitrate to keep the image sharp.
- 2. CRF (Constant Rate Factor). Best for x264 CPU Encoding. This delivers consistent visual clarity by modifying the data rate frame by frame based on the complexity of the scene.
- 3. CBR (Constant Bitrate). Best for Live Streaming. It forces the program to give you a fixed amount of data per second, regardless of what's happening on your screen.
Best OBS Recording Resolution and FPS
Next, to get the perfect balance between your resolution and frame rate, match your settings to the content you're creating. Provided below is how to set up your best OBS recording settings, resolution, and fps, for different recording scenarios:
| Content Type | Base Resolution | Output Resolution | Recommended FPS |
| Fast‑Paced Gaming | Match your monitor, e.g., 1080p | Same as your base | 60 FPS |
| Desktop Tutorials | Match your monitor | Same as your base | 30 FPS |
| Low‑End PC or Performance | 1920×1080 | 1280×720 | 30 FPS |
| TikTok, Shorts, or Reels | 1080×1920 | 1080×1920 | 60 FPS |
Best OBS Audio Recording Settings
Meanwhile, those great visuals will mean very little if your sound has annoying background hums or a robotic voice. Therefore, up next for the best OBS settings for recording, learn how to configure your audio:
- 1. Sample Rate (48 kHz). Head to Settings, then Audio, and adjust it to 48 kHz. This is the standard for modern digital, and it matches all your USB and XLR microphones to avoid video-audio sync issues over long recordings.
- 2. Channels (Stereo or Mono). If you're using a single-channel XLR mic, ensure to check Force Mono, so your voice plays evenly in both left and right ears.
- 3. Audio Bitrate (320 Kbps). Open Settings, then go to the Output to Audio tab and max out to 320 Kbps on all tracks.
Best OSB Alternative for Low-end PC
As powerful as OBS Studio is, its heavy system can be a problem for your budget hardware or older laptop. Constantly adjusting OBS recording settings can take a lot of your time instead of hitting record instantly. For crisp, lag-free footage, switch to AnyRec Screen Recorder, a perfect OBS alternative. This software delivers high-definition 60 FPS captures with zero learning curve. It bypasses all the complex recording menus you've faced in your previous recorder, allowing you to capture smooth video-audio with just a single click.
Ultra-lightweight engine compatible with low-end computers.
Multiple capture modes for gameplay, desktop, webcam and pure-audio recording.
Real-time screen annotation for text, marker and shape drawing.
Built-in noise reduction and multi-source audio capture.
Secure Download
Secure Download
Step 1.Open AnyRec Screen Recorder and choose your desired capture mode from the main dashboard, e.g., Video Recorder.
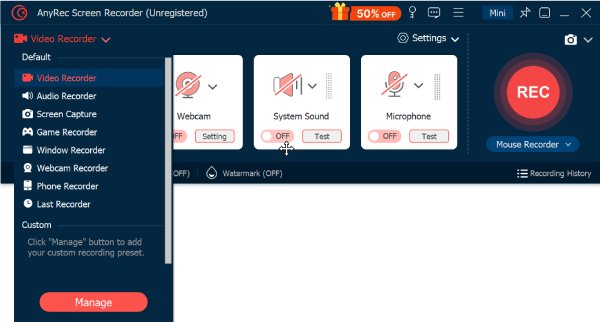
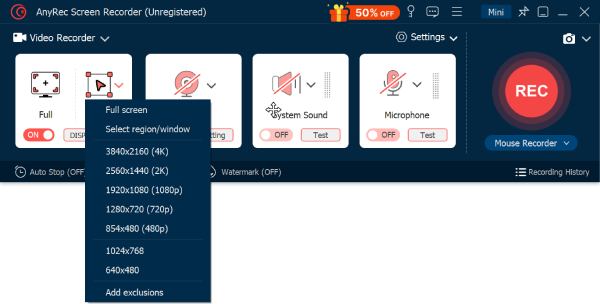
Step 2.Choose to record your entire screen (Full) or drag the frame to capture a selected window or region (Custom).
For other options, you can flip the switch to enable your System Sound, Microphone, and Webcam overlay based on your needs.
Step 3.Click the "REC" button to begin capturing your on-screen activity. You can use the floating toolbar to annotate or take screenshots mid-recording.
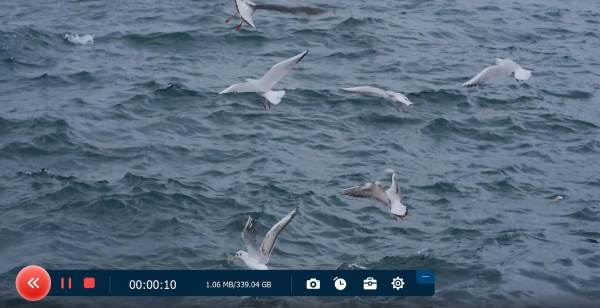
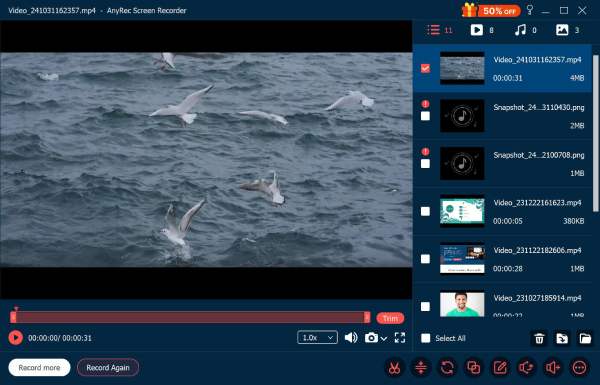
Step 4.Later, click the "Stop" button when finished. Trim any extra footage in the preview window, then save your video in your desired format.
Conclusion
Taking a few minutes to optimize your best OBS settings for recording transforms your final video quality from blurry to smooth, ready to share! Adjusting frame rate, resolution, and others makes all the difference. With all that, OBS is not always the convenient choice for recording. For an easy backup plan, download AnyRec Screen Recorder today. Record all your gameplay, meetings, and custom screen activities in high definition with no learning curve. This lightweight alternative saves you tons of time.
Secure Download
Secure Download
Related Articles
About Our Author