Hot
AnyRec Screen Recorder
Capture every moment. Record like a pro.
Secure Download
How to Take a Screenshot on Linux with Shortcuts and 3 Powerful Alternatives
Linux is an OS embedded in many applications, such as network systems, automotive, etc. But unlike Windows and Mac, many people need to learn how to screenshot on Linux. Because its system does not have the universal screenshot utility installed, one program can capture screen activities on your computer. This article will cover how to take a screenshot on Linux with more alternative solutions.
Guide List
Part 1: Use Shortcuts to Screenshot on Linux Part 2: 2 Software to Take Linux Screenshots Part 3: FAQs about Linux ScreenshotsPart 1: Use Shortcuts to Screenshot on Linux
One program that can help you screenshot on Linux is the xfce4-screenshooter. You can capture the screen with just a shortcut key on your keyboard. Follow the instructions below:
Step 1.Type xfce4-screenshooter from the command line to open the application.
Step 2.Press the "PrintScreen" button on your keyboard to capture the whole screen.
Step 3.To screenshot the current window, press "Alt" and "PrintScreen" simultaneously.
The application is a great way to screenshot on Linux. However, it does not provide any feature for other ways to use screenshots or editing tools to enhance the photo. Read part two of this post to see other alternatives to try.
Part 2: 2 Software to Take Linux Screenshots
While there is a default way of screen capturing in Linux, it only has fewer features to edit pictures. In this part, two practical applications are recommended to try as better solutions to capture onscreen activities.
1. GIMP
GIMP is a cross-platform image editor that you can use on Linux, Windows, and macOS. It is a perfect alternative to screenshots on Linux as it has a built-in screen capture function. With its sophisticated interface, GIMP allows you to edit pictures by adding elements, icons, and other designs. Since the app is free and open source, you can change the source code for better productivity and workflow. Let’s see how you can use GIMP on Linux to take a screenshot:
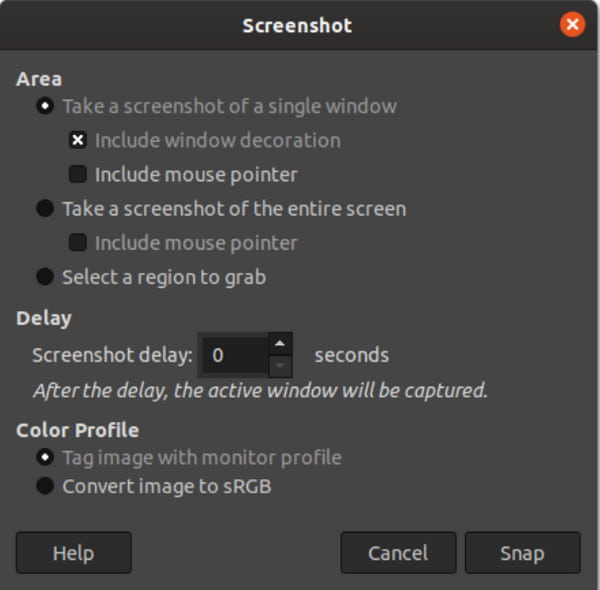
Step 1.Download GIMP from the official website and install it on your device. Navigate to the File menu and select the Create option. Choose Screenshot from the dropdown list.
Step 2.When the dialog box appears, set up the area and which items to capture on the screen. Once done, click the "Snap" button to take a screenshot. Save the result to your computer.
2. Gnome
A simple and easy-to-use application that provides a focused working environment to help you finish tasks quickly. With its features, taking screenshots on Linux will be simple as you can use a shortcut on your keyboard. But unlike GIMP, Gnome does not offer editing tools for further image editing. Still, it is compelling enough for screenshots on your computer.
Step 1.Download Gnome on your device and launch it. The easiest way to take a screenshot is to press the "PrintScreen" key on your keyboard. Then, you will be prompted to choose the designated folder to save the file.
Step 2.Press Alt and PrintScreen buttons simultaneously to capture the current window. It will be saved in the Pictures folder by default. For a free way to capture the screen, use Shift and PrintScreen keys.
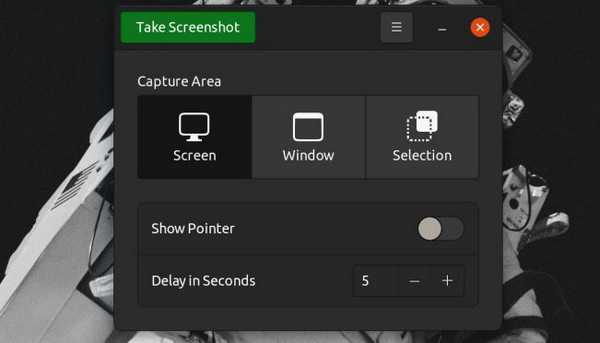
Step 3.For additional functions, open the Screenshot utility and choose effects and seconds to delay the screenshot. You can also include the cursor on the screenshot by checking the Include Pointer option. Save the new settings and take a screenshot.

Bonus Tips: The Best Software to Screenshot on Windows/Mac
There are many ways to take a screenshot on Linux, but a more effective and powerful tool exists. AnyRec Screen Recorder is a comprehensive tool for recording video, gameplay, phone, and meeting. Aside from its high-quality recorders, it provides the SnapShot function, which captures the screen with precise measurements. Furthermore, it has the best drawing effects that you can apply, including brushes, paints, colors, text, numbers, and shapes. AnyRec Screen Recorder is worth trying for more elaborative work.

Have a screenshot tool on Windows and Mac operating systems.
Various Export formats, supporting JPG, PNG, BMP, TIFF, etc.
Screenshot in whole, partial, and customized portions in different ways.
Connect your Android and iOS to your computer to screen record.
Secure Download
Secure Download
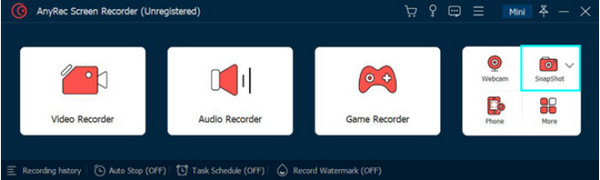
Step 1.Download and install AnyRec Screen Recorder to your device. Once the installation is done, launch the software and click the SnapShot button from the main menu.
Secure Download
Secure Download
Step 2.Point the center of the cursor to an opened window and click to take a screenshot. Click and move your mouse to select the area you want to capture.
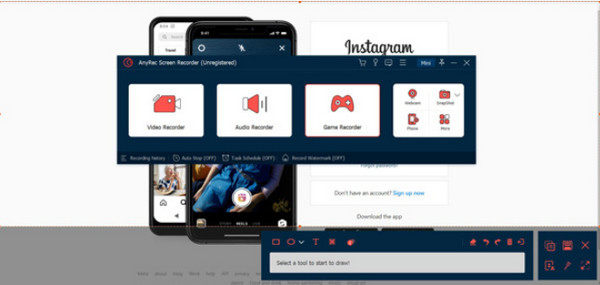
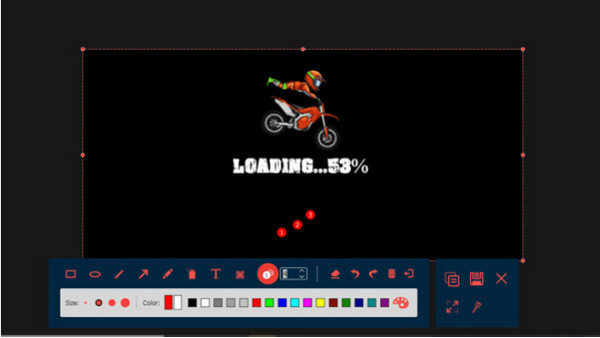
Step 3.When the widget menu appears on your screen, use the editing tools to make changes to the picture. Don’t forget to click the Save button to apply the changes.
Secure Download
Secure Download
Part 3: FAQs about Linux Screenshots
-
1. Where does the screenshot go on Linux?
All screenshots are saved in a specific folder by default. You can find the pictures in the Pictures or Screen folder. All information can be found, including the time and date it was taken.
-
2. What are the other options for screenshots on Linux?
Aside from the recommended tools in this post, there are more alternatives to screenshots on your device. You can try Shutter, Screen-Gab, Shotgun, Mate-Ulism Ksnip, Flameshot, Spectacle, and Scrot.
-
3. How to screenshot on Linux using Firefox?
Firefox is a simple solution if you need to capture content on Linux. Open the browser and right-click on your mouse. From the opened list, select the Take Screenshot option. Click or drag the page you want to capture. The picture will be saved in the Download Folder.
Conclusion
Now that you have learned how to take a screenshot on Linux, the task will be completed immediately with those Linux snipping tools. Since the operating system is not straightforward like Windows and macOS, this tutorial to screenshots on Linux is only necessary. Moreover, thanks to its measurement function, you get to try AnyRec Screen Recorder as a snipping tool for Mac and Windows to capture onscreen activities with the perfect angle. Click the Free Download button to try the best screen recording software!
Secure Download
Secure Download
Related Articles:
About Our Author


