[2026 5 Simple Methods] How to Trim Video on Windows 11
How do you trim a video on Windows 11? You may be working on a video on your Windows computer and want to remove parts of it. It could be unwanted beginning or ending parts, or you may want to shorten the video because it is too long. Well, whatever the intent behind the need to trim a video, there are a few tools that you can use on Windows 11, and you can find five of them here. Explore the five best tools for Windows 11 video trimming below.
Guide List
Trim, Edit, and Convert a Video on Windows 11 How to Trim a Video on Windows 11 with Photos How to Trim a Video on Windows 11 with Clipchamp How to Cut Video Length on Windows 11 with Online Video Trimmer How to Batch Trim Videos on Windows 11 with FFmpeg FAQsTrim, Edit, and Convert a Video on Windows 11
When you need to shorten a video or trim specific parts of it, it shouldn't be hard to do or to achieve your desired result. One of the best Windows 11-compatible tools that can help you with this is the professional AnyRec Video Converter. This Windows video editor features an easy-to-use video trimmer designed not only to help you remove unwanted beginning and ending parts of a video but also to trim parts in the middle. Yes, you read that right! It also lets you remove the middle parts of the video by adding multiple segments. Aside from trimming a video on Windows 11, this tool also provides various options to tweak your video. See them all below.

Supports a fast split option to cut the video's current segment by average or time.
Lets you merge all the created video segments after trimming the unwanted parts.
Enables you to apply fade-in and fade-out effects to a trimmed video.
Enhances the video's quality by adjusting settings and converting it into another format.
Secure Download
Secure Download
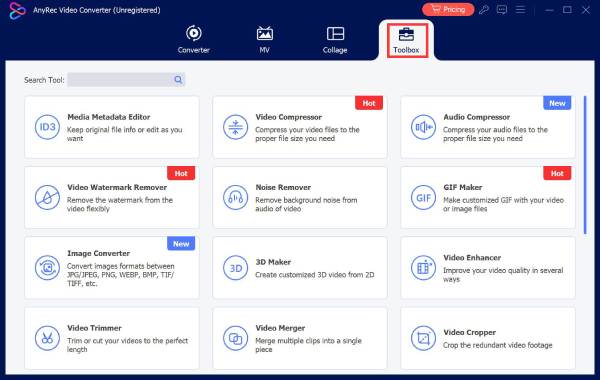
Step 1.Download and install the AnyRec Video Converter on your Windows 11. After that, run it, click the "Toolbox" tab, and select the "Video Trimmer" feature from the list of options. Next, click "Add" to import the video you want to trim a MP4 video.
Step 2.Next, set the start and end points by entering time values or dragging the progress bar. Unselected parts will be deleted by default. To trim parts within the clip, create a smaller segment and position it as desired. Then, click "Add Segment" to separate and trim part of a video.
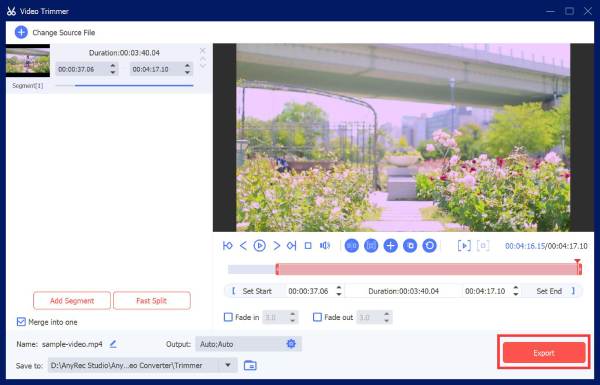
Step 3.Once done, click "Fade In and Fade Out" to add effects to your video. Next, go to the "Output Settings" section to adjust the video's parameters as needed and click "OK". Finally, click "Merge into One" to combine all the clips and then "Export" to save it.
Secure Download
Secure Download
How to Trim a Video on Windows 11 with Photos
Apart from the first featured tool, you can also use the Photos app on your Windows 11 to trim an MP4 video. This tool is a Windows built-in image viewer and manager designed to organize, edit, and share photos and videos. In terms of editing, one of the editing-related features it supports is, of course, the option to trim videos. Trimming videos with this tool is also easy; however, it doesn't support removing the middle parts of the video. If that's not an issue for you, here are the steps on how to trim a long video on Windows 11 using Photos.
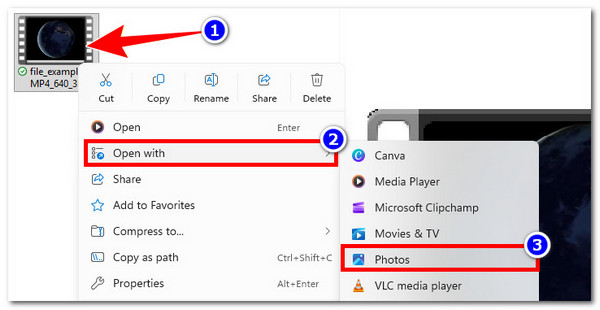
Step 1.Access the video's file location on your Windows 11 device (where the video is stored). Then, right-click it, select "Open with", and choose "Photos" from the options.
Step 2.Next, press "Ctrl + E" on your keyboard to open the free video trimmer feature in the Photos app. Then, drag the beginning and ending sliders below the video preview toward the center to remove unwanted parts.
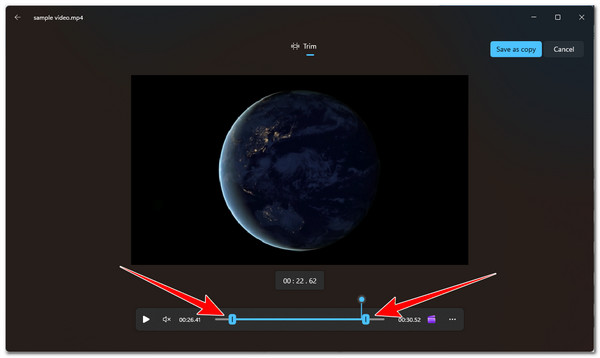
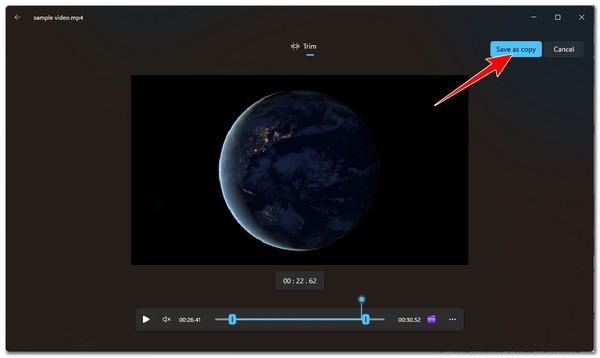
Step 3.Once done, click the "Save as copy" button in the upper-right section and select your preferred file destination folder to save the trimmed video.
How to Trim a Video on Windows 11 with Clipchamp
Another tool solution you can use to trim a large video on Windows 11 is Clipchamp. This is a default, free, AI-powered video editor built into Windows 11. It is designed to help you create videos as easily as possible. As part of its video editing features, this tool also lets you trim those unwanted parts from your video. However, it requires a Wi-Fi or data connection and can lag when trimming large videos. If you still want to try this one, here are the steps to cut a video in Clipchamp on Windows 11:
Step 1.Launch the Microsoft Clipchamp on your Windows 11 computer and sign in with your account. After that, click the "Create a new video" button.

Step 2.Next, click the "Import media" button in the upper-left corner to access and import the video you want to trim. Then, drag it onto the tool's timeline to start the editing process.
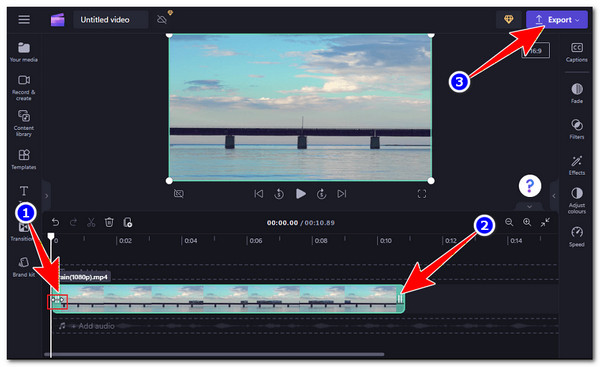
Step 3.After that, click the video in the timeline to highlight it. Then, drag the sidebars left and right to trim the video according to your preferences. Once done, click "Export" and choose a resolution. That's it!
How to Cut Video Length on Windows 11 with Online Video Trimmer
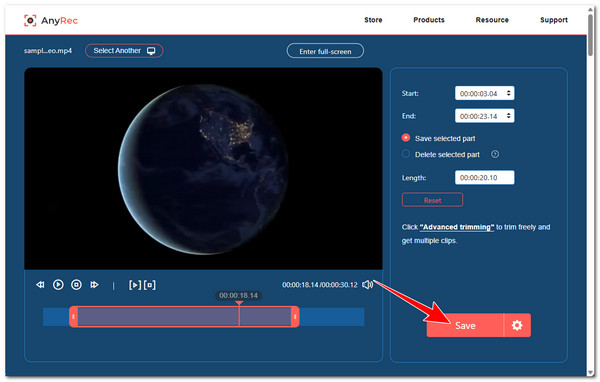
Aside from these desktop-based tools, you can also trim videos on Windows 11 online, and one of the best options is the AnyRec Free Video Trimmer Online. This web-based online video trimmer lets you remove unwanted portions of your video in just a few clicks. You can trim your video by entering specific start and end times or by dragging the start and end sliders. After trimming, you can choose whether to save or delete the selected parts. The tool also shows the current length of your video once the edits are applied. Aside from that, it also supports output tweaking options, where you can improve the quality of the trimmed video before exporting it! Here's how you use it:
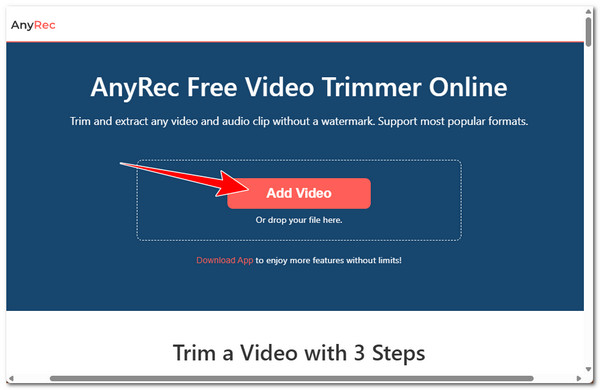
Step 1.Visit the AnyRec Free Video Trimmer Online webpage on your Windows 11 browser. After that, click the "Add Video" button to import the video you'd like to trim.
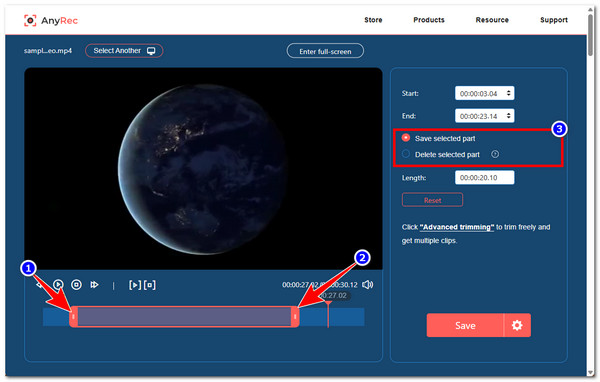
Step 2.Next, drag the left and right sidebars below the preview and choose whether to save or delete the selected part for trimming.
Step 3.Once done, click the "Save" button. After that, wait for the process to finish. Once finished, click "Download" to save the trimmed video to your Windows 11.
How to Batch Trim Videos on Windows 11 with FFmpeg
The last solution you can use to trim a video on Windows 11 is FFmpeg. This free, powerful command-line tool lets you trim videos efficiently. What makes it a great option is that it allows you to trim multiple videos at once without losing quality, which is especially useful if you have many videos to edit. However, since it is a command-line tool, you might not be familiar with how to use it. If you are, here are the steps to trim videos using FFmpeg.
Step 1.Install FFmpeg on your PC and place all the videos you want to trim in a single folder, then open "Command Prompt" and go to that folder by typing cd "C:\Path\To\Your\Folder".
Replace C:\Path\To\Your\Folder with the actual folder location. For example: C:\Users\YourName\Videos\TrimVideos.
Step 2.After that, enter the batch command for %i in (*.mp4) do ffmpeg -i "%i" -ss 00:00:05 -to 00:01:00 -c copy "trimmed_%i" to trim each video from 5 seconds to 1 minute. You can adjust the start and end times as needed.
Step 3.Next, press "Enter" and wait for FFmpeg to process all the videos. Once done, the trimmed videos will be saved in the same folder with a "trimmed_" prefix.
FAQs
-
1. Will trimming a video on Windows 11 reduce its quality?
No. Trimming a video does not usually reduce its quality, especially if the tool only removes unwanted parts without re-encoding the video. However, some editors may slightly compress the video during export, which can cause minor quality loss.
-
2. Can I use Clipchamp to trim the middle parts of a video?
Yes. You can trim the middle parts of a video in Clipchamp. You need to split the video at the beginning and end of the unwanted section, then delete that middle part to cut your video shorter.
-
3. How do I install FFmpeg on Windows 11?
To install FFmpeg on Windows 11, download the latest build from the official FFmpeg website and extract the ZIP file to a folder. After that, add the FFmpeg bin folder to the system's PATH environment variable so that you can use FFmpeg commands directly in Command Prompt.
Conclusion
Through the use of these tool solutions, you can easily edit and trim videos on Windows 11 to remove unwanted beginning or ending parts or to shorten it to a specific length. Most of the solutions mentioned are built into Windows 11, so you no longer need to install anything or pay just to trim particular parts of your video. However, if you are looking for a tool that not only trims videos but also offers advanced features, you should use the professional AnyRec Video Converter or its Free Video Trimmer Online. Try them today!
Secure Download
Secure Download
About Our Author


