Hot
AnyRec Screen Recorder
Capture every moment. Record like a pro.
Secure Download
[Solutions] How to Easily Record a TeamViewer Remote Session and Meeting
TeamViewer is a worldwide remote access software with a built-in screen recording function. You can record remote controls and online meeting sessions on TeamViewer Classic, including video, audio, voice-over IP, webcam images, and more. In short, you can record TeamViewer sessions and meetings on Windows and Mac computers. When you control virtually on someone's computer remotely, you can record and save all on-screen activities in real-time. What to know how to do it? Just continue reading.
Guide List
Record an Outgoing Remote Session on TeamViewer Record Outgoing/Incoming TeamViewer with Your Computer Screen Enable and Enforce TeamViewer Automatic Recording FAQsHow to Record an Outgoing/Incoming Remote Session or Meeting on TeamViewer
When you start a connection with a remote device, you can record it at the same time. All on-screen video and audio activities can be captured. So you can make full use of the recorded sessions for monitoring and training.
Step 1.Fire up your TeamViewer program. Start a session and log into a remote computer.
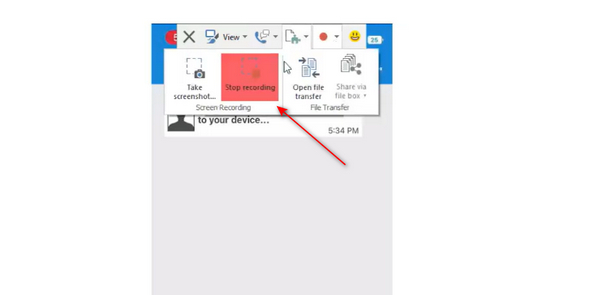
Step 2.Once a session is open, locate the "Files&Extra" menu in the remote control toolbar. Later, click the "Start session recording" button to initiate the recording.

Step 3.Click on the "Stop" button after the recording is completed. You will get a popup prompt. Save the video file to a selected location. Keep in mind that the file is saved in .tvs format.
Step 4.Go to the three-line menu on the top left corner of TeamViewer Classic. Find "Extra" and click "Play or convert recorded session...". Select your recorded TeamViewer TVS file. Click the "Convert" button. Specify video and audio settings. At last, you can click the "Convert" button to complete TeamViewer TVS to AVI video conversion.
Tips
If you want to make your TeamViewer meeting video in smaller file size, you can click this to convert AVI to MP4 and other lossless formats.
Bonus: How to Create Remote Session with TeamViewer
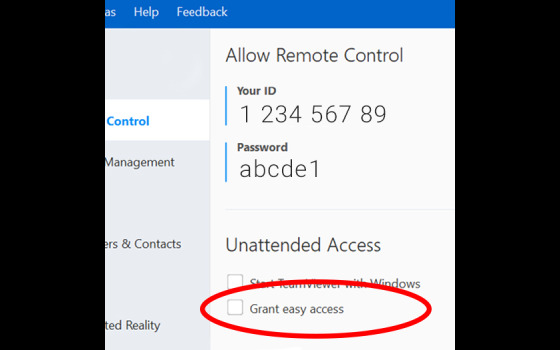
Step 1.To start a remote session, you need to obtain the "Partner ID" of the remote machine first. If the remote machine does not have the full version of TeamViewer installed, it needs to use the "Download QuickSupport" feature provided by TeamViewer first.
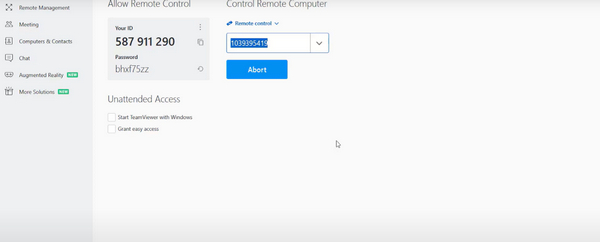
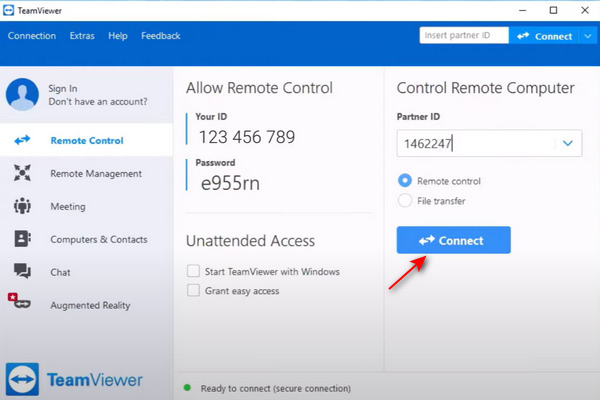
Step 2.On the main screen, enter the "Partner ID" into the box. Enable the "Remote Control" option and click on the "Connect" button. Enter the "Password" and confirm.
Step 3.Once you have connected, you would be given full access to the remote machine.
Tips
There might be a slight chance that you need the approval of UAC access before TeamViewer grants you admin access for the remote computer. This could be easily circumvented by asking the other person to accept the invitation.
Record TeamViewer with Your Computer Screen - Beyond TeamViewer Screen Recorder
Despite the convenience provided by the TeamViewer built-in screen recorder, it also has many disadvantages such as limitations on video qualities and formats, no way to edit videos afterward, not able to record your computer screen along with remote controlled computer, etc. Thus, a better solution could be using professional screen recorder software. AnyRec Screen Recorder is your best alternative. It has the following vital features that might help you:

Record outside the TeamViewer with custom screen size.
Export video/audio recordings to AVI, MP4, MP3, and more popular formats.
Add mouse cursor, keystroke, annotation during TeamViewer recording.
Set custom hotkeys to start/stop the screen recording instantly.
Trim, merge, compress, and edit recording files within the program
Secure Download
Secure Download
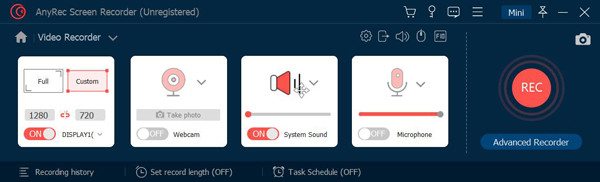
Step 1.Download and install the best screen recorder software for TeamViewer. Open up the program. On the main screen, click on the "Video Recorder" button on the left side of the screen to proceed.

Step 2.In the second step, you need to select a region of the screen to record. Click on the "Full" button to record a full-screen video. If you prefer to have a windowed TeamViewer session, click on the "Custom" button for the specific session window.
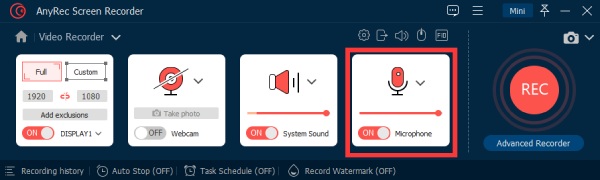
Step 3.Depends on your need. If you wish to record your voice commentary to the video, click on the "Microphone" button. If you wish to record remote audio from the session, enable the "System Sound" by clicking it.
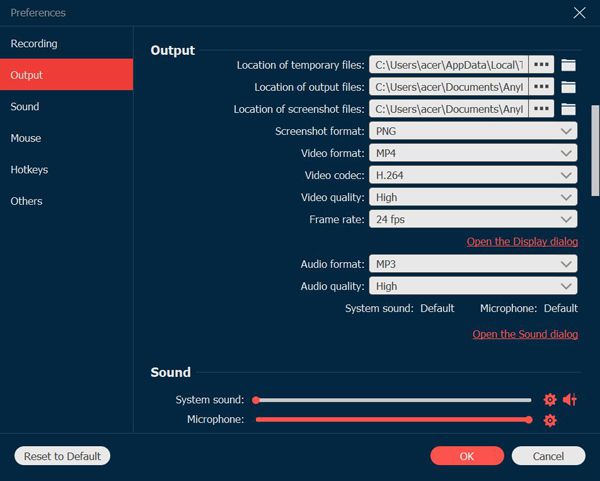
Step 4.If you wish to save the output file to the desired format, click on the "Setting" button. Move onto the "Output" tab by clicking it. Make necessary adjustments and click on the "Save" button.
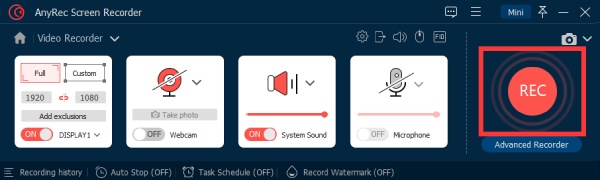
Step 5.Click on the "REC" button to start recording.
Step 6.Once the recording is completed, click on the "Stop" button. On the preview screen, you could edit, trim, crop, cut your video and add more special effects accordingly. Click on the "Done" button to complete recording a TeamViewer session.
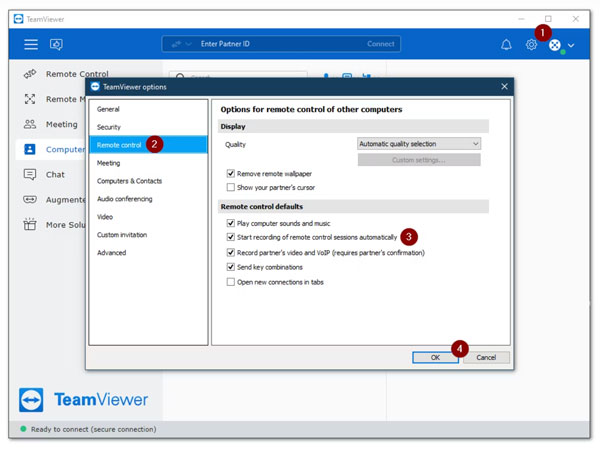
How to Enable and Enforce TeamViewer Automatic Recording
Actually, TeamViewer provides options for users to record all connections and remote controls automatically. There is no need to trigger the TeamViewer record function repeatedly. Follow steps below.
Step 1.In your TeamViewer Classic account, find and click the "Settings" button on the top right corner.
Step 2.Go to the "Remote Control" section. Tick the checkmark before "Start recording of remote control sessions automatically".
Step 3.Click the "OK" button to save changes.
Step 4.You can find the TeamViewer auto recorded file with the default file name of "Device Name (Device ID)_[YYYY-MM-DD] [HH.MM]". If you want to change TeamViewer session recording directory, go to "Preferences" to manage it.
FAQs about Recording a TeamViewer Session
-
1. Does TeamViewer have a keylogger feature?
No. TeamViewer has the capacity of sending certain key combinations such as Ctrl+Alt+Del, however, it does not record your keystrokes. If you wish to record keystrokes on a remote computer during the TeamViewer session, use a third-party application instead.
-
2. I can't find the recorded TeamViewer video. Where is it located?
TeamViewer sessions and meetings are saved in different folders. If you cannot do your TeamViewer recording, make sure you are checking in the correct folder. If you are still having trouble, use an alternative screen recorder to avoid any hassle.
-
3. Is TeamViewer better than AnyDesk?
Both parties have their advantages and disadvantages. AnyDesk allows faster connections and gives better performance compared to TeamViewer even at a low bandwidth. However, TeamViewer has more features and better support.
Conclusion
As we have discussed in the article, there are multiple ways to record a TeamViewer session or meeting on your computer. Either using the built-in recorder or using professional third-party screen recorder software. If you want to record not only TeamViewer remote-controlled computer but also your face/screen, AnyRec Screen Recorder is your better choice. Moreover, you can use it to record online video meetings without having recording button not showing, file not saving, audio not recorded, and similar TeamViewer not recording questions. Depending on your particular need, you would be informed well enough to choose the most stable toolkit for your use case.
Secure Download
Secure Download
Related Article
About Our Author


