4 Ways to Transfer Photos from iPhone to Chromebook and More
While both are amazing in their own ways, the Apple-Google ecosystem can make photo transfer feel like a challenge. However, it's only a minor hurdle to transfer photos from iPhone to Chromebook, and you don't have to be a tech wizard to do it. Thankfully, this post outlines four straightforward ways to upload photos from iPhone to Chromebook, alongside a bonus workaround for transferring iPhone media files to Windows. Dive in now and make that transfer a breeze!
| Method | Cable/Internet Required | Storage Limit | Speed | Ease of Use |
| Google Photos | Internet | 15GB | Moderate | Easy |
| USB | Cable | Depends on the phone or drive | Fast | Moderate |
| Google Drive | Internet | 15GB | Moderate | Easy |
| Dropbox | Internet | 2GB | Moderate | Moderate |
Guide List
Transfer Photos from iPhone to Chromebook with Google Photos Transfer Images from iPhone to Chromebook with USB Cable Upload Photos from iPhone to Chromebook with Google Drive Move Photos from iPhone to Chromebook with Dropbox Transfer Photos and Videos from iPhone to Windows Using AnyRec PhoneMoverTransfer Photos from iPhone to Chromebook with Google Photos
Google Photos offers a cloud-based solution for photo storage that automatically backs up your photos and videos from your iOS device. This method of transferring photos from an iPhone to a Chromebook is ideal if you want to access your media from anywhere. Upon backing up your photos, you can quickly view or download them from Google Photos on your Chromebook. Here's how to transfer photos from iPhone to Chromebook using Google Photos:
Step 1.Open Google Photos on your iPhone. Sign in with your Google account, and enable "Backup & Sync" in the settings. Please wait for your photos to upload; the process depends on the strength of your connection.
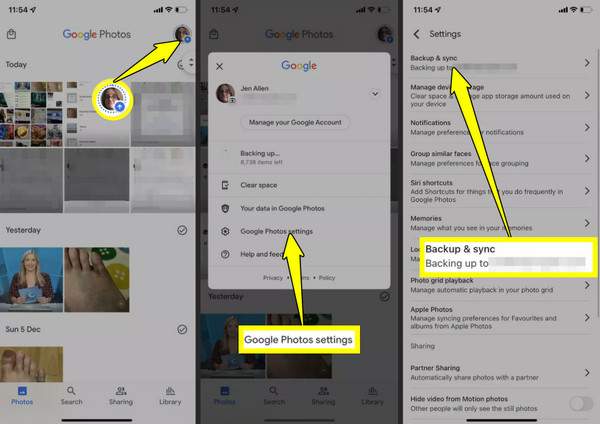
Step 2.Once done, open the Chromebook and navigate to the photos.google.com website in your browser. Then, sign in with the same Google account you used. There, you can view, download, and organize your photos.
Pros
Can be easily accessed from any device.
Automatic backup.
No cable needed.
Cons
Require an internet connection.
The free storage is limited to 15 GB.
Transfer Images from iPhone to Chromebook with USB Cable
Using a USB cable is a direct way to connect iPhone to Chromebook and transfer photos. It does not have to depend on internet access, regardless of how large your file transfer will be, but it will let you transfer the files straight to local folders on your Chromebook. However, there's a catch: this method requires an additional step to enable file access on your phone.
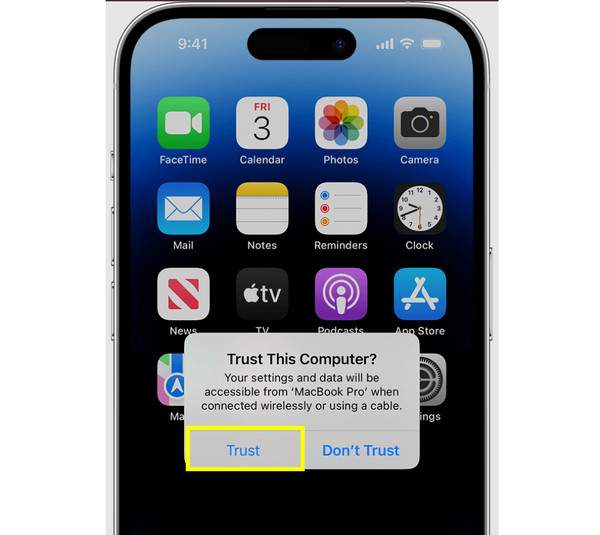
Step 1.Open Google Photos on your iPhone. Sign in with your Google account, and enable "Backup & Sync" in the settingsGet a workable USB cable and use it to connect your iPhone to your Chromebook. On your iPhone's pop-up notification, ensure to "Trust This Computer" and enter your passcode to allow access to your phone.
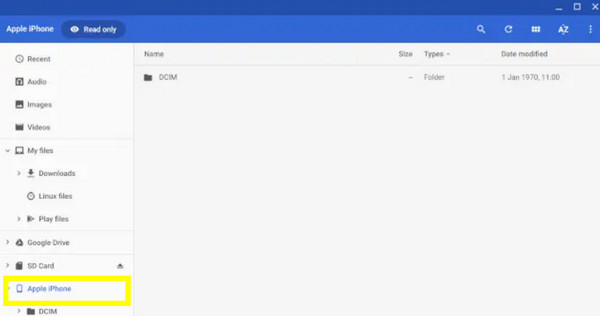
Step 2.On your Chromebook, open the "Files" app and locate your iPhone from the list of devices. There, navigate to the "DCIM" folder, and start dragging and dropping photos to your Chromebook folder.
Pros
Offer faster operation for large files.
Do not use cloud storage.
No internet connection is needed.
Cons
Manual selection of photos.
Need a compatible cable.
Upload Photos from iPhone to Chromebook with Google Drive
Meanwhile, Google Drive here provides cloud storage that operates nicely with both iPhone and Chromebook, which can transfer photos from iPhone to Chromebook easily. You can simply upload your images to Google Drive and then access or download them on your Chromebook, as long as you've signed in to the same Google account. This third method is ideal if you prefer organizing files manually and want to store more than just photos from your iPhone.
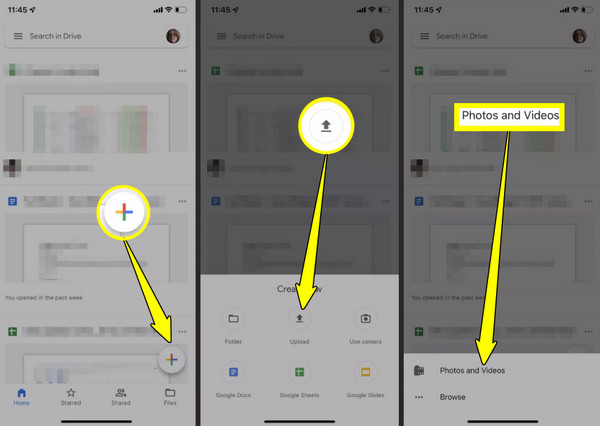
Step 1.Launch Google Drive on your iPhone. With your Google account, sign in to Drive. Then, tap the "Add" button and select "Upload"to "Photos and Videos"; select photos to upload.
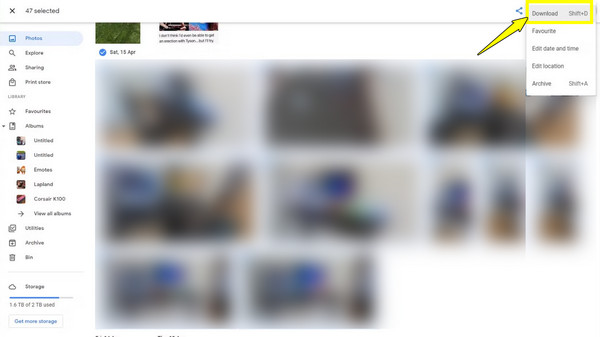
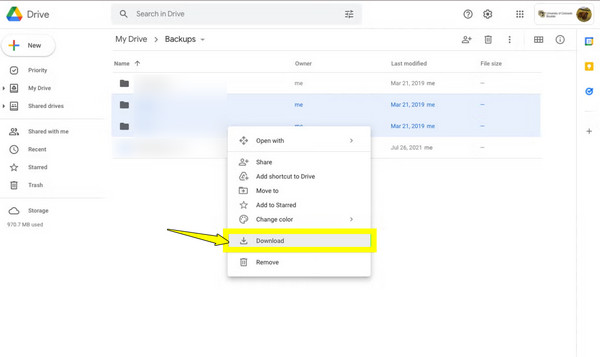
Step 2.Open your Chromebook now and search for drive.google.com in your chosen browser. Then, sign in with the same Google account. Locate and download all the photos that have been uploaded from your iPhone to transfer to Chromebook.
Pros
Offer easy sharing options.
Multi-file type support, including photos, videos, and documents.
Integration with Google Workspace.
Cons
Have 15GB of free storage.
Dependent on the internet connection.
Move Photos from iPhone to Chromebook with Dropbox
Another cloud storage service, Dropbox, supports uploading and syncing photos between iPhone and Chromebook. Like the previous method, you can use it to upload images here in the Dropbox app, then view and download them on your Chromebook via the web.
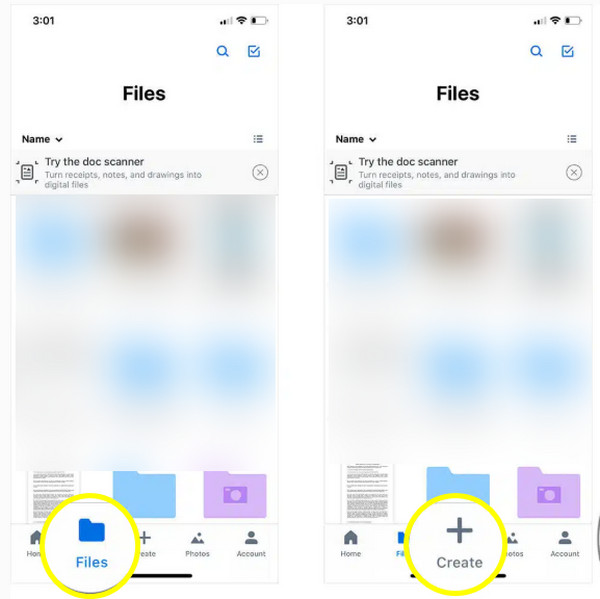
Step 1.Open Dropbox on your iPhone, then sign in with your account. From the "Files" tab, tap "Create", then "Upload Photos", and select images to upload.
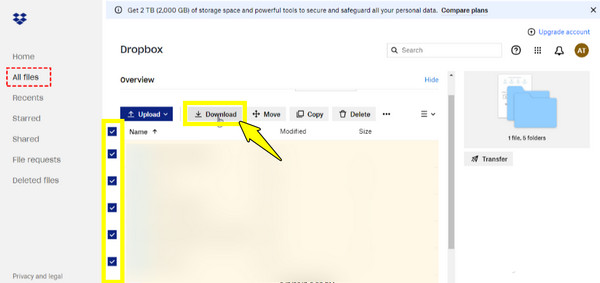
Step 2.Now, on your Chromebook, open dropbox.com and sign in with the same account you used on your iPhone. Then, find your uploaded photos, select them, and click the "Download" button.
Pros
Can organize your photos in folders.
Excellent for collaborative use.
Sync across all devices.
Cons
Manual upload needed.
Only offer 2GB of free storage.
Upload tends to be slow on weak connections.
Transfer Photos and Videos from iPhone to Windows Using AnyRec PhoneMover
Done with Chromebook! If you want a straightforward way to transfer photos and videos from your iPhone to your Windows PC, AnyRec PhoneMover is a wise choice! Whether you're switching devices or simply backing up your memories, this fantastic tool makes the process hassle-free, regardless of your model or version of iPhone. It gives you freedom to control over what you transfer from your iPhone, offering a preview of it before the operation. It also gives faster processing and a more reliable solution than relying on cloud-based syncing or sending large files via email to yourself. You can even transfer iPhone photos to external hard drive to save forever.
Can transfer photos, videos, music, contacts, messages, and more.
Support adding, deleting, editing, and organizing files.
No data loss or quality compression will happen throughout the process.
Find and manage all duplicates to free up iPhone storage.
Secure Download
Step 1.Launch AnyRec PhoneMover on your Windows PC. Connect your iPhone 17, 16, or 15 (or earlier models) to the computer via a USB cable. Make sure to trust the computer to allow permission.
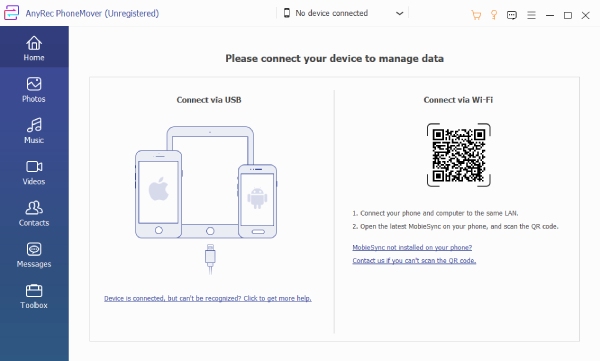
Once it is successfully connected, you'll see your storage capacity, device name, and system version on the screen.
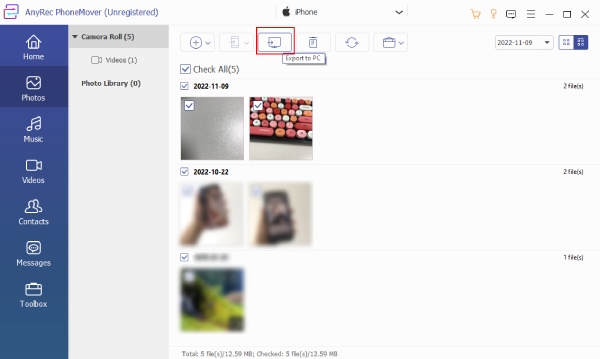
Step 2.Next, go to "Photos" and click all the boxes of the selected pictures you wish to transfer. You can easily click on the "Check All" box if you want. Once done, click the "Export to PC" button.
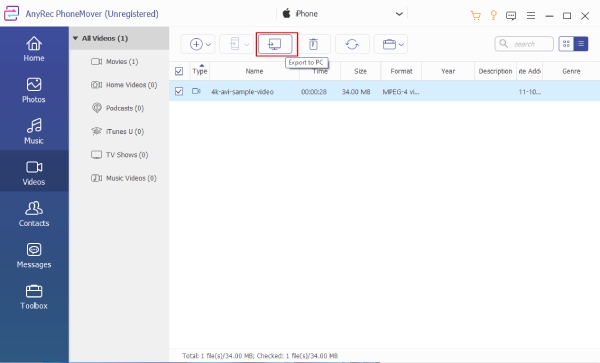
For videos, simply navigate to the "Videos" section on the left side tab and select the boxes of your chosen videos to transfer from various categories. Then, click the "Export to PC" button.
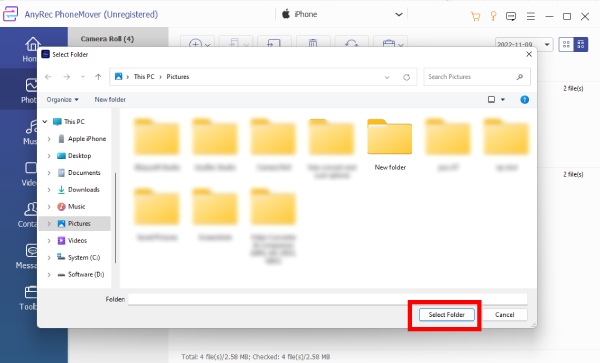
Step 3.Now, select the destination folder on your Windows PC where you want the photos and videos to be saved. Click the "Select Folder" button to confirm and initiate the transfer of photos and videos from your iPhone to your Windows PC.
Conclusion
Transferring photos from iPhone to Chromebook is easier than ever with the above methods available. From cloud-based options like Google Photos to a USB cable approach, each has its own power, depending on your needs. If you're also looking to transfer photos and videos from iPhone to PC, consider AnyRec PhoneMover. It offers not only fast but also secure and friendly transfers between iOS, Android, and computers. Use this powerful tool today to back up precious memories, clear up storage space, and organize media with minimal hassle.
Secure Download


