Hot
AnyRec Screen Recorder
Capture every moment. Record like a pro.
Secure Download
Best 4 Ways to Record Screen on Windows 10 without Xbox
Many Windows 10 users search for ways to record the entire screen, only to discover that Game Bar is unavailable or simply not best for their needs. Is there a way to record screen on Windows 10 without Xbox? While it is a built-in tool, it may fail to capture some activities, so this guide offers alternatives to record entire screen on Windows 10 without Xbox. Whether it is online classes, tutorials, presentations, and more, these ways capture your screen smoothly, no Xbox needed.
Guide List
Why Record Screen on Windows without Xbox Game Bar How to Screen Record on Windows 10 with Audio Using AnyRec Screen Recorder How to Record Screen on Windows 10 with OBS How to Record Desktop on Windows 10 with PowerPoint How to Capture Screen on Windows 10 with VLCWhy Record Screen on Windows without Xbox Game Bar
Before exploring alternatives to record Windows screen without Xbox, understand first why many users, like you, choose not to rely on the built-in recorder on Windows 10.
See the listed reasons to record video on Windows without using the Xbox Game Bar:
- 1. Buggy and unreliable performance. Black screen recording, frequent crashes, or failed recordings.
- 2. Limited full-screen app capture. Some full-screen apps are not supported.
- 3. Laggy recordings. Dropped frames and desynchronization during capture often happen.
- 4. Limited output format. Only exports in MP4 with a fixed bitrate.
- 5. No desktop recording support. Cannot record the Windows desktop or File Explorer, and other system settings.
- 6. No webcam overlay. Can't add facecam for lectures, tutorials, or presentations.
- 7. No quality customization. Lock output controls over frame rate, resolution, or compression.
- 8. Poor audio control. Limited options for system sound and microphone audio.
- 9. High CPU/GPU usage. It causes performance issues on older PCs.
- 10. No advanced features. There's no scheduled recording, hotkey customization, or extra features.
How to Screen Record on Windows 10 with Audio Using AnyRec Screen Recorder
AnyRec Screen Recorder can capture videos in full screen, included or excluded windows, or custom regions without restrictions. It is made for smooth performance, making it perfect for recording online classes, meetings, tutorials, presentations, gameplay, video/audio calls, and more on Windows, Mac, iPhone, and Android. Another advantage is its straightforward interface, making the screen recording simple even for first-time users.

Record full screen, window, or custom region in high-quality,
Can capture system audio and mic separately or simultaneously.
Customizable output formats, resolution, frame rate, and other settings.
Preview the screen recording, then edit it with trimming and other tools.
Secure Download
Secure Download
Step 1.Open AnyRec Screen Recorder. From the main "Video Recorder" interface, select Full Screen or Custom as recording area.
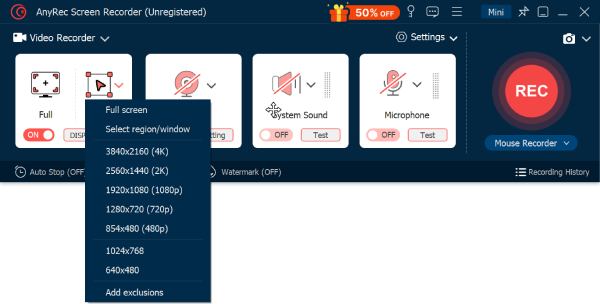
Step 2.Turn on toggle buttons before "System Sound" and "Microphone" based on your recording needs. Don't forget to adjust output settings like resolution, format, and frame rate if needed.
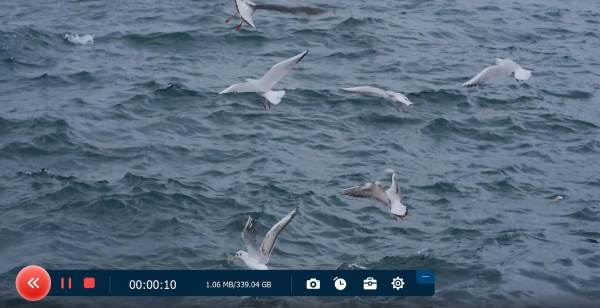
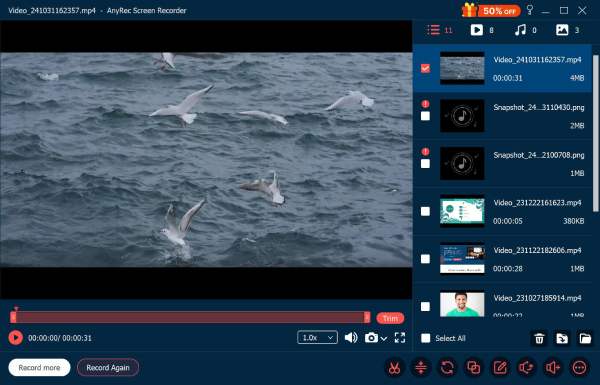
Step 3.Once ready, click the "REC" button to start recording. You can click the "Stop" button when to stop Windows recording anytime you want. Later, preview the recording, trim it, and save your file.
Secure Download
Secure Download
How to Record Screen on Windows 10 with OBS
OBS Studio is a powerful, open-source recording tool usually used by gamers, educators, and content creators. Compared to Xbox, the program has far more control over recording sources, quality, and audio mixing. It is an excellent choice for anyone who needs professional-level recordings, making it a strong alternative to record Windows 10 screen without Xbox.
Pros
Works completely free and open-source.
Suitable for professional and long recordings.
Highly customizable recording.
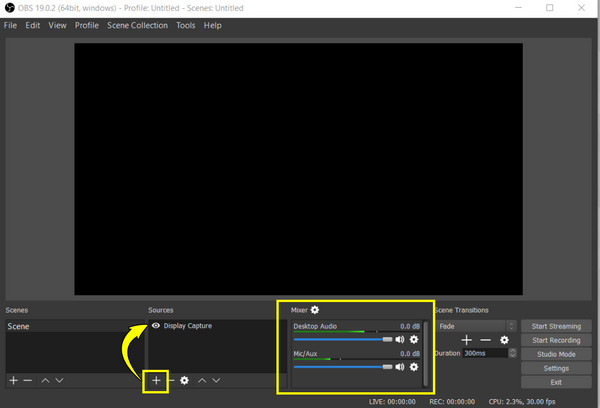
Step 1.From the OBS Studio main screen, navigate to the "Sources" box and click the "Add" button, and choose "Display Capture" or "Window Capture".
Step 2.Next, configure "Desktop Audio" and "Mic/Aux" in the audio mixer.
Step 3.Then, go to "Settings" and choose "Output" to modify recording format and quality.
Step 4.Click "Start Recording" and stop when completed to save your video.
How to Record Desktop on Windows 10 with PowerPoint
The next solution to Windows 10 screen recording is using PowerPoint. This way is not just for presentations, as it also has a built-in PowerPoint screen recording feature. PowerPoint allows you to capture the selected portion of the screen along with the mic audio. While it does not have advanced recording and editing controls, it is enough for your short tutorials or demonstrations.
Pros
Simple and beginner-friendly tool.
No extra software installation needed for Windows.
Made perfectly for presentations.
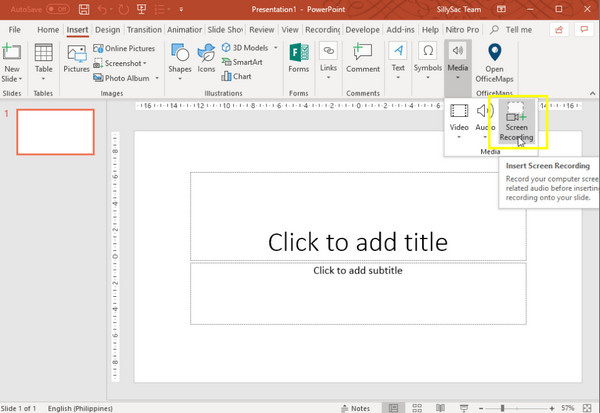
Step 1.Open PowerPoint and create a new presentation or select an existing one. Head to the "Insert" tab and click on "Screen Recording".
Step 2.Choose the area you want to capture. Enable "Audio" to record the microphone.
Step 3.Once everything is set, click the "Record" button to begin.
Step 4.After all that, stop the recording and save the video.
How to Capture Screen on Windows 10 with VLC
Here comes VLC Media Player, a widely known program for playing videos; it also has a basic recording function. It helps you record desktop screen on Windows 10 without Xbox, capturing desktop and saving recordings in formats like MP4. However, VLC screen recording does not have webcam support, separated audio settings, as well as real-time controls.
Pros
Free and lightweight program.
No extra downloads for VLC users.
Covers standard output formats.
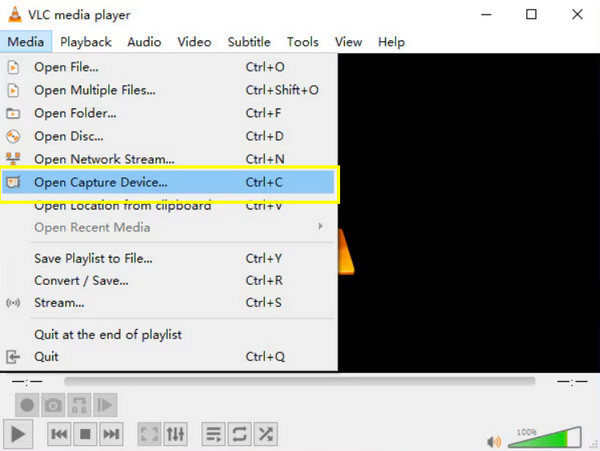
Step 1.Launch VLC Media Player on your PC. There, click on "Media" in the above menu and select "Open Capture Device".
Step 2.Next, choose "Desktop" as the capture mode.
Step 3.Set the desired frame rate, and click on "Convert/Save".
Step 4.After that, select your output format and location in this window.
Step 5.Click "Start" to begin recording and later simply close VLC to stop.
Conclusion
Recording screen and audio on Windows 10 without Xbox is made possible by the many options available today! As shown in this article, alternatives like OBS Studio, VLC, and PowerPoint can fit your recording goals, skill level, and system performance. However, if you want the best balance of quality, features, and friendliness, AnyRec Screen Recorder stands out! It supports full desktop recording, system and mic audio, webcam overlay, and adjustable output settings, all while keeping smooth performance on your Windows 10 PC!
Secure Download
Secure Download
Related Article
About Our Author


