Hot
AnyRec Video Converter
120× faster video conversion and editing. No waiting.
Secure Download
How to Trim a Video on Windows 10 Casually or Frame by Frame
Video creators tend to trim videos after recording. And trimming clips allows you to shorten them or remove unwanted parts. There are also differences when trimming a video on Windows 10 with different tools. Some tools can trim a video very casually, you can just shorten the length. On the contrary, some tools could help you trim a video frame by frame to make the frame and length the specific you want. With that said, you will learn how to trim videos on Windows 10 by the Windows default and an alternative professional tool.
Guide List
Part 1: The Default Way to Trim Video on Windows 10 via Photos Part 2: The Professional Tool to Trim Video on Windows 10 Part 3: FAQs about Trimming Video on Windows 10Part 1: The Default Way to Trim Video on Windows 10 via Photos
If you own a computer with an updated version, such as Windows 10, video editing comes with easier access to it. You don’t have to download an application or a video editor to sustain your needs for video editing. Moreover, you can trim video on Windows 10 by opening the file via Photos. Although it is known only for organizing and viewing media files, this built-in program expands its features, including splitting, trimming, applying text, filter, and 3D effects. The best part of using Photos to trim a video on Windows 10 is it saves the output automatically when you accidentally close the program. Here are other Photos features you need to know:
Features:
1. Effectively trim videos while maintaining video quality.
2. Enable users to add narration to their videos.
3. Support removing the black parts and changing the aspect ratio.
4. A straightforward but professional interface fit for both beginners and pros.
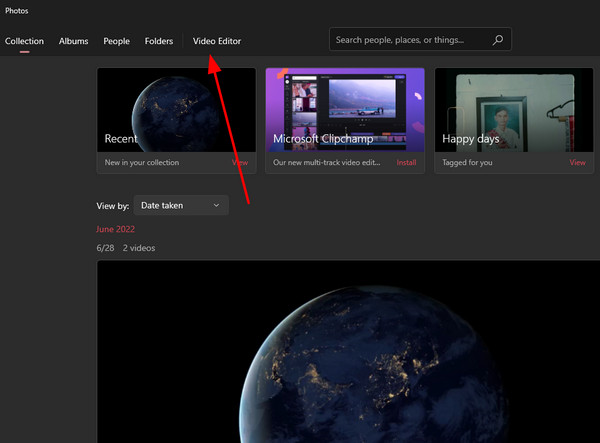
Step 1.Open the Photos app by searching it on the "Start" menu. Click the "Video Editor" button from the top menu of the interface. Then, click the "New Video Project" button to create a new project. A pop-up will ask you to rename the file, but you can skip and do it later.
Step 2.Click the Add button and choose the source where you want to obtain the video clip. Once successfully uploaded, drag the clip to the timeline below your screen. The editing features will appear once the action is executed.

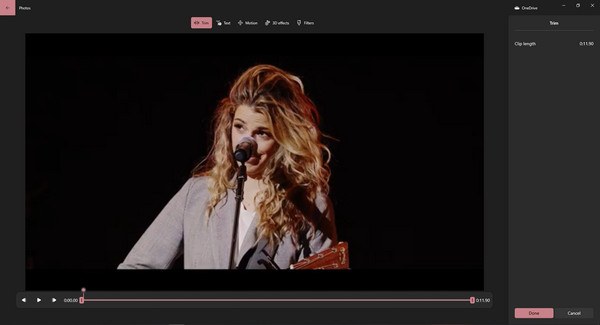
Step 3.Click the Trim button to proceed. Move or glide the video parameter to trim the unwanted parts of the clip. You can track the video length or duration from the right panel of the interface. Moreover, you can edit the video with the features included at the top menu, like text, motion, 3D effects, etc. Click the Done button to go back to the main menu.
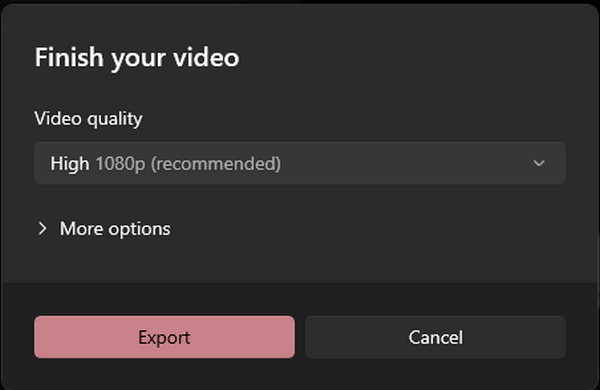
Step 4.To export the final output, click the Finish Video button from the top right corner. Choose the desired video quality, then click the Export button to proceed. You may also leave the program, and it will save the clip under My Video Project.
The Photos app is a great way to free trim videos on Windows 10, but it doesn’t allow cutting clips frame by frame. Moreover, it can’t support other video formats, such as AVI or WebM.
Part 2: The Professional Tool to Trim Video on Windows 10
Alternatively, trimming a video on Windows 10 is easier with AnyRec Video Converter. The software consists of all the video editing features, especially the trimming option. The Video Trimmer supports cutting clips with the Add Segment to trim clips, merge them with the Fade In and Fade Out features, and save the output with high quality. Moreover, you can configure the output settings, where you can change the video encoder, quality, frame rate, resolution, and more. AnyRec Video Converter is available on Windows and macOS.

Professionally trim videos on Windows 10 with four ways to cut unwanted parts.
Offer an intuitive interface with tools, including a video enhancer, watermark remover, color correction, etc.
Enable users to change the output format to MOV, MP4, AVI, WMV, MKV, and GIF with 60 FPS.
The best solution for high-quality conversion, compression, GIF making, and audio syncing.
Secure Download
Secure Download
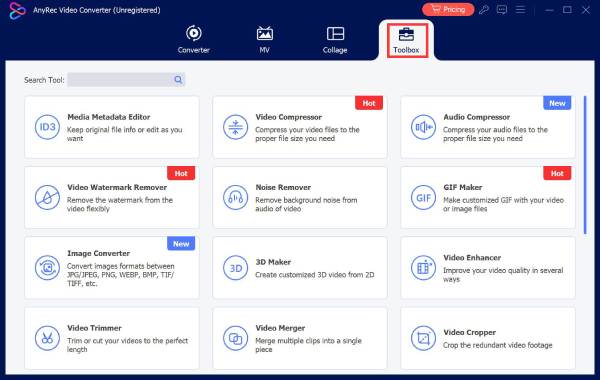
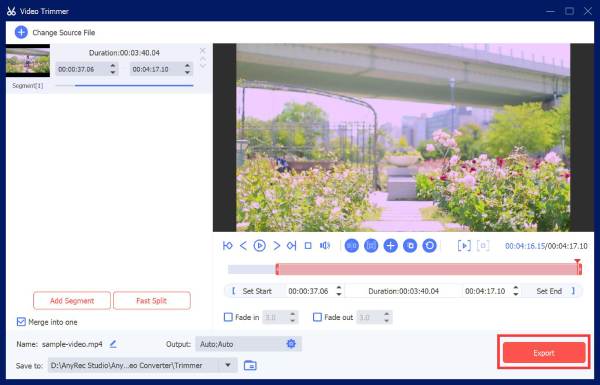
Step 1.Launch "AnyRec Video Converter" on your computer after downloading and installing the software to trim video on Windows 10. Go to the "Toolbox" menu and click the "Video Trimmer" button. Open your device’s folder by clicking the Add button and browse for the video clip you want to edit.
Step 2.After uploading the clip, you can trim the video by moving the orange timeline. Another recommended trimming option is to set the start and ending parts with a specific video duration to remove the parts. Using the "Fade In" and "Fade Out" features help the video to be in smooth transitions.
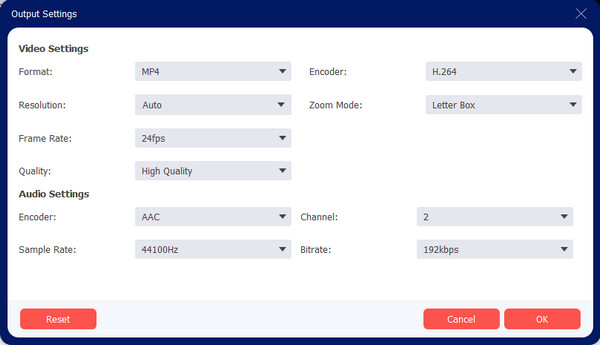
Step 3.To go to the advanced settings, select the "Output" menu at the lower part of the interface. The smaller window will give you video settings like format, resolution, frame rate, encoder, and audio settings. Click the "OK" button to confirm the changes.
Step 4.Finally, choose the designated folder path for the output on the "Save To" menu under the Output. You can also rename the video if you wish. Click the "Export" button to process the trimmed clip.
Tips
You can edit and trim a video, even if you are converting, compressing, or enhancing it. You can find the video trimmer by clicking the Cut button with the Scissors icon.
Part 3: FAQs about Trimming Video on Windows 10
-
1. What is the best online tool to trim a video on Windows 10 without a watermark?
Many online video trimmers are available for free, but the majority will apply an unwanted watermark. You can try Kapwing to trim a video on Windows 10 or 11 without a watermark in the output. The web-based video editor provides professional features, including transitions, Chroma Key, and more. Ensure that you have a stable internet connection while using Kapwing.
-
2. Does trimming my video on Windows 10 reduce video quality?
No. Trimming videos does not cause lower video quality in most cases. There is no major reduction in quality when you remove some parts of a video clip. The main factors affecting video quality are bitrate, resolution, and frame size.
-
3. How to trim a video on Mac?
The best way to trim a video on Mac is to use iMovie. It is the built-in video editor for Apple users. To edit a video, open iMovie on your computer and import the video file. Fine-tune the starting and ending points by moving the clip timeline. Edit the rest of the video clip and export iMovie video to MP4 and other formats.
Conclusion
After learning how to trim a video on Windows 10, you can freely avail of the Photos app when you need to edit a video. But in any case, you are not satisfied with the default video editor, AnyRec Video Converter will help you to edit media files professionally, create videos, and enhance them with more straightforward navigation. Try the free trial version of the best alternative video editor!
Secure Download
Secure Download
Related Articles
About Our Author


