Hot

AnyRec Screen Recorder
Screenshot on PC/Mac in full/long screen.
Secure Download
Do Remote Desktop Screenshots on Both Devices [Windows/Mac]
Have you done remote desktop screenshots and want to save them on the host computer? Otherwise, are you having difficulty screen-capturing your remote desktop? Either way, there is confusion about what screen gets captured and where it will be saved once it gets controlled by a host. That said, this entire post is here to guide you in handling take screenshots on remote desktop, featuring how to take one and save it on both Windows and Mac.
Guide List
How to Take Remote Desktop Screenshots on Windows 2 Ways to Save Remote Desktop Screenshots on Mac Easy Way to Save Remote Desktop Screenshots on Both Devices Could You Take Desktop Screenshots When Controlled FAQsHow to Take Remote Desktop Screenshots on Windows
To start this out, know that the key to outstanding remote desktop screenshots is taking control of the guest computer. It can be achieved through combinations, and the two must-use keys are Ctrl and Alt. To see how screen capture remote desktop works, come after the listed combination keys.
Ctrl + Alt + Break: It doesn't count as taking remote screenshots, but it toggle switches the RDP connection in full screen and windowed mode. Working in a window mode will make it quick to go back and forth between the host and guest computers.
Ctrl + Alt + PrtScn: As for this Windows snipping tool shortcut, it will take remote desktop screenshots; thus, it will be saved only to the remote computer. Moreover, if you’re using RDP in window mode, it will capture the whole screen.
Ctrl + Alt + "+": This hotkey will take a screenshot of the host computer screen, which will be saved to the remote computer.
Ctrl + Alt + "-": On the other hand, this combination will let you take a screenshot of the host's active window screen and save it to the remote computer.
2 Ways to Save Remote Desktop Screenshots on Mac
Mac users will surely be glad to know that they have two options for saving remote desktop screenshots, as the common issue here is getting the screenshot from the guest computer.
Way 1: Shift + Command + 3
This normal screenshot command on your Mac is just like the print screen key on Windows. On your host computer, you can use it to upload the captured image using email or other media of file-sharing.
Way 2: Use the Save Capture As
Meanwhile, in this way, do it while using the Screen Sharing mode. You can see the Save Capture As inside the Connection menu, and by that, the host computer will save the remote desktop screenshots.
Easy Way to Save Remote Desktop Screenshots on Both Devices
Besides using combination keys for the remote desktop screenshots, it’s great to know that you also use a recording tool to help you save the screenshots on both devices. Hence, go for AnyRec Free Screen Recorder to get the job done easily. Working for free, this online recorder can help you capture screen activities; thus, use it on the chosen device on which you intend to save and do the remote desktop screenshots. Furthermore, it gives you options to capture in full screen or a customized region of your choice.
Features:
- Capture remote desktop screenshots and save on both host and guest devices.
- Come with real-time drawing tools that are effective in emphasizing points.
- Offer no time recording limit nor recording restrictions, unlike paid competitors.
- Allow you to choose to show or hide the floating bar once the recording starts.
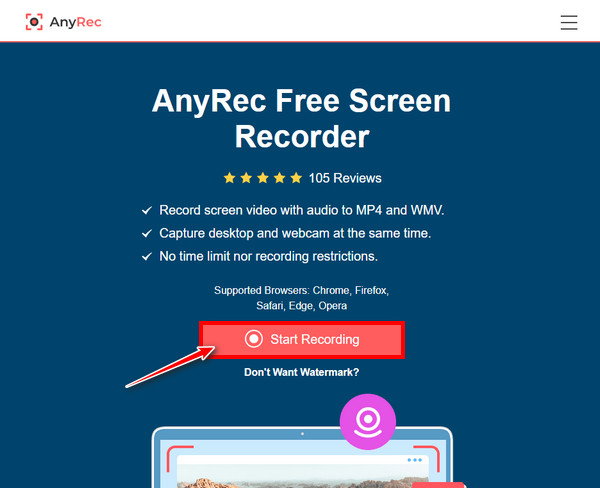
Step 1.To get that remote desktop screenshot saved on your favored computer, search the AnyRec Free Screen Recorder on it. Once in it, click the "Start Recording" button.
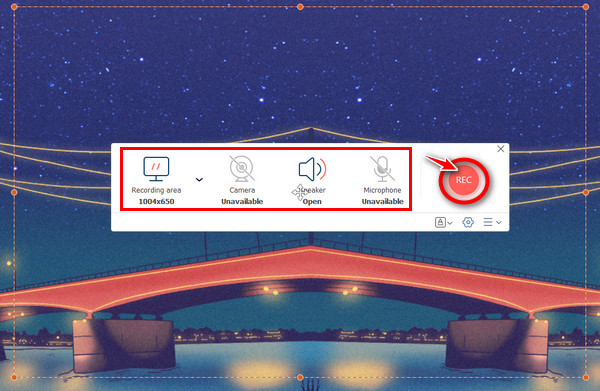
Step 2.Note that the activity you want to capture should be ready at any time. When the recording frame appears, set the recording area and audio options, if required. Later, click the "Rec" button to begin.
Step 3.After a moment, click the "Stop" button on your chosen device and determine what format you’ll use to export your video, either WMV or MP4. The remote desktop screenshots will then be saved on the device where you’ve completed the capturing process.
Could You Take Desktop Screenshots When Controlled
Although nothing beats an online and free tool, another solution deserves recognition for being a trustworthy recorder software that can help you take remote desktop screenshots, even when controlled. This software is the AnyRec Screen Recorder, and it will be possible to take screenshots yourself with the designed hotkeys once inside the SnapShot tool. What’s more, the recorder can do scrolling, window, customized parts, and more screenshot options.

Powerful screenshot tool to capture screen in full screen, scrolling, etc.
Let you customize hotkeys to screen capture remote desktop effortlessly.
Have no ads popping up during screenshots and no watermarks applied.
Edit your captured desktop screenshots in the preview with colors, lines, etc.
Secure Download
Secure Download
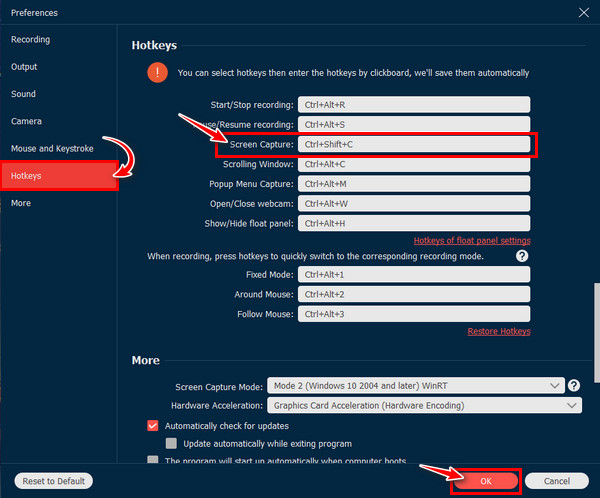
Step 1.When you have launched AnyRec Screen Recorder, choose the "Video Recorder" button for more options. Locate the "Settings" button, to customize keys for desktop capturing.
Step 2.Find your way to the "Hotkey" section on the left tab and see the "Screen Capture" bar. After determining your hotkeys, click the "OK" button and apply the changed keys.
Step 3.Later, go to the capturing area, either a window, your full screen, or the selected content you intend to capture. Then, apply the keys you’ve set earlier; even when your screen is controlled, you can still use the hotkeys.

Secure Download
Secure Download
FAQs about How to Take Remote Desktop Screenshots
-
What does the RDP screen capture on Windows mean?
RDP practically means that you have remote access to devices that run Windows. Concerning the screen capture, you can take screenshots of the remote desktop using the host computer.
-
How to screenshot on remote desktop Mac?
The easiest way is through the Screen Sharing feature in the OS X version, or use the Shift + Command + 3 keys.
-
Can I use the Snipping tool for remote desktop screenshots?
No, it won’t work properly if you use it for the said purpose. The hotkeys in the above post are the best way to take desktop screenshots.
-
How does screen capture in remote desktop work?
Just use the default combinations. However, you must be mindful when taking a screenshot on a remote desktop, as it can only be saved on the remote desktop, not on the host computer. Therefore, using the correct keys is vital.
-
Can I use the Xbox Game Bar to take remote desktop screenshots?
No. Unfortunately, you cannot use the Game Bar to get the screenshot done, though you can take its assistance in taking screenshots, but for the host computer only.
Conclusion
That’s how remote desktop screenshots work! You see, there are different approaches for Windows and Mac. Also, you see here what you should do when saving the remote desktop screenshots on your desired device, and it can be done with AnyRec Free Screen Recorder, an online tool. Otherwise, go for AnyRec Screen Recorder, a software that can help you take desktop screenshots quickly using set hotkeys yourself. Either way, both ensure high-quality screenshots.
Secure Download
Secure Download
Related Articles
About Our Author


