Your Full Guide to Trimming a Video on Mac - Fast and Simple
In fact, trimming a video on Mac is quite easy. You can start with the built-in QuickTime Player for quick edits, or explore free online video trimmers if you need more advanced features. In this guide, we'll show you four easy ways to trim a video on your Mac, helping you find the best option to suit your needs.
Guide List
The Easiest Way to Trim a Video on Mac How to Trim a Video on Mac with QuickTime Player How to Trim a Video on Mac with iMovie How to Trim a Video on Mac with VLCThe Easiest Way to Trim a Video on Mac
Best for: Users seeking an easy and feature-rich tool for trimming and editing videos on Mac.
Are you looking for a versatile, all-in-one tool for trimming a video on Mac? This all-in-one tool, AnyRec Video Converter, may match your needs perfectly. This powerful software not only allows you to trim your videos but also offers a wide range of editing and converting options. Whether you need to convert videos to different formats or create music videos, AnyRec can handle it all with ease. It also has a built-in toolbox so that even beginners can edit videos effortlessly.
Crop, merge, edit, and trim videos in batches on Mac or PC.
Resize your 4K video while maintaining the clarity and vibrancy.
Support batch video conversion up to 120× faster with GPU acceleration.
Convert videos to 1000+ formats without quality loss.
Secure Download
Secure Download
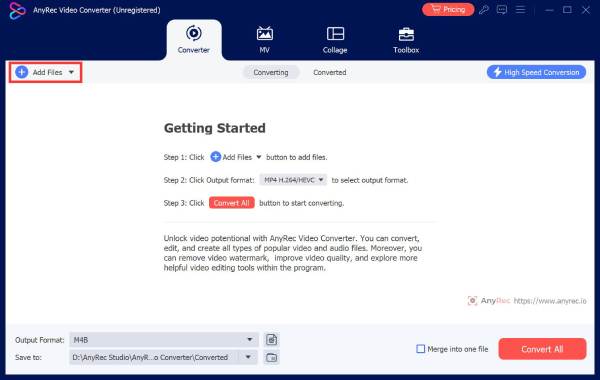
Step 1.Launch the software on your computer and click "Add Files" in the top left corner. You can also drag and drop your video files into the software.
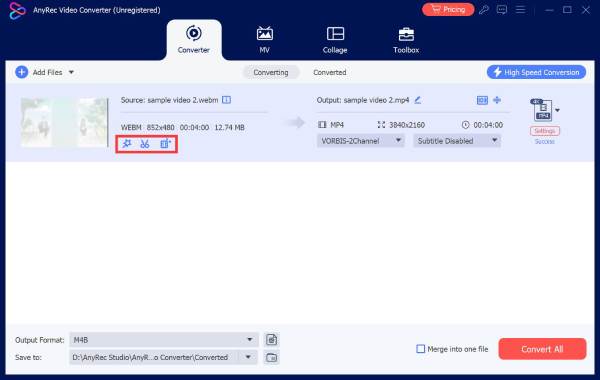
Step 2.Click on the "Trim" button to access the trimming page
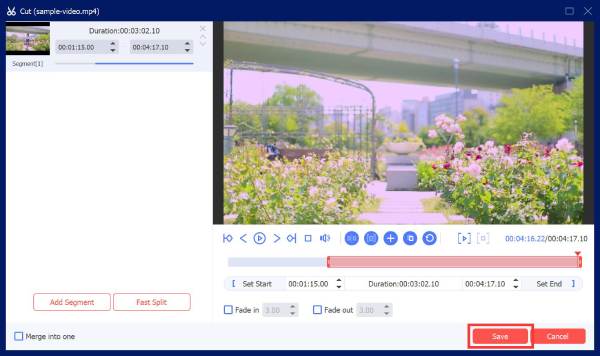
Step 3.Drag the handlebars to set your clip edge. After setting the starting time and end time, click the "Save" button to confirm video trimming.
How to Trim a Video on Mac with QuickTime Player
Best for: Quick and simple video tasks without complex edits.
QuickTime Player is Apple's build-in media player and editor. It allows users to view, record, and edit audio and video without installing extra software. It provides basic editing features like rotating, flipping, or trimming videos on Mac. If you want to do simple video editing, QuickTime Player is your best choice.
Step 1.Open "Spotlight" by pressing "Command + Space", then type "QuickTime Player" and press "Enter". Open "Finder", go to the "Applications" folder, find "QuickTime Player", and double-click to launch it.
Step 2.In QuickTime Player, click on the "File" menu in the top bar and select "Open File". Select the video you want to trim and click "open".
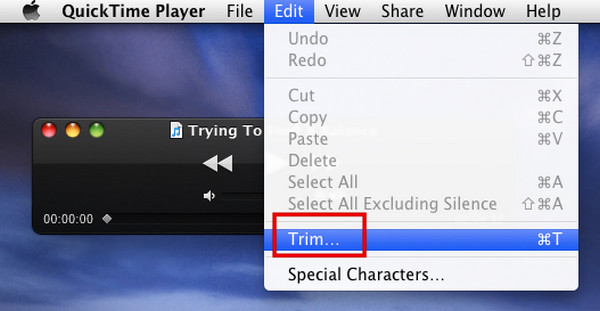
Step 3.With your video open, click on the "Edit" menu in the top bar and select "Trim" (or press "Command + T" on your keyboard).
Step 4.A yellow trim bar will appear at the bottom of the video. Drag the "handles" of the yellow bar to adjust the start and end points of the video.
Step 5.To preview your trimmed video, click the "Play" button while editing.
Step 6. Click on the "File" menu and select "Save". Name your video, choose where to save it on your Mac, and click "Save".
How to Trim a Video on Mac with iMovie
Best for: More involved video editing tasks with advanced features.
Similar to QuickTime, iMovie is another Apple-built app that offers a more robust suite of tools for editing and producing polished videos. Besides trimming a video on your Mac, you can also create movies, add subtitles or effects, and edit multiple video clips via iMovie.
Step 1.Go to "Finder" > "Applications", and launch iMovie on your Mac.
Step 2.Click the "Create New" button and then choose the "Movie" option. Click "Import" to upload the video you want to trim.
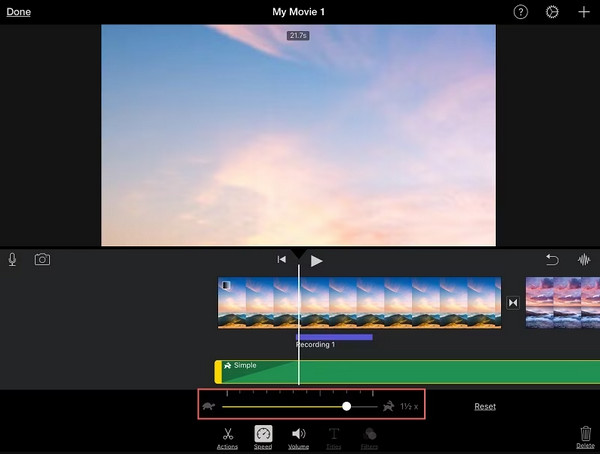
Step 3.Play the video, and drag the playhead bar to the specific point where you want to trim. Click on the "Modify" menu and select "Split Clip". Drag the edge of the clip to set the beginning or end of the clip. Press the "Delete" key on your keyboard to remove it.
Keyboard Shortcut:
- • Press "Space Bar" on the keyboard to pause and play the video.
- • Use the left and right "arrow keys" to move the playhead frame by frame.
- • Press "Command + B" to split the video at the playhead.
Step 4.Once finished, you can click the "Share" button at the top-right corner and then click "File" to export the trimmed video.
How to Trim a Video on Mac with VLC
Best for: Users who pre-installed VLC on their Mac.
As one of the most popular media players, millions of users have installed VLC on their computers. Many of them asked, "Can I use VLC to trim a video on Mac?" Yes! While VLC is primarily known for playback, it also provides basic video editing tools for quick edits.
Step 1.Launch VLC, click on "File" in the top menu, and select "Open File". Select the video you want to cut.
Step 2.Go to "View" in the menu bar and check "Advanced Controls" to display the record button.
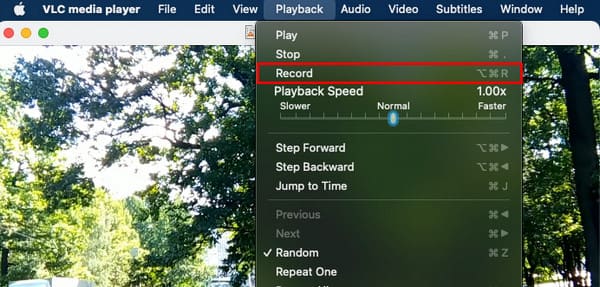
Step 3.Play the video and pause it at the beginning point where you want to trim.
Step 4.Click the "Record" button to start, then click it again when you reach the end of the section you want to keep. The trimmed video will be automatically saved in your "Movies" folder.
Conclusion
In this guide, we covered how to trim a video on Mac using 4 tools. You can choose from QuickTime Player, iMovie, VLC, or AnyRec Video Converter depending on your needs. For a well-rounded solution, we recommend AnyRec Video Converter as your best option because it's powerful and easy to use.
Secure Download
Secure Download
About Our Author


