Hot
AnyRec Video Converter
120× faster video conversion and editing. No waiting.
Secure Download
Easy Guide on How to Make a Watermark for Images and Videos
When you get a brilliant photo or video, do you want to add an exclusive watermark to it? This is meant to announce that this work only belongs to you and enforce a precious sense of collection and ownership. But how can you practice your watermark ideas? Don't worry; and this article offers you 3 efficient guides on how to make a watermark. Go through this article and find your favorite method.
Guide List
The Best Way to Make a Watermark for Videos How to Make a Watermark with Word How to Make a Watermark with Photoshop FAQs about How to Make a WatermarkThe Best Way to Make a Watermark for Videos
You can go straight to some editing programs to make a watermark to your video. You don't need to create a watermark logo on other programs, which will save you a lot of time for you. You can use AnyRec Video Converter. This powerful video editing software can add a watermark to your videos. Also, you can create a new watermark logo every time you edit a new video, making your watermarks diverse. This program also contains other powerful features like filters, split screen videos, watermark removal, and more.
Allow you to create text or picture watermark logos.
Modify the font, color, and size of the watermark easily.
Set the duration of your watermark logo full-time.
Export the video with your watermark in high quality.
Secure Download
Secure Download
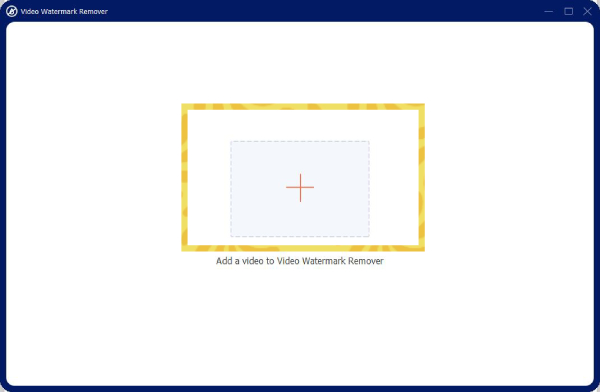
Step 1.Free download AnyRec Video Converter and launch it. Click the "Add" button to choose your video and import it to the software.
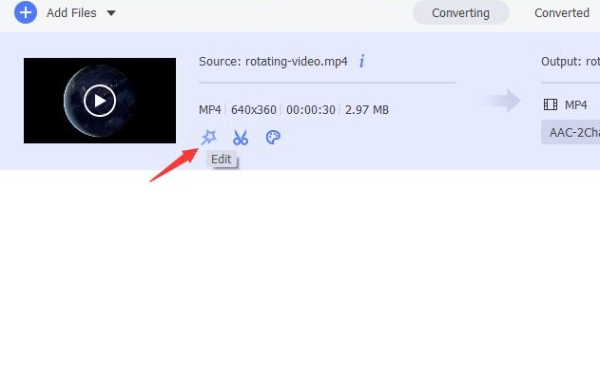
Step 2.Left click on the "Edit" button next to your video.
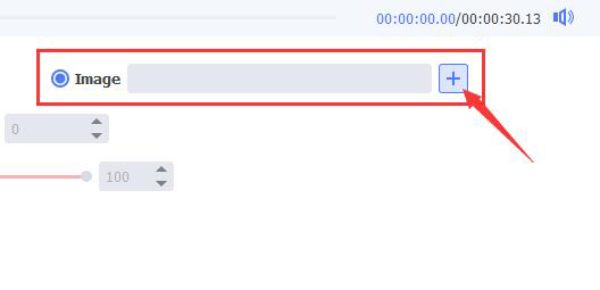
Step 3.On this new interface, click the "Watermark" menu at the top side. You can choose a text watermark and input what you want, and then you can see the watermark come up on your video. You can also set the font, size, color, and opacity of it.
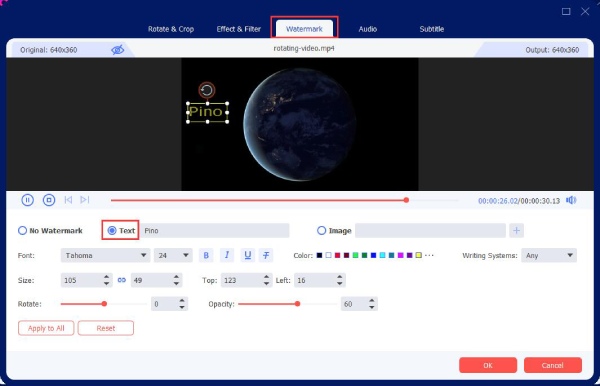
Step 4.You can also choose a photo watermark. Click the "Add Picture" button to select your picture as a watermark.
How to Make a Watermark with Word
You can also try a text editing software - Word. This program also has a powerful photo and text design function as long as you broaden your imagination. Also, you can use the watermark templates to make some simple watermarks.
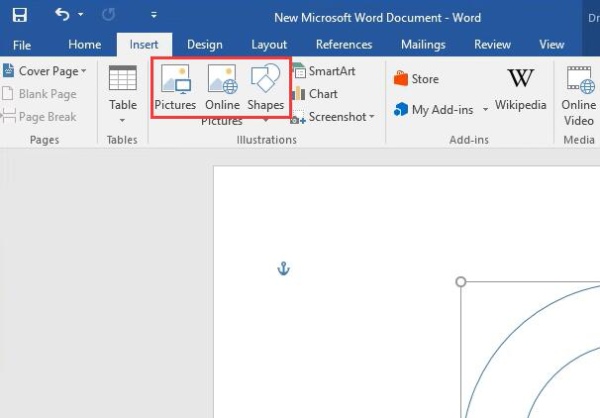
Step 1.Open Microsoft Word and create a blank document. Click the "Insert" button to add a picture or some shapes as the background of your watermark.
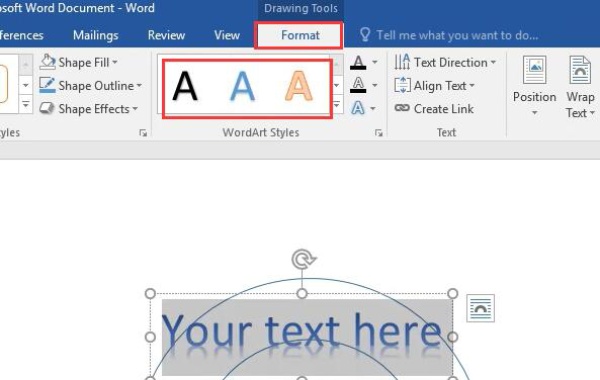
Step 2.You can click the "Format" button to add a WordArt Style to your text. Your text is the main part of your watermark logo, so you should deliberate to decide what to input.
Step 3.You can also add more shapes, modify their sizes, and combine them together to change the background of your photo and create a beautiful layout and texture.
Step 4.The next 2 steps are the last and most important part. You should hold on to the "Control" button on your keyboard and left-click all elements on your page. And then, right-click the watermark logo and choose the "Group" feature.
Step 5.Now, you can see that your elements are joined together as a single unit. Right-click on the watermark logo and click the "Save as Picture" option to export your watermark logo.
Creating a watermark with Word is really refreshing. This program does not require experienced editing skills and can bring your watermark ideas into reality once you are willing to spend time on it. If you want to make a watermark more professionally, you can try some more complex programs.
How to Make a Watermark with Photoshop
Photoshop is a powerful professional editing program that can make your photos HD or polish the texture of pictures. It requires experienced skills and basic knowledge. It offers the most operations and features that are essential and fundamental so that its users can associate those features together to create gorgeous works. You can also try this program to create your own watermark logo.
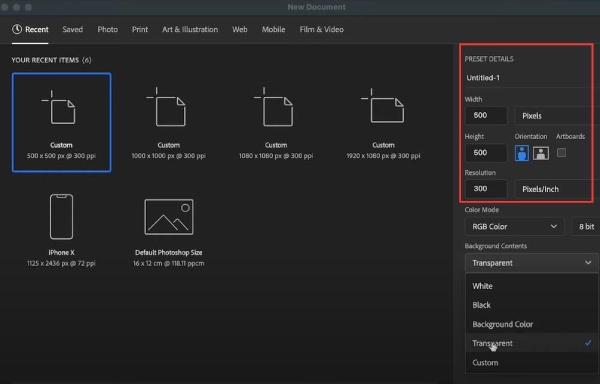
Step 1.Launch Photoshop and create a new document. You can choose the size of your document to help you operate easily.
Step 2.You can click the "Text" button to add a text first. On the top side of the window, you can modify the font, color, and size of your text. Your text is the main part of your watermark, so please think it over before inputting.

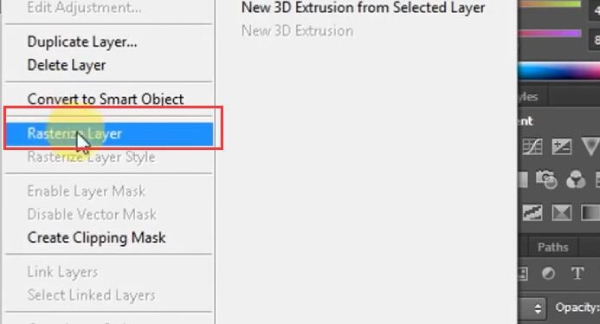
Step 3.Right-click your text in the "Layer" window on the bottom right corner. Then choose the "Rasterize Type" to make your text a picture so that you can control it more easily.
Step 4.You can right-click the "Shape" button to choose a type of shape for your watermark.

Step 5.The following two steps are the most important part. After you have added all your elements, you can click the "Transparency" button to make the background layer disappear.
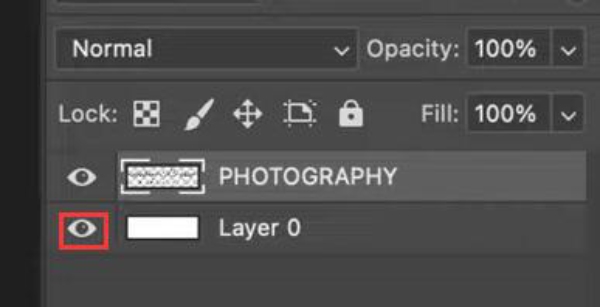
Step 6.Finally, you can export your watermark. Remember to save your watermark in PNG format and tick the "Transparency" checkbox.
FAQs about How to Make a Watermark
-
How can I remove a watermark logo from a picture?
There are many other photo editing programs that can make a watermark or remove it. You can download some editing programs or use an online watermark remover tool like AnyRec Free Watermark Remover Online. You only need to unload your photo and start removing the watermark with simple clicks.
-
What if my watermark logos are removed?
You can protect your rights with laws. Removing watermarks is illegal in some countries or regions. If your watermarks are removed, and your works are reprinted or re-posted for business purposes, you are infringed on your rights. However, due to high time and energy costs, it may be challenging to protect your rights.
-
Can I insert watermarks directly on Word?
Yes. You can use the "Design" and "Watermark" features on Word to quickly make a watermark. However, this method can only add watermarks on a fixed position as a background. Therefore, you can use Word to edit to create your own special watermark.
-
How can I remove the watermark of a video?
You can use Anyrec Video Converter. In the "Toolbox" function on this program, you can find the "Video Watermark Remover" feature. You can use it to remove a watermark easily.
-
Can I sell my watermark ideas to others?
Yes. As long as you have diverse ideas and experienced watermark-creating skills, you can easily sell your watermark ideas to others.
Conclusion
You have learned how to bring your watermark ideas to reality. Now, you can add your watermark to your works to announce your ownership and save them as your private collection. We hope you can use this skill to make your creating career thrive or enjoy your creating hobby to entertain yourself daily!
Secure Download
Secure Download
Related Articles
About Our Author


