
How to Change Photo Resolution on iPhone? (via Default Settings)
When you take photos by iPhone with low quality, the best way is to change the photo resolution on iPhone through settings and take a new one. However, fixing low-resolution of old photos on iPhone is crucial, especially if you still have an older iOS version. No matter you want to change the resolution of iPhone photos from the original settings, or want to increase the quality of taken photos, you can find 3 efficient ways with detailed steps.
Guide List
How to Change Photo Resolution on iPhone through Settings The Ultimate Way to Increase Photo Resolution for iPhone How to Change Photo Resolution on iPhone to Smaller One How to Change Photo Resolution on iPhone with A App FAQs about Changing Photo Resolution on iPhoneHow to Change Photo Resolution on iPhone through Settings
To capture the iPhone photo in the desired resolution with high-quality, you can easily change the original settings for all photos. Follow the steps below and take high-resolution photos on iPhone 17 now.
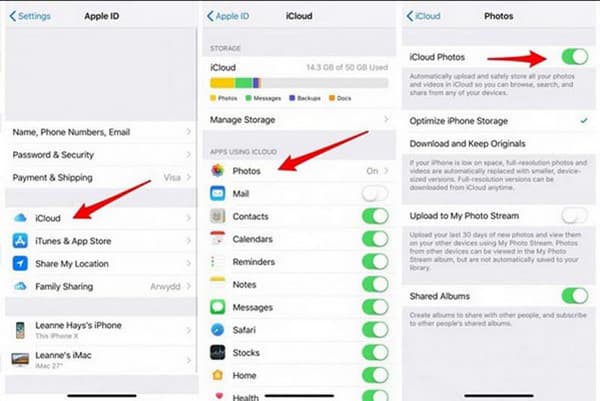
Step 1.On your iPhone, go to the "Settings" menu and locate the iCloud settings. For iPhone 10.2 and so, tap your name at the top of the settings, then tap "iCloud".
Step 2.Tap "Photos", then turn on "iCloud Photos". Doing this will evade the loss of image files while fixing photo resolution on the iPhone.
Step 3.Go back to the "Settings" menu, tap "Camera". After that, tap "Formats" to change the output image format. Tap "High Efficiency" to change and enhance photo resolution on iPhone.
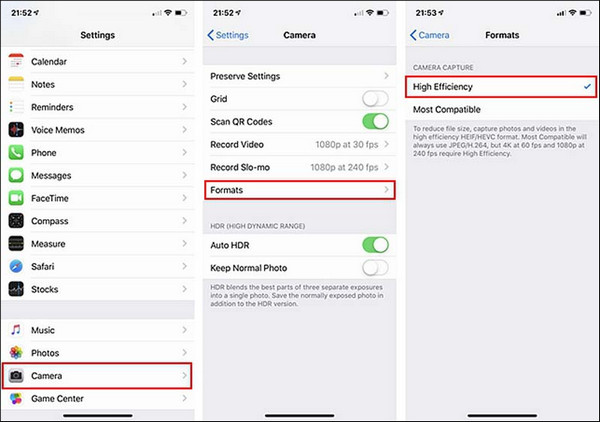
Although High-Efficiency increases video resolution up to 4K, you may find the photos are saved in HEIC format, which is not compatible to other devices and many platforms.
The Ultimate Way to Increase Photo Resolution for iPhone
Fixing low-resolution photos on iPhone may not make too many changes for high-quality images. But using AnyRec AI Image Upscaler can make high-quality photos without any trouble. Just with its simplified interface, this online tool will work its professional way to change photo resolution on your iPhone. It will not ask you for any subscription or register, just upload the photo, and you are good to go!
◆ Change photo resolution for iPhone easily without damaging the pixels.
◆ Increase iPhone images quality with the Magnification function up to 800%.
◆ Automatically detect and fix blurred parts, image noise, and retouch face.
◆ Provide a side-by-side preview to compare the original image to the upscaled one.
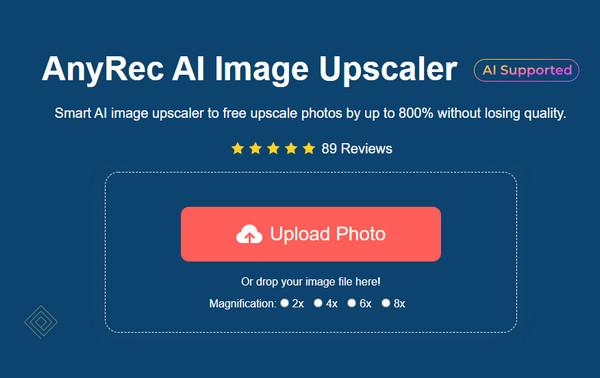
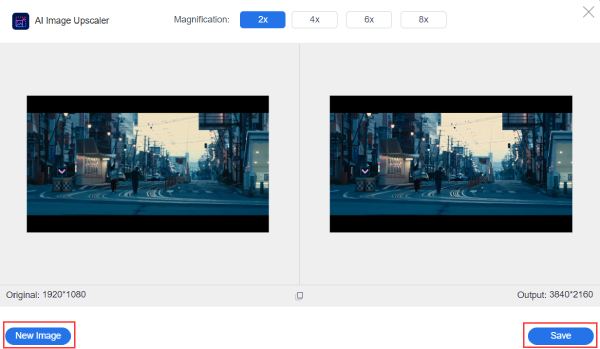
Step 1.Go to your browser and search AnyRec AI Image Upscaler. On the main screen, click the "Upload Photo" button or drag and drop the photos you want to fix low resolution from iPhone.
Step 2.After successfully uploading the image, choose the upscale percentage you want to apply to the photo from the "Magnification" button bar. Move your cursor around the picture to see the differences between the original to the edited one.
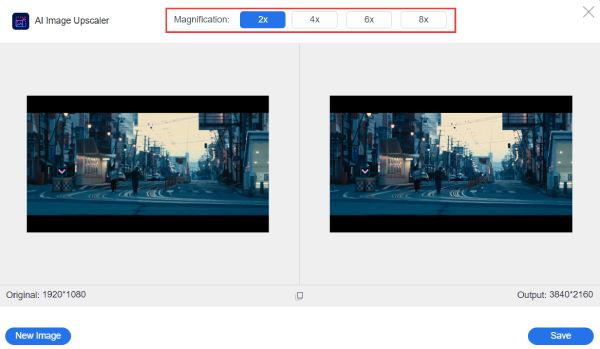
Step 3.Once you are good with everything, click the "Save" button at the bottom of the window. The online tool will automatically download the enlarged photo to your local folder.
How to Change Photo Resolution on iPhone to Smaller One
Is it possible to change the photo resolution from the Photos app? Definitely, yes! There are various ways to use the Photos app to optimize and resize your favorite images, and you can learn the detailed steps to crop photos on iPhone in the following:
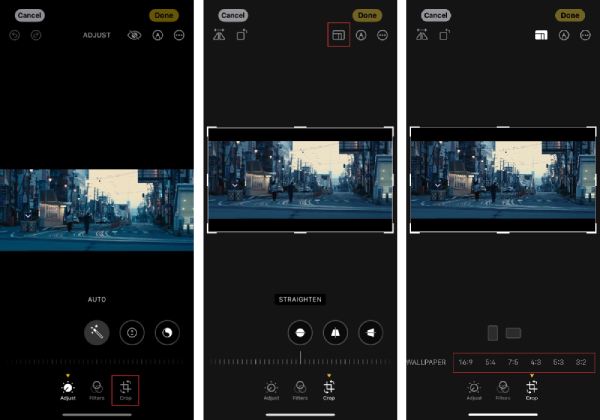
Step 1.Launch the "Photos" app on your device. Choose the desired picture you want to edit. Tap "Edit" on the top right part of your screen to begin changing the photo resolution on your iPhone.
Step 2.Tap on "Crop" with two right angles intersecting icon once a new menu appears. Then tap on the "Dimension Editing" button. Choose the desired dimension, or you can also change the length and height ratios from the preset option.
Step 3.After editing, tap "Done" at the bottom-left part of the screen to save all the changes. This way, you have a cropped image without losing the photo quality.
How to Change Photo Resolution on iPhone with A App
Image Size is a popular app that allows you to quickly and easily change the photo resolution you like. You can also resize images by adjusting millimeters, centimeters, and inches. Moreover, this application also provides the function options of saving, sending via email, printing, or sharing the final image. The following is how to use it to increase the image resolution.
Step 1.Open Image Size app on your iPhone and tap the "Gallery" button to add the photo you want to change the resolution. Note that you need to grant the app access to your photos by tapping the "Allow Access to All Photos" button.
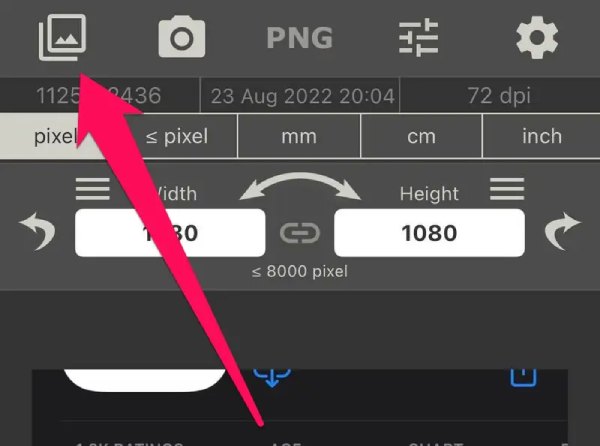
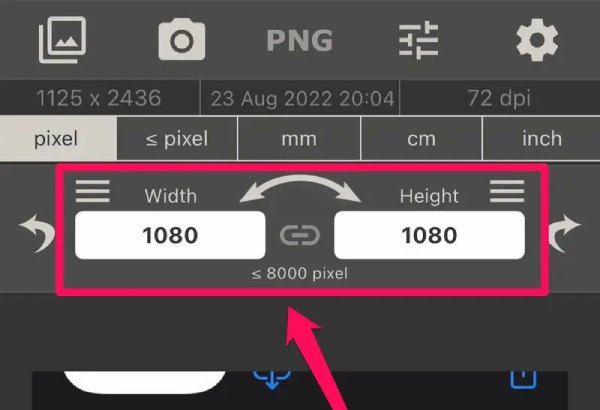
Step 2.Tap the "Choose" button in the bottom right corner. Then you should tap the "Pixel" button and enter the resolution of the image you want in the "Width" and "Height" text boxes.
Note: You shhould know that the maximum width and height it supports is about 8000.
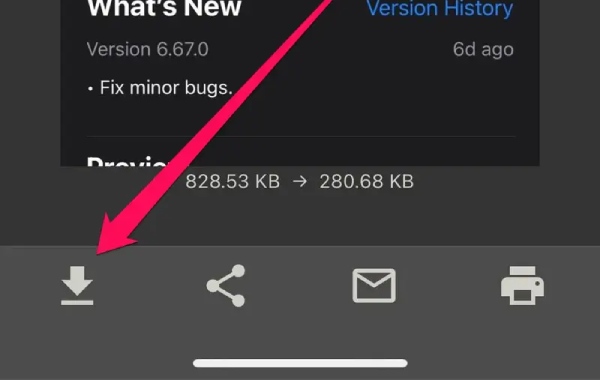
Step 3.After adjusting the resolution, save your picture by tapping the "Download" button. You can also tap the "Share" button to send the photo to your friends directly.
FAQs about Changing Photo Resolution on iPhone
-
How to change video resolution on iPhone when recording?
To change the video resolution on iPhone, go to the "Settings" app and tap "Camera". Then tap "Record Video Settings", and a list of resolution options will appear. The three options have good video quality, but you can choose the 1080p HD at 60 fps option for the best video quality. You also need to remember that the higher the quality, the higher the storage space a video will take.
-
What is the highest resolution I can change to on iPhone?
Since the iPhone versions are all different in many aspects, their offer high resolution may differ too much. Take it from the iPhone X; it offers the highest resolution of 2436 × 1125p at 458ppi. While iPhone 13 has a resolution of approximately 1170 × 2532 at 460ppi.
-
Why does my photo reduce quality when I post it on social media?
One of the many reasons to lower image quality when posted on social media is the compression algorithm of a social network. They intentionally decrease the data from the photos to the size they need in their data centers. However, you can resize videos or photos for Instagram in advance to avoid the compression.
Conclusion
There is no better feeling than taking pictures with high image quality. Now that you have learned how to fix photos with low resolution on iPhone, you will not worry about image quality while taking many pictures. However, if your iPhone is a late version, you should use AnyRec AI Image Upscaler to change the photo’s resolution on iPhone. The online tool guarantees to upscale all your pictures without paying a subscription. Try it now!
Related Articles
About Our Author


