[Solved] How to Screen Record on the iPhone 12/12 Pro with Editing Features
To introduce a useful function or explain some settings of iPhone 12 to your friends who are new to iOS devices, recording the screen on iPhone 12/12 Pro is the easiest way. Luckily, screen recording on iPhone 12 is now very easy after the release of iOS 13. That's because you can add a built-in screen recorder on the iPhone with iOS 13 or later and use it to capture your screen easily. Moreover, you can learn an easier method to record the screen on iPhone 12 and edit the recordings at the same time.
Guide List
How to Add Screen Recorder and Capture the Screen on iPhone 12 How to Edit, Clip, and Crop the Recordings Captured by iPhone 12 The Best Way to Screen Record iPhone 12 with a Customized Region FAQs of Screen Recording on iPhone 12/12 ProHow to Add Screen Recorder and Capture the Screen on iPhone 12
With the iOS 14 and later version, you can easily screen record your iPhone 12 through the built-in recorder. You should add this function to the control panel to use it quickly at any time. Then follow the next steps to learn how to use it:
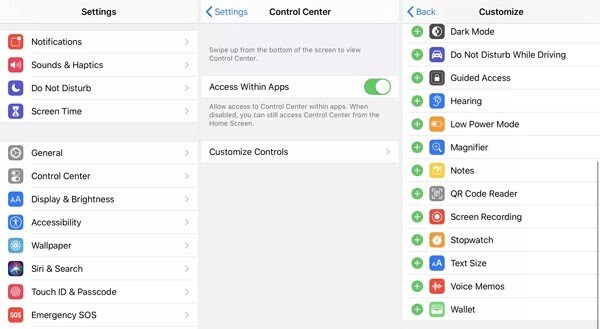
Step 1.At first, you should check whether you have turned on the default screen recorder on your iPhone 12 or not. Tap "Settings" on your iPhone and scroll down to find the "Control Center" below the general button. Then tap "Customize Controls", and you can see all the apps that are added on or not. Find the Screen Recording app and tap "Plus" to add screen record on iPhone 12.
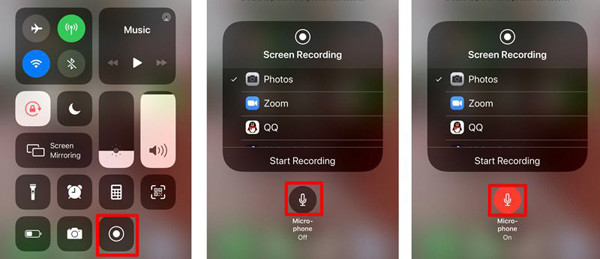
Step 2.Now you can swipe down from the top right corner of the screen and find the screen recorder on the Control Panel. If you want to change the recording settings before start recording on iPhone 12, you should tap "Screen Recorder" for a few seconds. Then, you can choose the app to record, and you can also tap "Microphone" to screen record on iPhone 12 with audio.
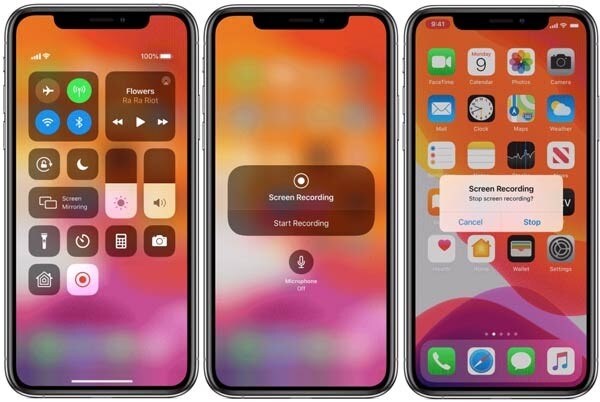
Step 3.Then you can tap "Screen Recorder" once to start capturing the whole screen, including some popping-up notifications. To stop the recording, you just need to tap the icon again. And the recordings will be automatically saved on the Photos app.
How to Edit, Clip, and Crop the Recordings Captured by iPhone 12
Since the built-in screen recorder can only capture the whole screen without any additional editing features when you screen record on iPhone 12, you need to edit, rotate and crop the recordings through other apps if you need.
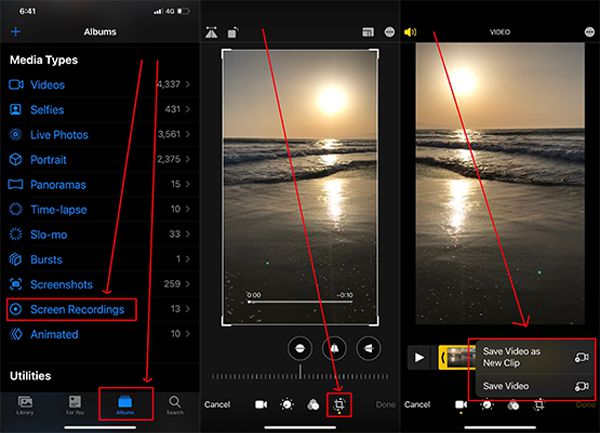
Step 1.Go to the Photos app on your iPhone 12 and find the Screen Recordings option on the Albums menu. Then open the desired recording and tap "Edit" at the top-right corner.
Step 2.After that, you can tap the tools at the bottom to trim, add filters, and crop the recording. You can also change the aspect ratio to crop the recordings to the desired size. Then tap "Done" and save the recording on the photos.
This process will be relatively complex and will occupy more storage space. In this case, you can also learn how to screen record on iPhone 12 with additional editing functions in the following.
How to Screen Record iPhone 12 with a Customized Region
To screen record your iPhone 12/12 Pro with a customized area and additional features, AnyRec Screen Recorder will be your best choice. Although you can only use this software on Windows/Mac, you can also screen record on iPhone 12 through the mirrored screen with a USB cable.

Screen record your iPhone 12/12 Pro with a mirrored screen.
Customized region to screen record the desired parts without any bothering notifications.
Provide additional editing features to add annotation and clip the recordings.
Able to adjust the format, quality, and frame rate of the exporting recordings.
Secure Download
Secure Download
Step 1.Free download and launch AnyRec Screen Recorder on your computer. Click the "Phone" button on the main interface and connect your iPhone to the computer via a USB cable. And your iPhone screen will be shown on the computer. Since this useful and convenient function is coming soon, you can learn how to capture the screen on the computer at first, which is the same as screen recording on iPhone 12.
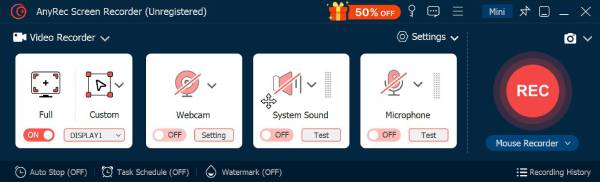
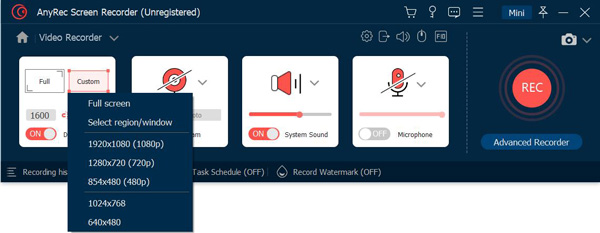
Step 2.Click the "Video Recorder" button to start this powerful recorder. Then click the "Custom" button to select the desired region to capture. And you can click the "System Sound" and "Microphone" buttons to screen record iPhone 12 with audio according to your need.
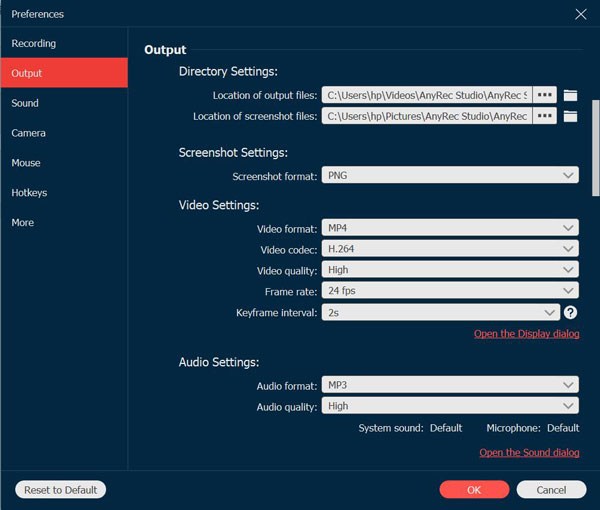
Step 3.To adjust the export settings, you can click the "Record Settings" button and click the "Output" button in the left pane. Then you can change the recording format, quality, and frame rate. After that, click the "OK" button and go back to click the "REC" button to start recording.
Step 4.In the popping-up toolbox, you can use the editing tools to add notes on the recordings in real time. Then click the "Stop" button to finish the recording and clip it as you like. At last, click the "Save" button to choose the storage path.

FAQs of Screen Recording on iPhone 12/12 Pro
-
1. Why can't I screen record my iPhone 12 with sound?
You should press and hold the screen recorder icon to open the settings and turn on the microphone to record your voice.
-
2. Are there any screen recorder apps for iPhone 12?
Yes, there are many useful apps for screen recording on iPhone 12, including AZ Screen Recorder, DU Recorder, TechSmith Capture, etc.
-
3. Where to find the recordings on iPhone 12?
The recordings taken by the default screen recorder will be saved on the Photos app. If you use third-party apps to screen record on iPhone 12, you can go to the settings to see the storage path.
Conclusion
You have learned how to screen record on iPhone 12 through the default recorder. But it can only capture the entire screen, and you need to rely on other apps to edit the recordings. Thus, you can also download AnyRec Screen Recorder to record the screen on iPhone 12 with editing functions.


