How to Burn a PowerPoint Slideshow to DVD [Ultimate Guide]
When you present PowerPoint, sometimes you cannot avoid encountering some technical problems, such as computer failure, that cannot be used to present PowerPoint. So you'd better back it up. Burning PowerPoint presentations to DVD is a good way to back up PowerPoint files. Because standard DVDs can store up to 4.7GB of data, there is no need to worry about insufficient storage space. This article will provide detailed instructions on how to burn PowerPoint to DVD in 2 ways!
Guide List
Part 1: How to Burn a PowerPoint to DVD Disc for Backup Part 2: How to Burn PowerPoint to DVD for Playing on DVD Player Part 3: FAQs about PowerPoint Burn to DVDPart 1: How to Burn a PowerPoint File to DVD Disc for Backup
You can try this solution if you want to burn PowerPoint to DVD without any software. But the drawback is you can’t use a DVD player to play the PowerPoint file after burning. The following are the specific operation steps to put PowerPoint into a DVD.
Step 1.Ensure your device has a disc drive before burning. Then insert your blank DVD disc into the computer’s internal or external DVD drive.

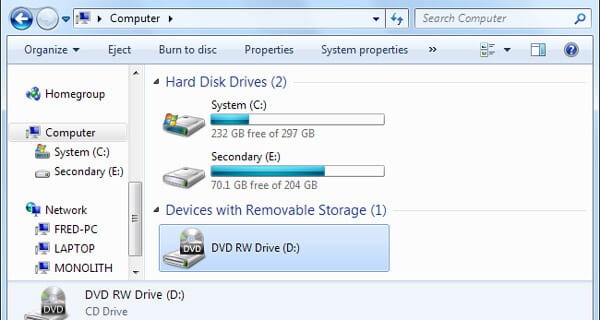
Step 2.Go to "My Computer" to find your DVD drive. Then you need to choose your PowerPoint slideshow and drag it directly to the DVD drive. You can also copy and paste it onto the drive.
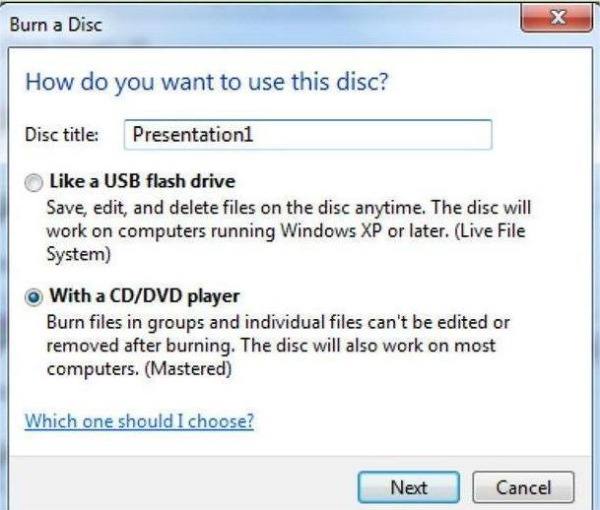
Step 3.After that, it will pop up a window. You need to type in the name of the Disc title and choose the "With a CD/DVD player" option. Then click the "Next" button.
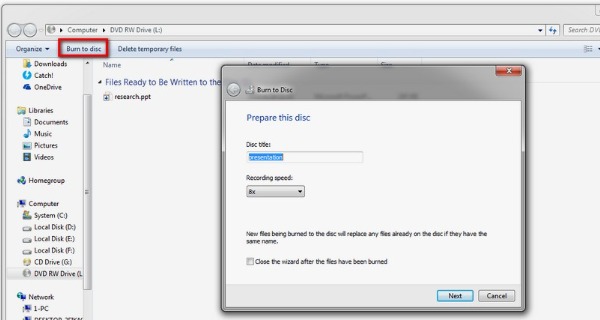
Step 4.Choose the copied presentation file after completing the previous step and click the "Burn to disc" button at the top. Then it will pop up a new window, and you should click the "Next" button to turn PowerPoint to DVD in a few minutes.
Part 2: How to Burn PowerPoint to DVD for Playing on DVD Player
Here is another way to try. You can play PowerPoint directly using the DVD player. But you need a DVD Creator for this method. Don't worry! This article recommends an excellent tool for you. Read on to learn the second method and obtain the best PPT to DVD converter tool.
Save Your PowerPoint into Video
Before PowerPoint burns to DVD, you need to save PowerPoint to WMV and other popular video formats. This step is directly completed in PowerPoint software without using additional tools. By the way, you can record a PowerPoint presentation video to an MP4 video as well.
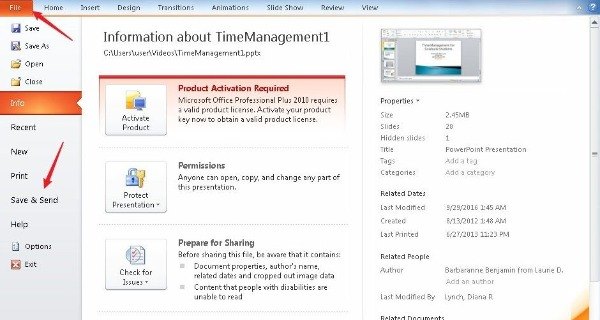
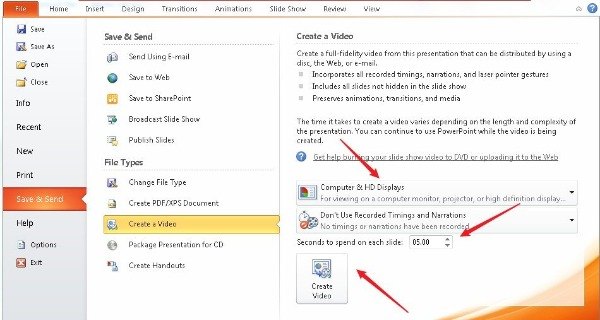
Step 1.Launch the PowerPoint on your device and open the file you want to burn. Then click the "File" button and select the "Save & Send" option from the menu.
Step 2.Choose the "Create a Video" option from the right window. You can adjust the quality of the video and set the seconds to spend on each slide. For better video quality, select the "Computer & HD Displays" option. Then click the "Create Video" button at the bottom.
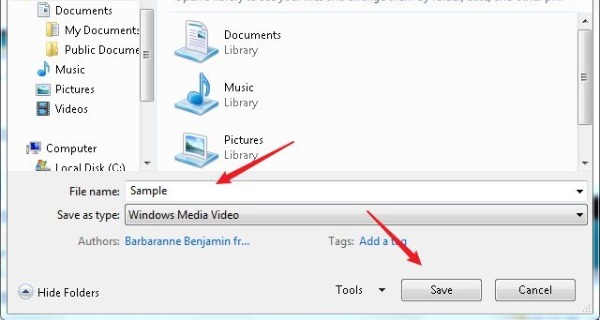
Step 3.After that, a new window will pop up. You can set the file name, and the default saved video format is WMV. You can set the file name, and the default saved video format is WMV. The last step is to click the "Save" button.
Burn PowerPoint PPT to DVD with the Best DVD Creator
After saving PowerPoint as a video, you need a tool to rip PowerPoint to DVD. AnyRec DVD Creator must be the initial choice you can’t miss. This excellent tool supports burning any video to DVD, such as MP4, FLV, AVI, VOB, MOD, AVCHD, SWF, WMV, etc. Moreover, it provides a built-in editor to adjust DVD videos, including adding background music, trimming, cropping, and adding the watermark.

Burn PowerPoint in video format to DVD with original quality.
Offer free DVD menu templates to create a unique DVD menu and subtitles.
Burn a video to a DVD fast by GPU acceleration.
Support editing videos with a powerful editor and taking snapshots.
Secure Download
Secure Download
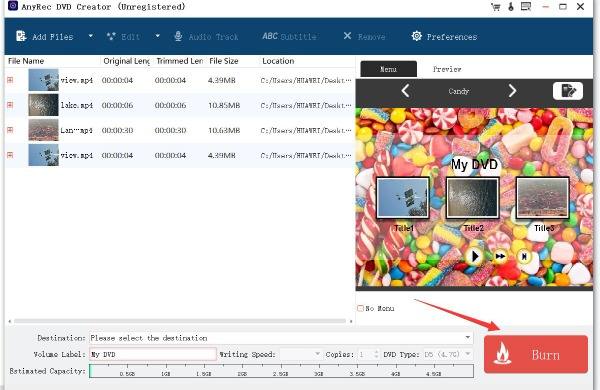
Step 1.After downloading the AnyRec DVD Creator from the official website, launch it directly. Click the "Add Files" button to upload your file into the software. You can upload multiple videos to burn at will.
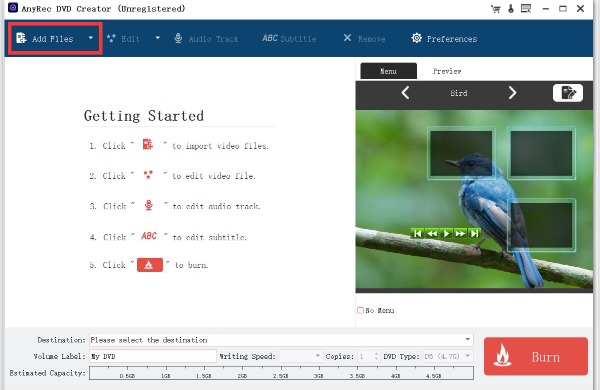
Step 2.This tool provides many free templates that you can pick according to your preferences. You should click the "Edit menu" button at the right. It will pop up a window, and you can choose the DVD menu template.

Step 3.If you want to edit the video, you can click the Edit button at the top. It will pop up an "Edit" window, and you can adjust the effects, such as brightness, saturation, contrast, hue, and volume. Click the "Watermark" button to add the text or picture watermark. You can burn PowerPoint to DVD with sound by adding background music.
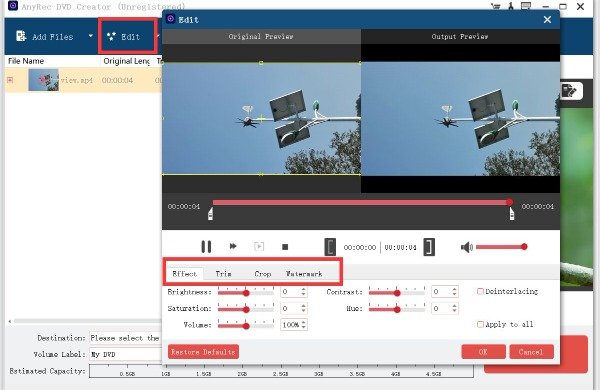
Step 4.After all settings are completed, you can click the "Burn" button to convert PowerPoint to DVD within a few minutes.
Part 3: FAQs about PowerPoint Burn to DVD
-
Can you play PowerPoint on a DVD player?
Yes. However, you must save the PowerPoint as a video and burn it to DVD before playing it in the DVD player.
-
Can I copy the PowerPoint presentation to a +R DVD, not just -R?
No, you can’t. The two formats are incompatible. If the recordable drive accepts DVD-R, it will not support DVD+R. However, the quality of DVD+R is slightly better, which is the first choice for burning PowerPoint to DVD+R.
-
How do I convert PowerPoint to video?
You can use PowerPoint to save it directly as a WMV format video. Moreover, you can also use the recording tool to record PowerPoint as a video in any format.
Conclusion
This tutorial describes two ways to burn PowerPoint to DVD. If you want to burn PowerPoint files quickly, choose the first method. But if you want to convert PowerPoint to video and burn it to DVD, AnyRec DVD Creator is an indispensable tool. It allows you to easily burn any video to DVD and enjoy the video editor.
Secure Download
Secure Download


