Hot
AnyRec Screen Recorder
Capture every moment. Record like a pro.
Secure Download
VLC Screen Recording Not Working – 7 Efficient Methods You Should Know
VLC Media Player is more than an open-source media player for Windows and Mac, it also enables you to record all on-screen activities. But what should you do when VLC not recording, or capturing the video only? There should be an error message related to the problem. Just learn more details about the 7 most efficient methods to fix VLC screen recording not working from the article.
Guide List
6 Methods to Fix VLC Screen Recorder Not Working Best Alternative When VLC Media Player Not Recording FAQs of VLC Screen Recording Not Working6 Methods to Fix VLC Screen Recorder Not Working
Case 1. VLC is Not Recording, the Exported Videos are Black
Because of some system bugs, VLC is not recording and the recorded videos are all black. Here are 2 methods to fix the related problems.
Method 1: Restart, Re-install or Upgrade VLC
The most primitive and time-saving method to fix the VLC screen recorder not working is restarting VLC and rebooting your computer. If the problem still exists, re-install the latest version of VLC.
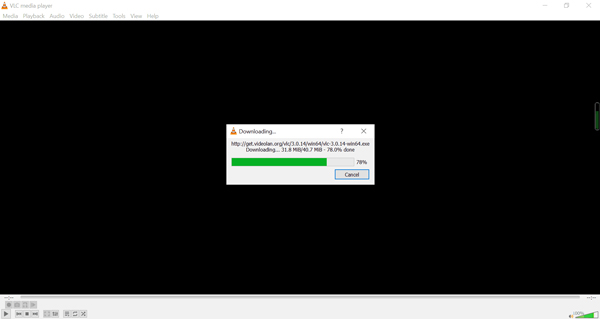
Open VLC Media Player and click the "Help" menu, then click the "Check for updates" item from the drop-down list. If any VLC updating version is available, click the "Yes" button to install it.
Method 2: Change the Video Output Format
If you get an error message that No Video Displayed in VLC Media Player, it should relate to the codec for the output format. Just learn more details about the method to fix VLC not recording video only audio as below.
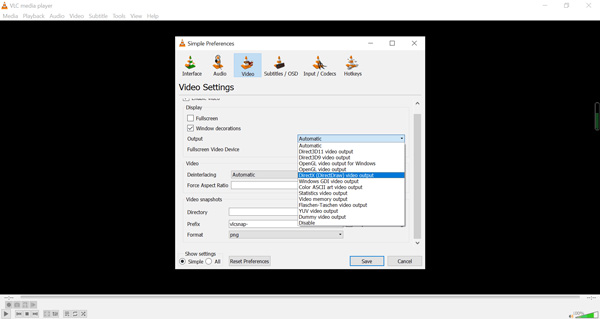
Click the "Preferences" button from the "Tools" menu. Click the "Video" button to open the "Video Settings" window. In the drop-down menu of the "Output", click the "Direct X" or "Windows GDI" item as video output.
Method 3: Disable Video Acceleration
The hardware acceleration is another reason that the VLC screen recorder not working. If another program is using hardware acceleration, there might be some conflicts that disable VLC screen recording.
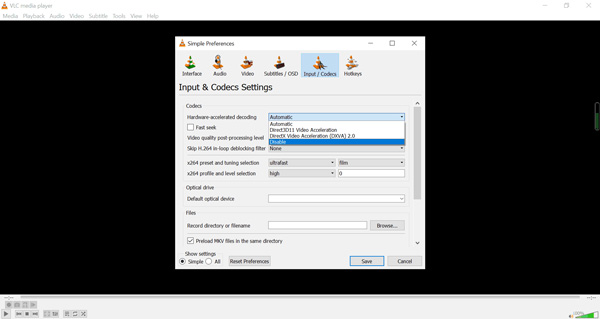
Open VLC and click the "Tools" button, then click the "Preferences" button in the list. Under the "Input/Codecs" part, click the toggle icon and then the "Disable" item in the Hardware-accelerated decoding part.
Case 2. Audio Files Problems of VLC Screen Recording
Method 1: Restart the Sound Card of the Computer
If the recording of VLC Media Player has no audio file, you need to check whether the sound card has become stuck, or another program is using it. Here is the way to fix VLC recording video only.
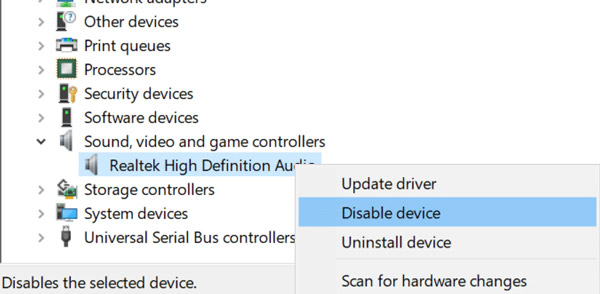
Click the "Start" button and click the "Device Manager" button, expand Sound, video, and game controllers to see your audio driver entry. Then right click your audio drive entry and click the "Disable device" button. After that, you can enable the device again for another recording.
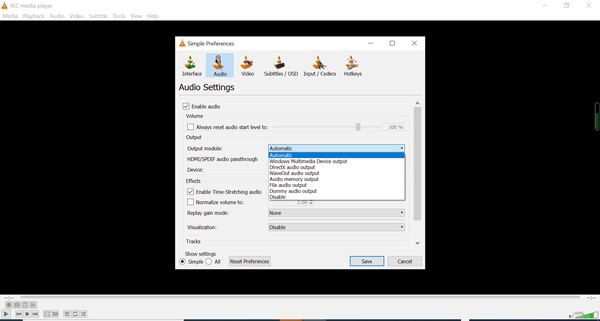
Method 2: Change the Audio Output Format
When VLC not recording video but only audio, you should find the VLC audio sound crackling when you play the recordings. Just change the audio output formats to solve the related problem.
Launch VLC Media Player and click the "Tools" button. Then you can click the "Preferences" button and the "Audio" tab. Check and click the "Enable audio" button. Click the "DirectX audio output" button in the Output module part to capture audio files.
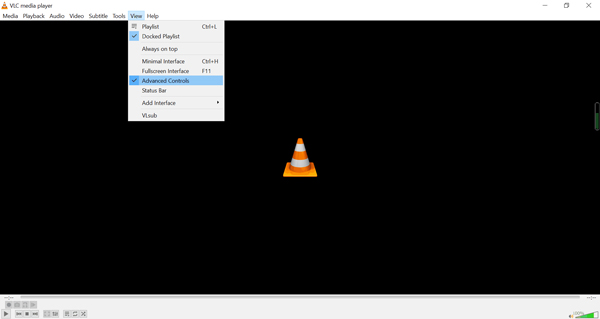
Case 3. VLC Record Button Not Working
What should you do if the VLC record button not working? It is because you have not clicked the "Advanced Controls" button. Once you have enabled the option, you can check whether screen recording works.
Open VLC Media Player and click the "View" drop-down list. Click the "Advanced Controls" item. After that, you can restart the program to find whether it works.
Further Reading
Best Alternative When VLC Media Player Not Recording
Besides the system bugs, there are more complicated reasons that VLC screen recording not working. AnyRec Screen Recorder is the best VLC alternative to capture onscreen activities, such as videos, audio files, webcam footage, and more others. It also provides advanced settings to tweak the video format, annotation, and editing.

Capture onscreen activities, including videos, audio, and webcam files.
Export the recording to the desired video codec, frame rate, quality, etc.
Add annotations, shapes, callouts, watermarks, and more other settings.
Preview the recordings and even edit the files within the media library.
Secure Download
Secure Download
Step 1.Once you have installed the screen recorder, you can launch the program on your computer and click the "Video Recorder" button to capture onscreen activities with audio files when the VLC screen recorder is not working on the computer.
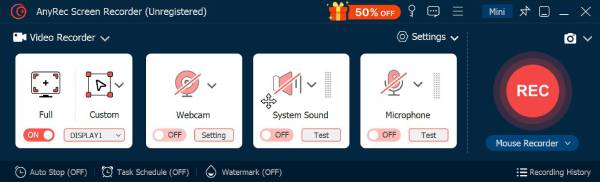
Step 2.Choose the full screen or customize the recording area. Toggle the "System Sound" button to capture the audio files from your computer and click the "Microphone" button to record your voice. Of course, you can also click the "Webcam" button to get the webcam footage.
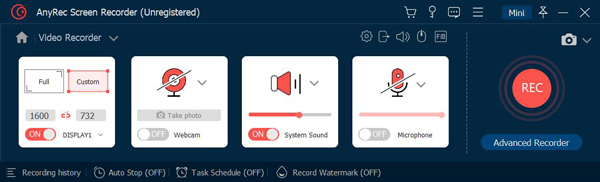
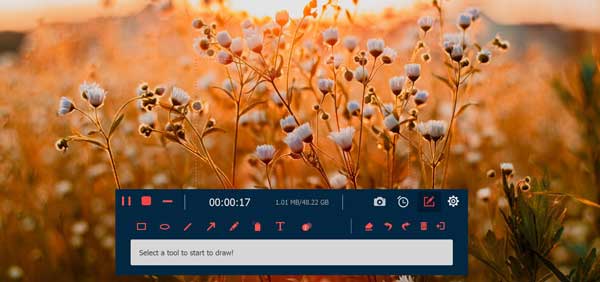
Step 3.Click the "REC" button to record the screen videos on your computer. It enables add annotations, watermarks, callouts, and more other elements into the program. Moreover, you can also take a snapshot of the recording with the Camera.
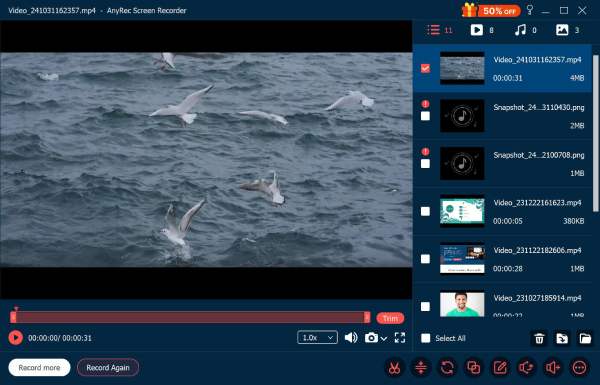
Step 4.Once you have captured the desired files, click the "Stop" button to save the recordings. Just preview the videos within the media player, trim the desired part, or adjust the audio volume. After that, you can click the "Save" button to save them to your computer.
FAQs of VLC Screen Recording Not Working
-
Is it possible to schedule a recording with VLC?
Yes. It is complicated to schedule a recording with VLC. You need to create two BAT files that contain the command line to start the player and record the files into a video. Of course, you can also choose the best alternative to record the videos automatically.
-
Where can I find the recorded video in VLC?
Go to the Videos folder of the Users folder to find the VLC recorded video. But if you cannot find recorded videos in this folder, check if the Controlled Folder Access feature of the Windows Defender is blocking you from opening any new file on your computer.
-
How do I know that VLC starts recording?
When you click the "Record" button, the record icon will change to another shape and a timer will appear to count your recording time. These two states indicate that VLC starts recording.
Conclusion
If you cannot record the videos with VLC Media Player, here are the 6 best ways you should know to fix the VLC record not working. Moreover, you can also choose AnyRec Screen Recorder as the best VLC alternative to capture video and audio files on your Windows and Mac.
Secure Download
Secure Download
Related Article
About Our Author