
Content
Instructions
AnyRec Video Enhancer is a great upscaler for your videos and improves your video quality in many aspects including resolution, brightness, contrast, picture, and sound quality. In addition, you may also enjoy some simple editing features in this enhancer and do things like quickly split or crop the video.
Install and Launch
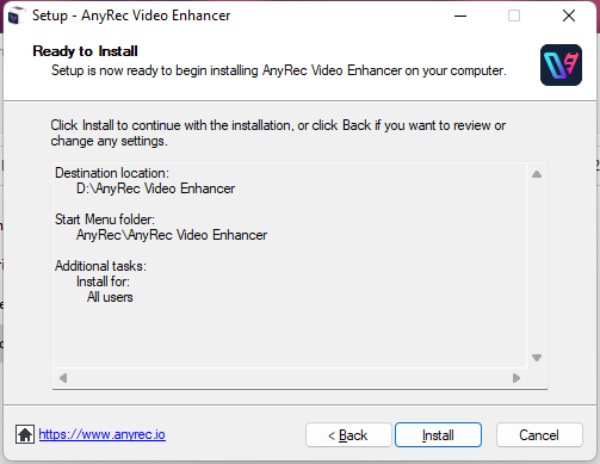
Get a free download of AnyRec Video Enhancer through the button at the top of this webpage. Then, after your browser finishes downloading, you can double-click that package to install. Choose your language and a destination folder to store files. Finally, click the Install button to finish the installation and launch the program.
Purchase
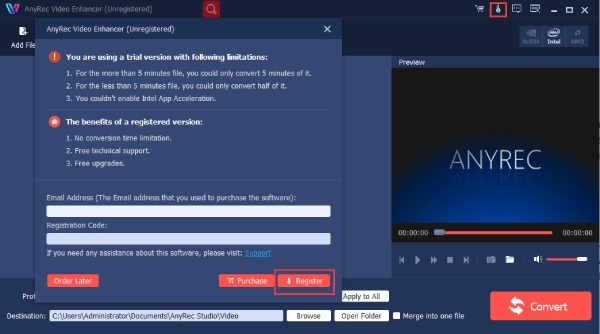
In order to access the full features of AnyRec Video Enhancer, you can purchase the product by clicking the Purchase button on the main interface after you launch the software, which will lead you to the ordering page. Then choose a preferred plan for yourself and remember the email address you used here for purchase. You will also receive an email with a registration code after that.
Register
After purchasing, you need to go back to the program and click the Register button with a key icon on the top of the main interface. Enter the email address you fill in when purchasing and paste the registration code you received in your email. Click the Register button below to finish registration.
Update
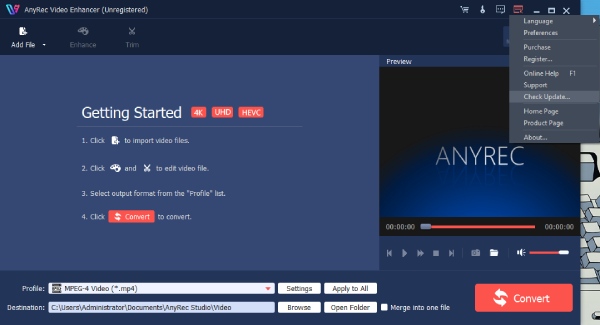
For manual updates, you may click the Menu button and click the Check Update button to see if there is a new version. Or you can turn on the auto-check for updates. Go to Preferences windows and enable the Check for Updates Automatically under the Update Settings.
Preferences
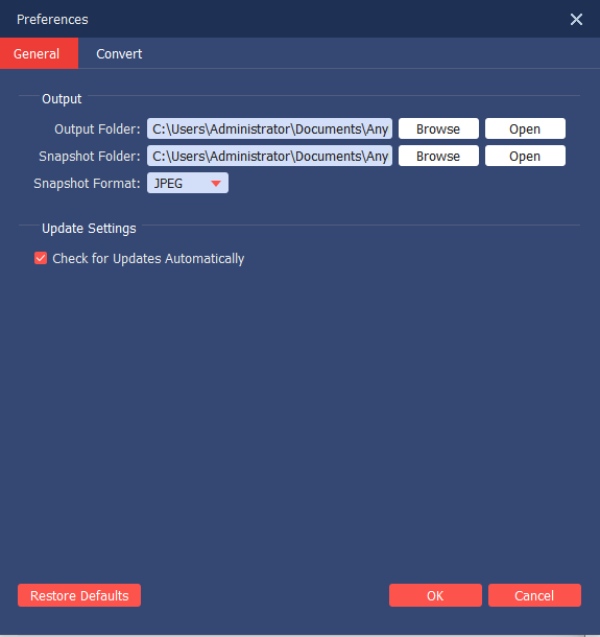
General
In the General tab from Preferences, you can tweak settings like where to store your enhanced videos, the file folder for your snapshots, and your snapshot format. You can click the Browse button to change a destination folder for your video or image files. Or click the Open button to see your files. The supported snapshot formats include JPEG, PNG, and BMP. Additionally, checking for updates automatically is also here.
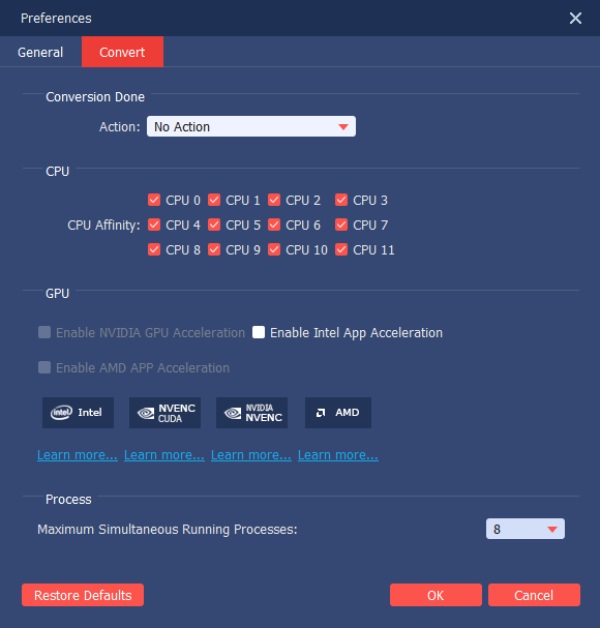
Convert
When you are in the Preferences window, click the Convert tab to set the action after conversion ends, or enable GPU acceleration or change the maximum number of files for enhancement. You can click the Restore Defaults button to go back to the original settings anytime you want and click the OK button to apply any changes.
Enhance Video
Here you will see the steps on how to enhance videos in AnyRec Video Enhancer. Then your video’s resolution, picture quality, visual effects, and other elements will be improved after enhancement.
How to Enhance Videos
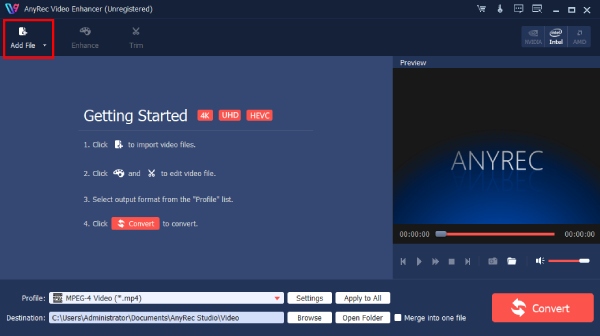
Step 1: Add Video Files
Free download, install, and launch AnyRec Video Enhancer. Click the Add File button on the main interface to import a video file or a folder. Choose one from your computer and click the Open button to confirm importing it.
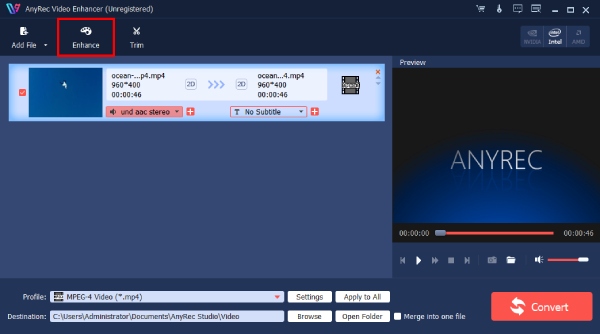
Step 2: Edit and Enhance Video
After loading your video, you can add extra audio or subtitles to the video before enhancing it. Just simply click the Add button with the Plus icon under your video name to do so. Then click the Enhance button above to continue.
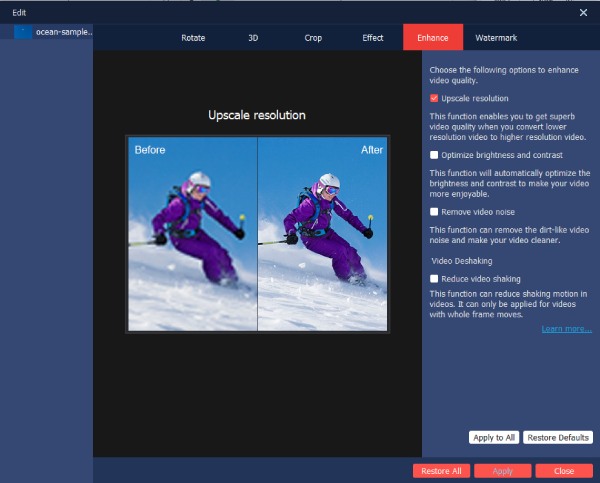
Step 3: Adjust Enhancement Settings
You will be directed to the Enhance window by default. Then, you will see many options for video enhancement: Upscale resolution, Optimize brightness and contrast, Remove video noise, and Reduce video shaking. Tick the checkbox before those options based on your need. The real-time Before and After preview window can show you all details.
Step 4: Change Output Settings
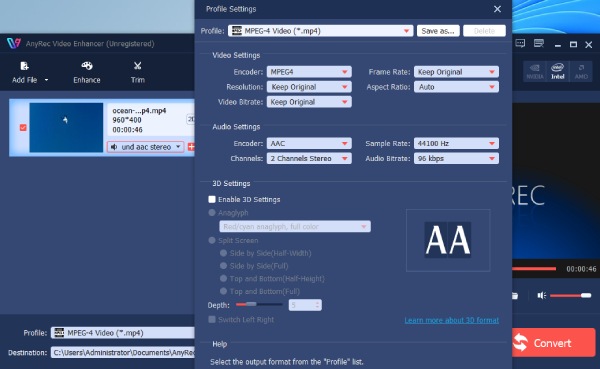
Click the Apply button to make use of the upscaling options you choose. If you have imported several videos, you can also click the Apply to All button to apply these changes to all the videos in the list. Click the Settings button to change the output video format, aspect ratio, and so on.
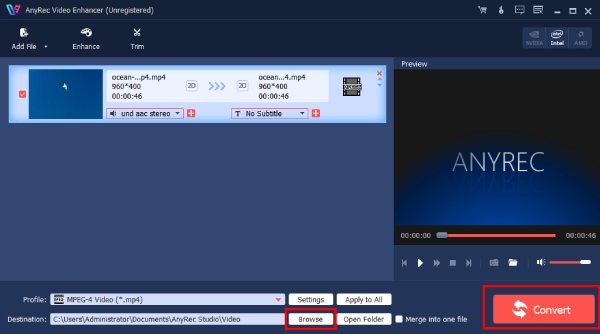
Step 5: Save Enhanced Videos
Click the Browse button to choose a folder to place your video. Afterward, click the Convert button on the lower right corner. You can improve video quality and convert to any popular format in one stop. The program will start processing your video immediately. Once it finishes, click the Complete button to end.
Enhancement Options
Upscale Resolution: Improve your video quality, especially for low-resolution videos. And you will have a higher resolution video.
Optimize Brightness and Contrast: Make your video brighter and the pictures will look more vivid. You will also get a clearer visual experience.
Remove Video Noise: The background noise in your video will be gone after applying this and sound quality will be better.
Reduce Video Shaking: This can reduce shaking movements in your video but can only be applied to videos with whole-frame moves.
Edit Video
Many simple editing features are also available in this program. Hence, before enhancing the video quality, you may also edit your video in advance for more desirable effects. Keep reading to see more editing functions.
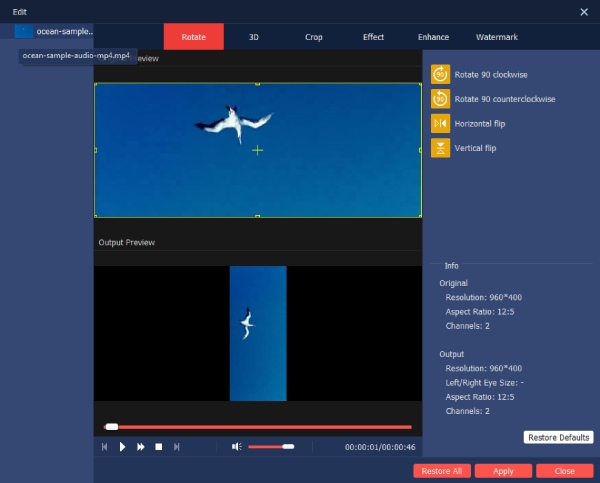
Rotate
The buttons on the right side enable you to rotate your video to different degrees. For example, you can flip your video and make it vertical or horizontal. Or rotate your video by 90 degrees counter- or clockwise. Just click Rotate 90 clockwise, Rotate 90 counterclockwise, Horizontal flip, and Vertical flip to change the direction of your video.
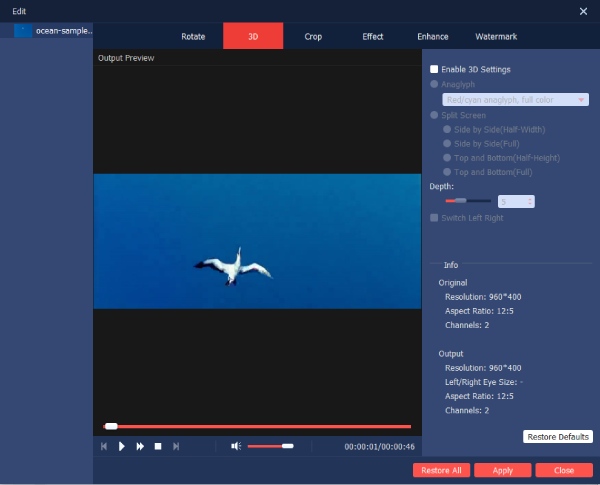
3D
To start with, tick the checkmark before Enable 3D Settings. Enable 3D effects for your video and tweak some relevant settings here. You can also split the screen into many modes. Meanwhile, you can adjust the depth for stronger 3D effects. The information of your video for both original and output is displayed at the very bottom of the window. You can click the Apply button to create a 3D effect.
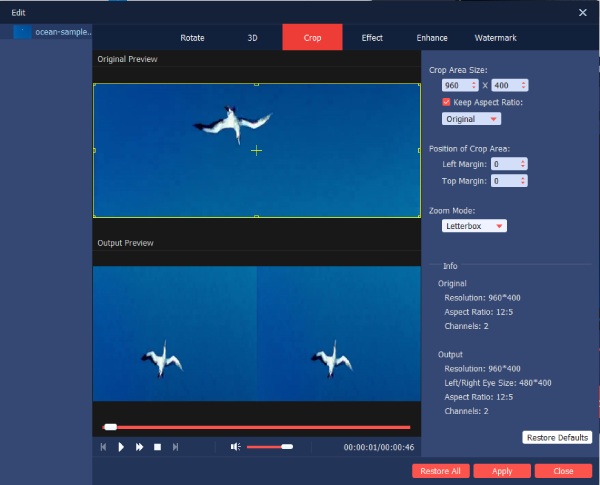
Crop
Crop your video size while keeping the aspect ratio the same as the original video. You can set custom Crop Area Size. Tick before Keep Aspect Ratio to preserve the original video aspect radio. Moreover, you can also adjust the position of your cropping area in the video. In the Position of Crop Area section, you can adjust the crop area with custom Left Margin and Top Margin. What’s more, there are four zoom modes for you: Letterbox, Medium, Pan & Scan, and Full.
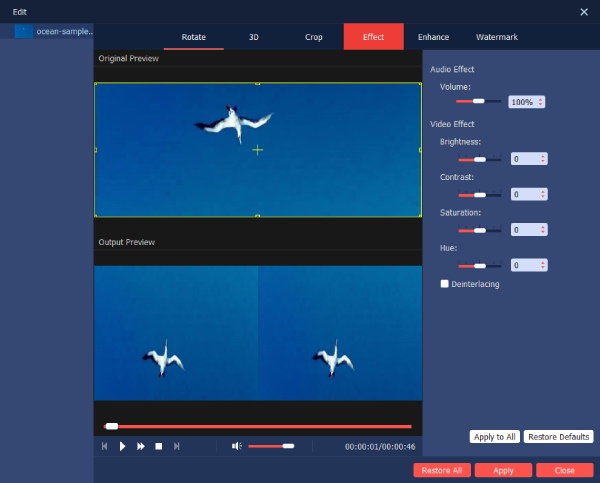
Effect
Tweak the video and audio settings through the Effect function. Adjustments of volume, brightness, contrast, saturation and hue are all accessible in this window. One more thing, you can tick the checkmark before Deinterlacing to make your video look better. Once you are done, click the Apply button to apply them all.
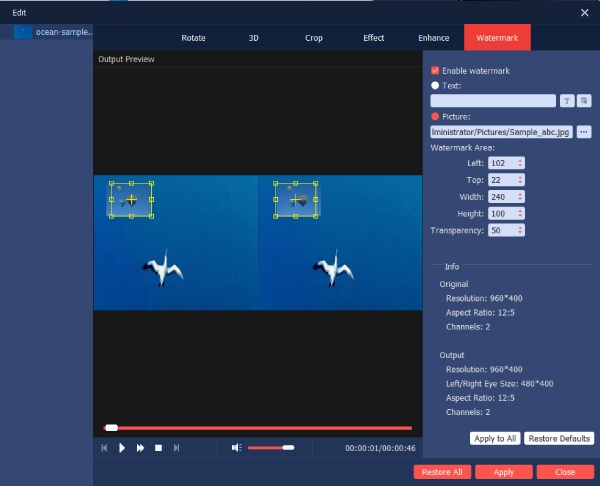
Watermark
Add a text watermark or image watermark for your final video so that other people will know this is your work. First of all, tick the checkmark before Enable watermark. Later, you can choose whether to use text or picture watermark. Type any text you want to add and then you can adjust its position, transparency, and size. For the image watermark, you can directly drag it in the preview window to change its position. Moreover, you can adjust with Watermark Area and Transparency options.
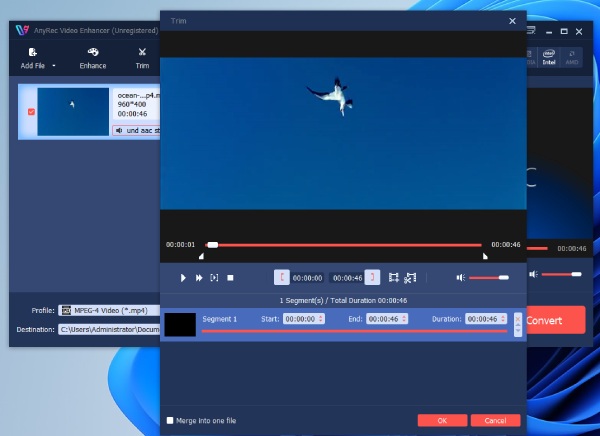
Trim
Back to the main interface, click the Trim button above. You will enter the Trim window. Here you can split the video into several segments. Just adjust the video length by moving the timeline bar. Or you can set the starting and ending points below. If you want to merge multiple video segments, you can tick the checkmark before Merge into one file on the lower left corner. At last, click OK to save all changes.
Need More Help?
Feel free to contact us if you have any questions about AnyRec Video Enhancer.
Contact Us

