Content
Instructions
AnyRec Blu-ray Creator, supporting multiple video formats, is a comprehensive Blu-ray burner and creator. The program provides exclusive features like video editing, menu templates, online template downloading, etc. The biggest highlight of AnyRec Blu-ray Creator is to create Blu-ray out of your videos or video folders seamlessly and quickly without any quality loss. Other customization options also allow you to enrich the content for your Blu-ray Disc. But not just Blu-ray, this burning software can also help you create ISO image files and Blu-ray folders.
Purchase and Register
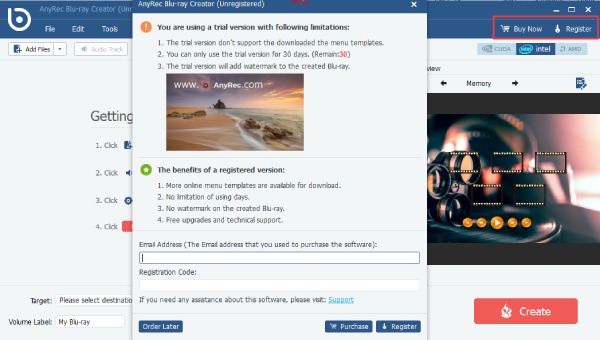
To enjoy AnyRec Blu-ray Creator’s features, you need to enter the activation code. By doing so, you can then wholly handle all functions, such as more online menu templates, no watermark for your Blu-ray, free technical support, etc. Launch the Creator after installation and click the Buy Now button to be on the ordering page. Then, fill in your email address and complete the payment. Later, you will receive a code in your email. Next, click the Register button on AnyRec Blu-ray Creator. Type your email address and the code you received. Click the Register button below to finalize.
Update
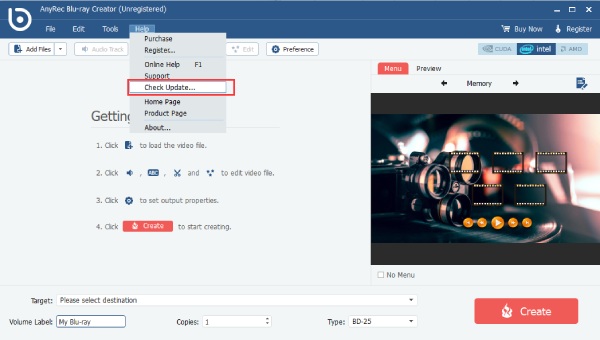
To obtain the latest version of AnyRec Blu-ray Creator, there are 2 methods to see. One is to click the Tools button on the main interface and then click the Preferences button consecutively. After that, you will see the Check for Updates Automatically option at the bottom of the Preferences window. Make sure to tick the box before it. So the Blu-ray creating software will always automatically check updates for you. The other method is to manually check by clicking the Check Update button from Help.
Preferences
The Preferences option is where you can change the storage place for snapshots or their formats, and other advanced settings like CPU, GPU, etc. The video and audio settings for creating Blu-ray are also here. To enter the Preferences windows, you can either click the Preferences button from Tool or click the Preferences button directly on the main interface.
General
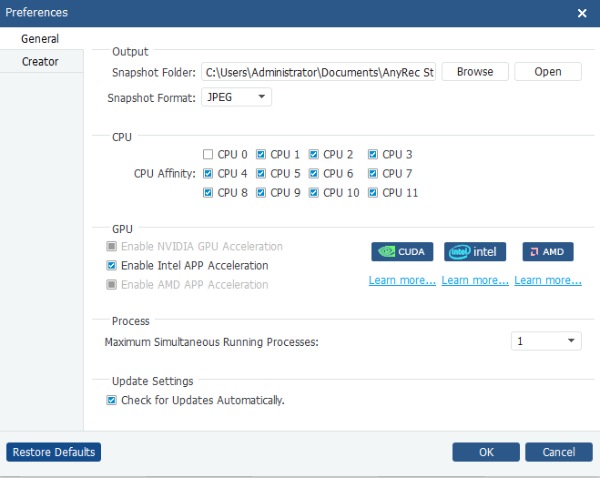
On the General Tab, you can see many advanced settings related to Blu-ray creating process and some hardware settings. You can see CPU settings and enable GPU acceleration for Blu-ray burning process. Usually, AnyRec Blu-ray Creator can automatically identify your GPU and enable the GPU acceleration accordingly. You do not need to change it. Other adjustable settings including the destination folder for Snapshot, Snapshot’s format, maximum simultaneous running process, and update settings are all here. You can change these anytime you want and click the OK button to save the changes.
Creator
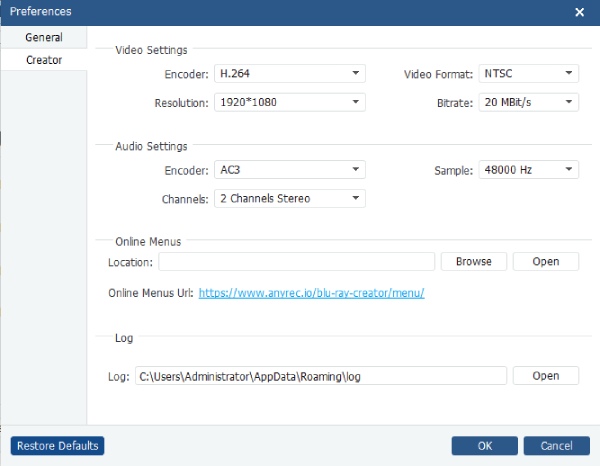
The Creator tab’s settings are all relevant to the video/audio or Blu-ray. For example, you can set up an encoder, video format, resolution, and bitrate for your imported video. Meanwhile, if you want to change the encoder, sample, and channels for the audio track, the options are also here. Click the corresponding down arrow near that option, and you will see many different settings. Furthermore, under the Online Menus section, you can click the Browse button to set up a folder to store the menus you download from the Online Menus URL below. If any crashes happen when using the AnyRec Blu-ray Creator, you may click the Open button near Log to send AnyRec the log file to identify your issue.
Create Blu-ray
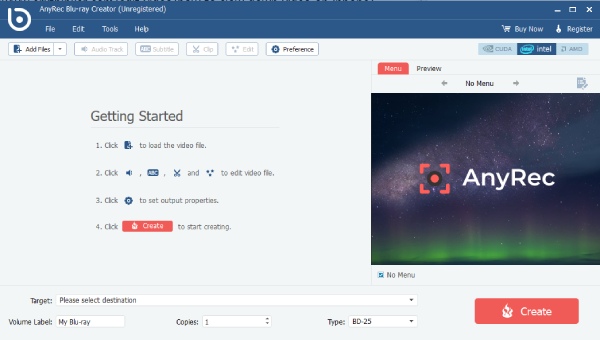
After you get a free download and installation of AnyRec Blu-ray Creator on your computer, you can finally create Blu-ray out of the videos. You can convert videos to Blu-ray folders and ISO image files. Here will take the Blu-ray as an example. You will see the detailed step on how to create Blu-ray with your video clips in AnyRec Blu-ray Creator. Before starting, you need a BD drive and a blank Blu-ray disc first.
Step 1: Add Video Files
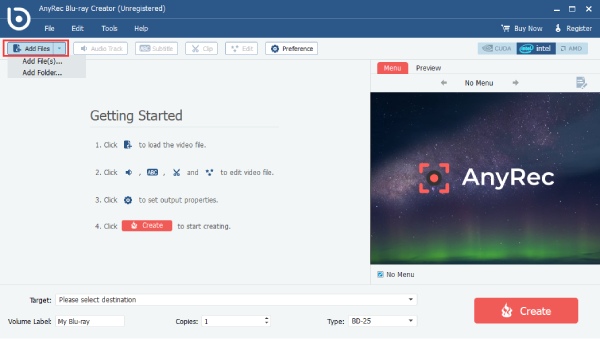
Before launching the AnyRec Blu-ray Creator, connect the BD drive to your computer. Later, insert a blank Blu-ray disc into that drive. Once you launch the program, click the Add Files button to import the video you want to include for the Blu-ray. Or you can click the down arrow and Add Folder(s) button to import several videos together.
Step 2: Edit and Trim Videos
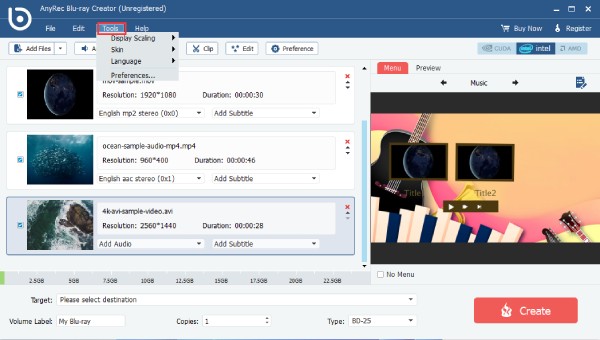
Select the videos you prepared and import them. Then, you can adjust the sequence of these clips, and add an extra audio track and subtitle. Meanwhile, you may also cut off some unnecessary parts from the clips through the Clip button above. Next, choose a menu style for your Blu-ray on the right side.
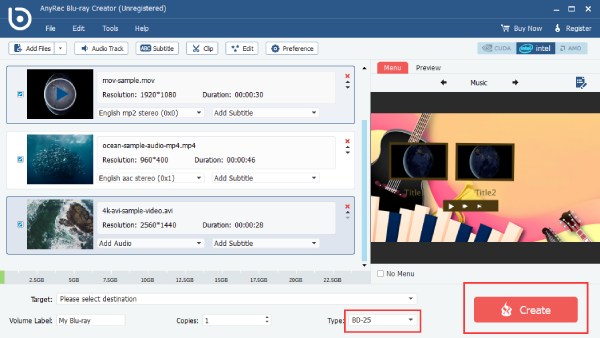
Step 3: Customize the Menu
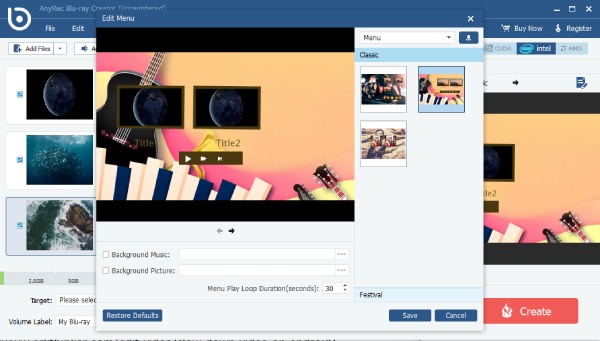
On the Menu section, you can click the forward and backward arrow to choose a cover for your Blu-ray. Afterward, click the Edit Menu button to change the titles of your video and the style of the play button. Then, you can choose a type for your Blu-ray by clicking the down arrow beside the Type option. There are BD-25 and BD-50. Next, select your Blu-ray disc as the destination folder by clicking the Target dropdown option. Finally, click the Create button to make Blu-ray.
Edit Video
Except for creating the Blu-ray in AnyRec Blu-ray Creator, there are many buttons and options you may utilize to enrich the content or refine the video. For example, you can cut, crop, apply video effects, and add watermark to your video.
Clip Video
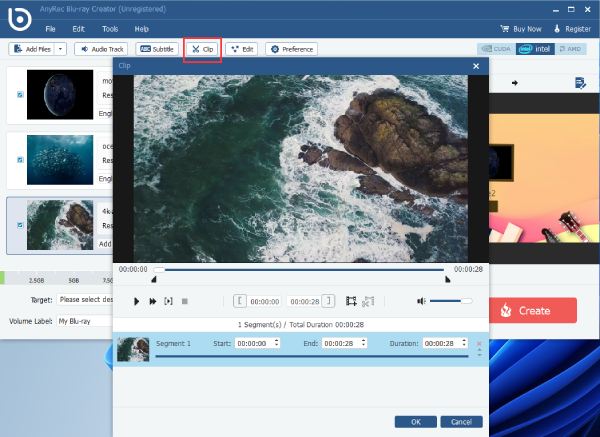
Step 1: Clip Unwanted Parts
After importing the videos to AnyRec Blu-ray Creator, you can click the Clip button above the video list. You will be in the Clip window. To trim your video, you can move the start/end point on the timeline. Later, click the Split button to cut it off.
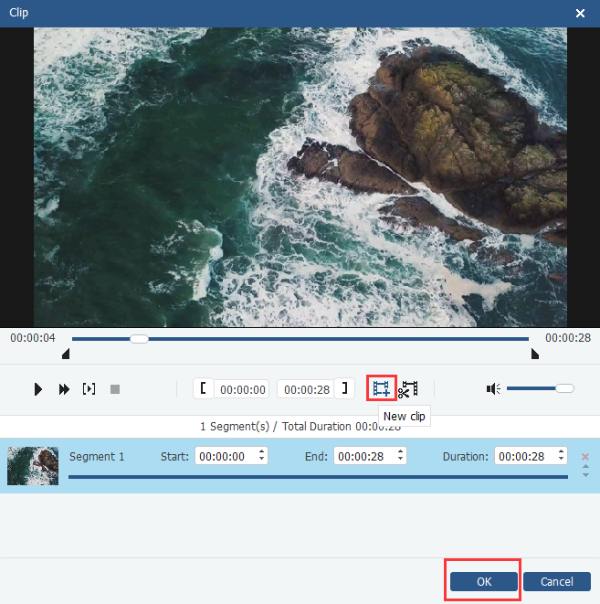
Step 2: Merge Clips
You can replace the cut segment with a new video by clicking the New Clip button. Then, you can play the video to check the result. Once you are done, you may click the OK button to confirm your changes.
Crop Video
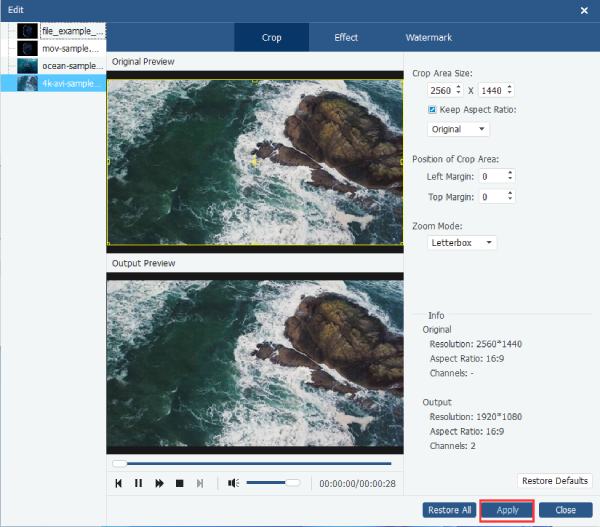
Step 1: Crop with the Desired Aspect Ratio
Before cropping your video, click the video you want to crop. Later, click the Edit button to continue. After that, you will be in the Edit window with the Crop tool. On the right side, enter a new dimension for cropping.
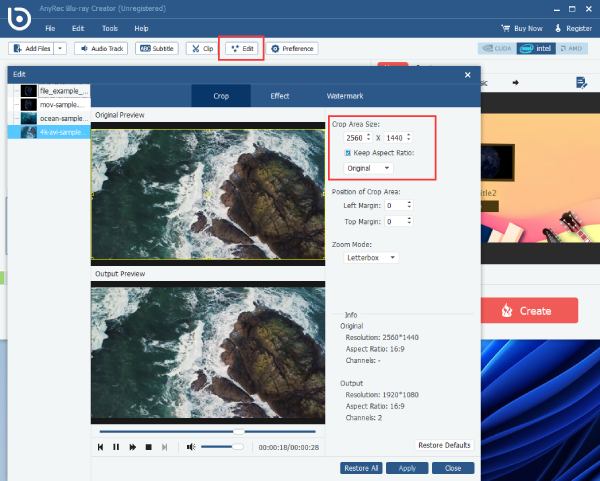
Step 2: Apply Zoom Mode
You can adjust the width and height while keeping the aspect ratio. Moreover, you may change the Zoom Mode by clicking the down arrow under it. There are Letterbox, Medium, Pan & Scan, and Full. Once you set it up, click the Apply button to apply the changes.
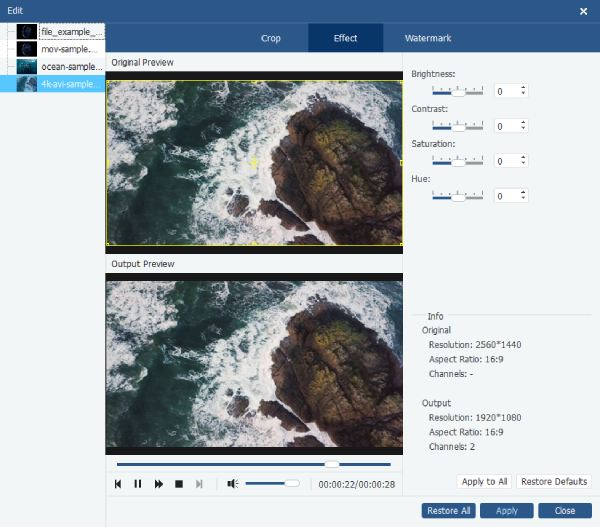
Add Effects
Once you enter the Edit window in AnyRec Blu-ray Creator, then you can click the Effect tab to adjust your video picture like brightness, contrast, saturation, and hue. You may also see the comparison of before-and-after effects on the Preview side.
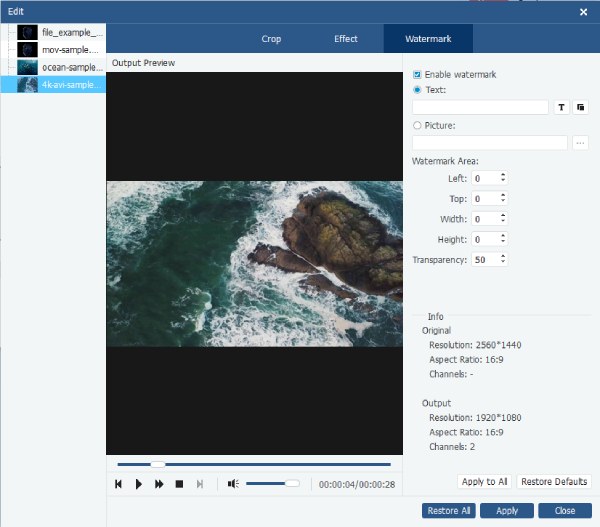
Add Watermark
Move on to the last tool in the Edit window, which enables you to add a watermark to your imported video before you create Blu-ray. The watermark can be both text and images. To type text as a watermark, simply tick the box beside Enable watermark to turn it on. Then, choose Text and type in the blank bar under it. You may click the T icon to change the font or click the square icon next to it to change the text color.
If you choose the Picture option, click the three-dot icon to upload an image as your watermark. Moreover, you can move the watermark around the picture to place it anywhere. Or adjust its place and transparency through the options under Watermark Area.
Other Tools
After launching the AnyRec Blu-ray Creator on your computer, you will also see the Tools button at the top. Once you click that button, you can change Display Scaling to as large as you want, change the language setting for the software, or go to the Preferences window from here.