3 Ways to Resize Images in GIMP without Losing Quality
Resizing an image in GIMP sounds easy. GIMP has three different operations that are related to image resizing. But they do completely different things. To start with, let's overcome the confusion first.
- • Scale Image: Change the actual dimensions of the image and all its content.
- • Canvas Size: Add space or crop content around the image.
- • Scale Tool (Transform): Resize a single layer or selection, not the whole image.
Now, let's see how to change the image size in GIMP step by step.
Guide List
How to Resize the Entire Image in GIMP How to Resize a Specific Layer in GIMP How to Change the Canvas Size in GIMP How to Resize an Image for Web Use Why GIMP Resized Images Can Look Blurry - Interpolation Use GIMP Online Alternative to Upscale ImagesHow to Resize the Entire Image in GIMP
In most cases, the GIMP Scale Image function is the answer to changing the actual pixel dimensions of the image. But if you significantly reduce the image size, the resized image can look slightly soft or even with Cubic interpolation. During this time, you can adjust with GIMP Unsharp Mask using modest settings (Amount 0.3-0.5, Radius 1-2) after export to restore perceived sharpness without introducing artifacts.
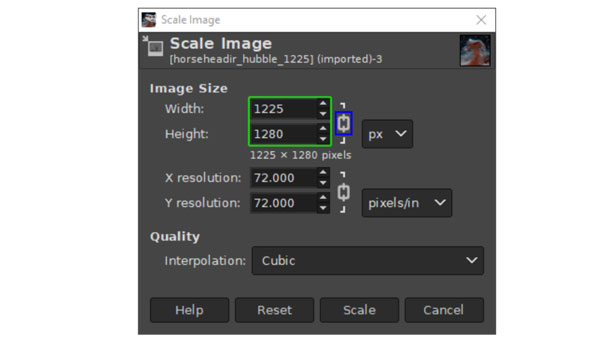
- 1. Open your image in GIMP. Click the "Image" and "Scale Image" button.
- 2. Enter a new Width. GIMP preserves the image aspect ratio by default (does not stretch images directly). If you want to resize an image with custom width and height, you can click the chain link icon first.
- 3. Choose an Interpolation method. It is suggested to choose "Cubic" for general photos. If you want to resize pixel art or game sprites, you can switch to None (Nearest Neighbor) instead.
- 4. Click the "Scale" button to confirm and change the size of a picture.
- 5. Click the "File" and then "Export As" buttons to save your resized picture as JPG, PNG, or other formats.
How to Resize a Specific Layer in GIMP
If you are working on a multi-layer project and only need to resize one element (such as a logo or a photo insert), you can scale its layer within GIMP.
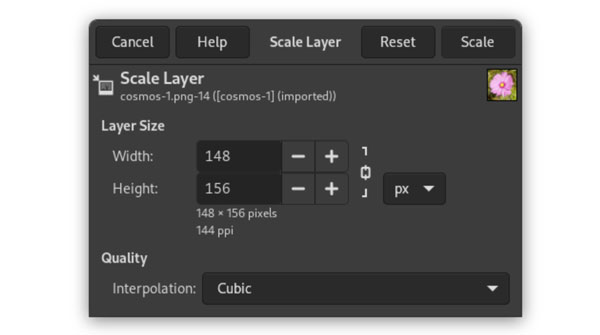
- 1. Make sure the target layer is selected in your Layers Panel.
- 2. Then click the "Layer" and "Scale Layer" buttons in the menu path. (Or you can press the Shift + S keys on your keyboards to access the Scale Tool.)
- 3. Enter the new dimensions. Drag the handles to resize this image. If you want to maintain the layer's current aspect ratio, you can also hold the "Shift" key on your keyboard while dragging.
- 4. Then click the "Scale" button to use GIMP to resize an image in a layer.
How to Change the Canvas Size in GIMP
If you want to add space around an unchanged image, you can adjust the canvas size in GIMP. This method just changes the size of the working area, the actual image content is untouched. No matter whether you want to make the image larger or smaller, you can add empty or crop the visible area.
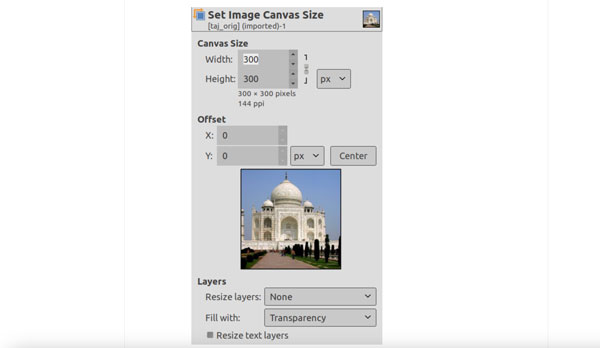
- 1. Click the "Canvas Size" from the top "Image" list.
- 2. Type your target Width and Height of this image.
- 3. Choose your preferred units, such as pixels, inches, percentages, and more.
- 4. You can adjust the position of your current image in the new canvas by clicking the "Center" button.
- 5. In the "Layers" section, you can choose to resize all layers or leave them as they are.
- 6. Click the "Resize" button to resize the canvas in GIMP.
How to Resize an Image for Web Use
If you want to resize images for social media platforms, you can check the following image sizes. It is suggested to export as PNG for graphics with text or transparency. Or you can save an image as JPG at a quality of 85 to 90 for photos.
| Platform | Dimensions |
| Instagram square | 1080 × 1080 px |
| Facebook / LinkedIn link | 1200 × 628 px |
| YouTube thumbnail | 1280 × 720 px |
| Stories / Reels | 1080 × 1920 px |
Why GIMP Resized Images Can Look Blurry - Interpolation
Interpolation is the most common reason that resized images look soft or blurry. GIMP uses 5 interpolation algorithms. Check these:
| Interpolation | Best For |
| None (Nearest Neighbor) | Pixel art, sprites, sharp-edged graphics |
| Linear | Quick previews, simple resizing |
| Cubic | Photos and most images (the default) |
| NoHalo | Enlarging or high-quality downscaling |
| LoHalo | Engineering drawings, line art |
Choose the correct interpolation while resizing images with GIMP. Moreover, when you downscale an image heavily (such as from 4000px down to 800px), even Cubic interpolation can leave the image looking a touch soft. You can click the "Filters", "Enhance", and "Upsharp Mask" buttons to restore perceived sharpness.
Use GIMP Online Alternative to Upscale Images
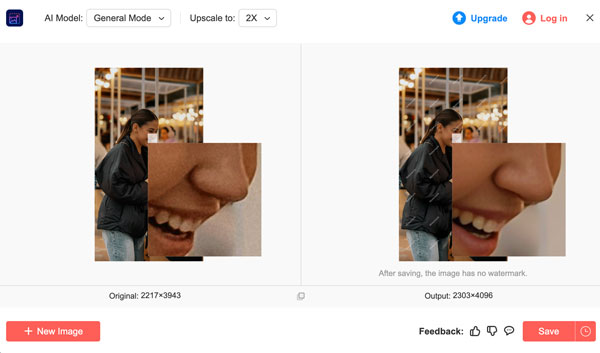
GIMP has limitations when it comes to enlarging images. The result looks soft or blocky, no matter which GIMP interpolation method you choose. For high-quality image upscaling, AnyRec AI Image Upscaler is your smart choice. It uses AI-based processing to reconstruct detail when enlarging, rather than simply stretching existing pixels. So, it can show most clearly when enlarging low-resolution photos, product images, or portraits.
- • Enlarge images from 200% to 800% instantly.
- • Batch upscale images (each image up to 50 MB).
- • Upscale images with sharper edges.
- • Textures look more natural after upscaling.
- 1. Click the "Add Photo" button to upload your image.
- 2. Increase the image resolution by choosing the upscaling modes from 2× to 8×.
- 3. Hover your mouse above the image to preview details through the before and after results.
- 4. Click the "Save" button to enlarge and enhance your image with AI.
Conclusion
Getting a clean resize in GIMP isn't complicated. You can use Scale Image for the whole image, Canvas Size for the workspace boundary, and Scale Layer or the Scale Tool for individual layers. Just add the correct interpolation to avoid unnecessary blurry or distorted results. However, GIMP doesn't perform well in image enlargements. If you want to enlarge images without sacrificing quality, you can choose AnyRec AI Image Upscaler. It can make images bigger with clean results based on dedicated AI processing.
Related Articles:
About Our Author


