
How to Make Images Larger without Pixelation Issues [Detailed Guide]

The downloaded images and screenshots are always in small sizes, like 640 × 480 or even 320 × 160 resolution. Whether you want to use this image footage to make a design or upload them on your blog, you should make images larger to meet the required size. However, most image editors will decrease the DPI and lower the image quality while upscaling image size. Thus, this article will tell you three efficient methods to make images larger without losing the original quality. Keep reading and learn about the 3 best online image upscalers and professional enlargement tools like Photoshop and GIMP.
Guide List
How to Make Images Larger without Losing Quality Online Detailed Steps to Make Images Larger in Photoshop How to Use GIMP to Make Images Larger on Windows/Mac FAQs about Making Images LargerHow to Make Images Larger without Losing Quality Online
How to make images larger without losing quality or installing any apps? The answer must be online upscalers. Most online tools are free and offer great performances. Meanwhile, for some who do not want to download another app on their Mac/Windows, online image enlargers must be the most suitable choice. Therefore, read along to see the key features of the three best online image upscalers and the detailed guide to making images larger.
1. How to Make Images Larger without Losing Quality – AnyRec AI Image Upscaler
Best for: Quick online image upscaling without installing software. Formats: JPG, JPEG, PNG, BMP, TIFF, TIF Max output: 4096×4096 pixels Magnification options: 2×, 4×, 6×, 8× File size limit: 50MB per upload Platform: Browser-based (Windows, Mac, iOS, Android)
AnyRec AI Image Upscaler is best for you to make images larger online. You can enlarge pictures to 2×, 4×, 6×, and 8× resolution without losing quality. Its powerful AI technology can automatically fix blurry parts and even enhance image quality. This way, you can easily make larger images for printing, presentation, sharing, background, and more.
◆ Make images in different formats larger, including JPG, PNG, JPEG, BMP, TIFF, TIF, etc.
◆ Support enlarging images to 2x, 4x, 6x, and even 8x resolution without losing quality
◆ Powered by AI technology to fix the blurred places and show the details clearly.
◆ Enable you to preview the enlarged images and adjust the changes before exporting.
Step 1.Navigate to the official website of AnyRec AI Image Upscaler, and click the "Upload Photo" button to choose the desired images from your computer.
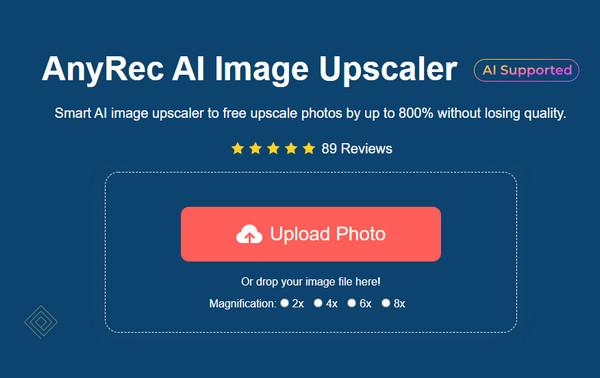
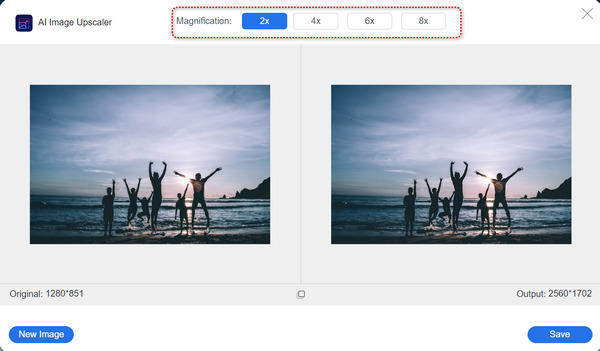
Step 2.After a window pop up, you can make images larger to the desired size, including 2×, 4×, 6×, or 8×. Choose it from the "Magnification" button bar and start increasing the image resolution. You can also move your mouse cursor to check the details and keep the high quality.
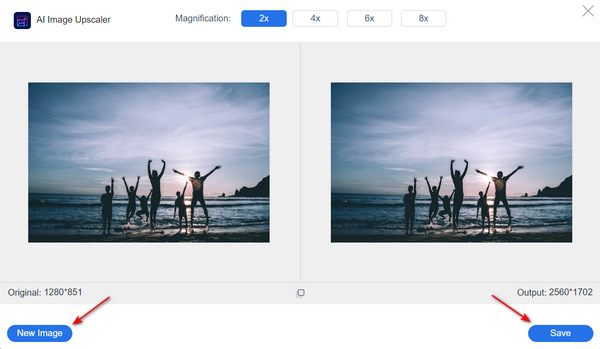
Step 3.Finally, click the "Save" button to export the enlarged images to the desired folder. If you are unsatisfied with the current image, you can also click the "New Image" button to import another one directly.
Honest scope: It works well for faces, product photos, and general photography. It has specific modes for portrait, anime/cartoon, and general images, which matters because the AI model is optimized differently for each type.
2. How to Make Image Larger without Losing Quality Online – UpscalePics
Best for: Batch image upscaling with noise removal. Formats: JPG, PNG, WebP Free tier: 3 images, up to 64MP output. Paid plans: From ~$5/month for unlimited processing, up to 256MP output. Watermark: Free trial adds a watermark on downloads.
UpscalePics is also a web-based platform equipped with AI technology for image enlargement online. Reviewed by many customers, this website, indeed, will make images larger without a quality drop. Meanwhile, with a free trial, you can upload JPG, PNG, and WEBP images to enlarge up to 4500×4500 pixels. The maximum input resolution is 36MP for free. However, the free trial will put a watermark on your output work.
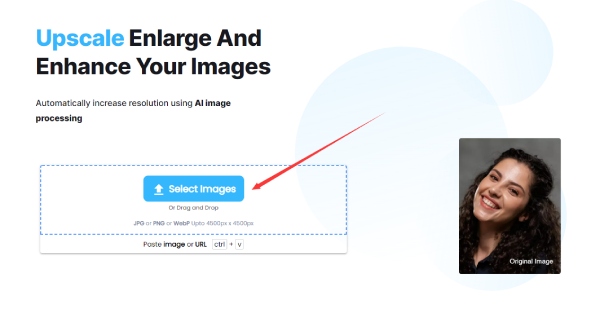
Step 1.Search UpscalePics on your browser and enter its official site. Click the "Select Image" button, press "Ctrl", and choose more than one picture for uploading. Then, you will be directed to a new page.
Step 2.Then, you can enter a new dimension for each picture or use the toolbar on the right to set up the same dimension to make images larger. Next, choose the output format and click the "Start Processing" button to enlarge them.
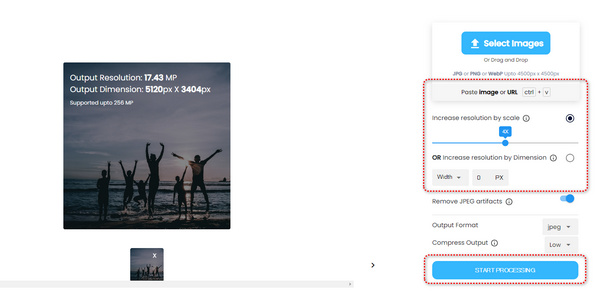
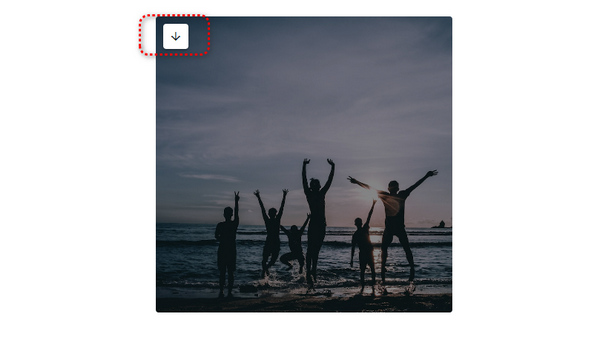
Step 3.The enlargement process might take a while for batch pictures. Once it is over, you can click the down arrow button to save these pictures to your device one by one.
What it's good at: Heavily compressed JPEG images with noise artifacts benefit most from UpscalePics. Their denoising combined with upscaling works better than pure upscaling, especially when the source file has significant JPEG compression banding.
What it's not good at: Smartphone photos rarely show significant improvement. Heavily pre-processed images also respond poorly.
3. How to Make Image Larger without Losing Quality - ImgLarger
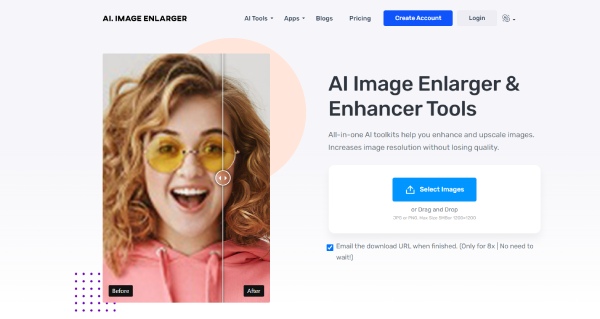
The "AI Image Enlarger" & "Enhancer Tools" from "ImgLarger" works perfectly for your JPG and PNG images. You can truly make images larger with no quality loss. As an all-in-one AI toolkit, "ImgLarger" also allows you to edit the image before enlargement. But, the features of a free trial are quite limited. You can only upload 8 images for enlargement per month; each size should be under 5MB. The maximum enlargement is 1200×1200px. Although the features are a few, it is still a good enlarger for you can enlarge images online and preserve the original quality.
Step 1.Go to the official website of ImgLarger and sign up. Afterward, go back to the home page and click the "Select Images" button to upload your image from the device.
Step 2.Choose an upscale option from the dropdown button. There are only two choices: 2× and 4×. Click the "Edit" button. Then, you can crop the image or put filters on it. If you make any changes, click the "Done" button to apply.
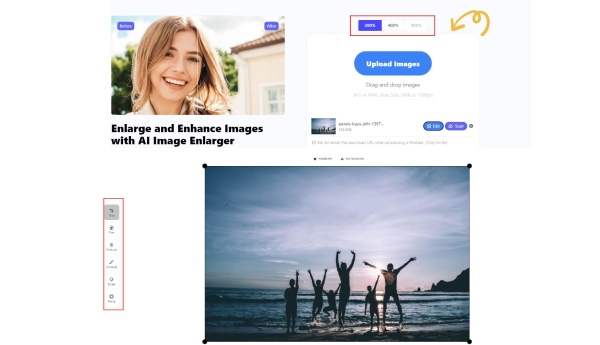
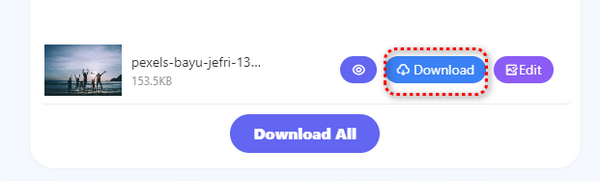
Step 3.On the home page, click the "Start" button to enlarge the image online. It will start uploading and progressing. After these end, click the "Download" button and save it.
Detailed Steps to Make Images Larger in Photoshop
Adobe Photoshop is a professional photo editor to help you make images larger. Of course, it supports sharpening your pictures and maintaining the details with high quality when doing the photo enlargement. Since you need to input the pixels manually, you should be professional in image resolution and dimension.
Step 1.Open your image in Photoshop.
Step 2.Enable Preserve Details 2.0 (required once per session - older versions only):
- Go to Edit > Preferences > Technology Previews (Windows) or Photoshop > Preferences > Technology Previews (Mac).
- Newer Photoshop versions (CC 2021+) have this enabled by default.
Step 3.Go to Image > Image Size (shortcut: Alt+Ctrl+I on Windows, Option+Command+I on Mac).
Step 4.Make sure "Resample" is checked. From the resample dropdown, select Preserve Details 2.0.
Step 5.Set your target width and height. For printing, set Resolution to 300 pixels/inch. For web, 72-96 pixels/inch is sufficient.
Step 6.Use the "Reduce Noise" slider that appears. Drag it right to reduce grain without sacrificing texture. Zoom into a detailed area (eyes, hair, fabric) while adjusting.
Step 7.Click the "OK" button. Then consider applying a light Filter > Sharpen > Smart Sharpen to finalize.
Tips
If you're working with a RAW, DNG, TIFF, or HEIC file, Photoshop offers a second AI upscaling method: Super Resolution in Adobe Camera Raw.
How to Use GIMP to Make Images Larger on Windows/Mac
GIMP is an open-source photo manipulation software that can make images larger on Windows/Mac. It provides multiple interpolation methods to enlarge a picture and different quality modes to enhance the image resolution. Follow the steps below to make images larger without losing quality through GIMP:
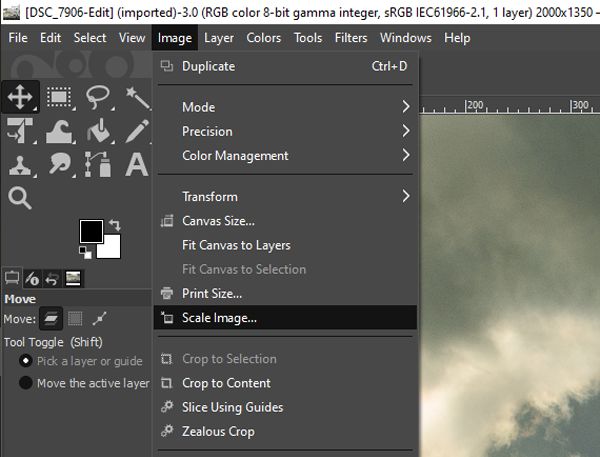
Step 1.Open GIMP and click the "Open" button under the File menu to add your images. Then, click the "Image" button and click the "Scale Image" button to make images larger.
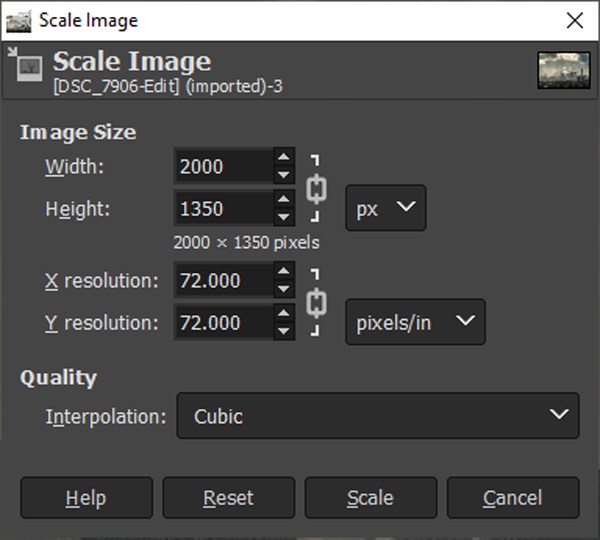
Step 2.When a new window pop up, you can directly input the desired size to increase the size. If you want to print your enlarged photos in high quality, you should also change the X and Y resolutions to 300 DPI. About the "Quality" option, you only need to keep the default "Cubic" choice to keep the high quality.
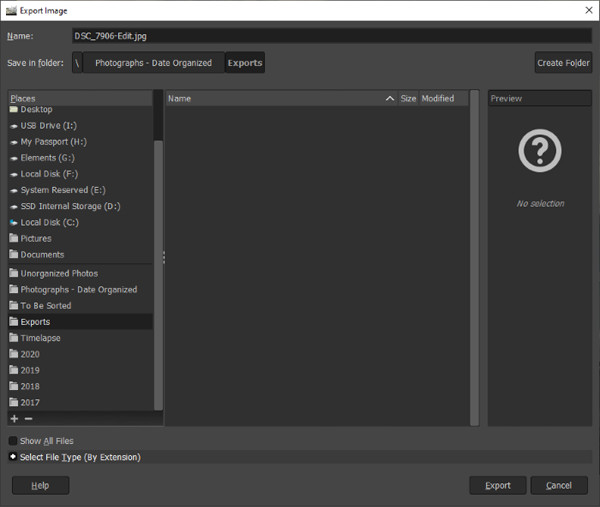
Step 3.After all settings are done, click the "File" button and click the "Export as" button to save the enlarged images in JPG or PNG format. Just choose the destination and click the "Export" button to start making images larger.
Tips
Practical recommendation: For photos, use NoHalo. For text-heavy images or heavily compressed JPEGs, try LoHalo. An icons8 comparison test found NoHalo outperformed LoHalo and Cubic for photographic content, which is "outlines are clear, and noise and artifacts are hardly noticeable."
FAQs about Making Images Larger
-
1. What is the CSS to make images larger on websites?
You can use the max-width and max-height properties to resize images in CSS. Just change the settings to more than 100% to make images larger than the original pixels.
-
2. Will making images larger increase the image resolution?
No. Making images larger only increases the pixels of your photos. The resolution or the quality is decided by the DPI (dots per inch). Using the AnyRec AI Image Upscaler with AI technology can help you increase the resolution.
-
3. How to make images lager through the Paint app on Windows?
Open your images on the Paint software and click the "Edit" button to resize your image. Adjust the "Percentage" to more than 100% or change the pixels according to your need. Then click the "OK" button to save the changes.
Conclusion
Here are 3 efficient methods to make images larger on your Windows/Mac. In this way, you can upload images in the required size. If you want to print your images with high quality, AnyRec AI Image Upscaler is best for you. With simple clicks, you can make your images larger without losing quality. Have other questions? Please get in touch with us now.
More Related Articles
About Our Author