
How to Crop Video on Mac: 4 Free Methods You Need to Know

Searching for a way to crop videos on Mac? Remove unwanted edges or backgrounds on it, adjust its size for a social media platform, fix incorrect aspect ratios, or focus attention on its subject. Whatever the intent behind it, this post has you covered! Here, you get to explore the four free and easy ways to crop a video on macOS using different program solutions! So, without any further ado, start exploring each solution below and explore them now.
Guide List
Comprehensive Video Cropper for Mac How to Crop Videos on Mac Using QuickTime Player Easily Crop Videos with iMovie on Mac How to Crop Videos on Mac Using VLC Media PlayerComprehensive Video Cropper for Mac
If you are looking for the best Mac-based tool that can help you crop video on Mac with no complicated processes, then consider using the professional AnyRec Video Converter. This video cropper and editor software supports a built-in video cropper feature that is designed to easily help you crop videos based on your preferences. This feature provides different options to crop your video; you can crop it manually using the crop borders in the video's preview, choose an aspect ratio for fast cropping, and enter specific area values. What makes this one the best option is that it doesn't compromise the video's quality, and it even lets you enhance it!
Offers simple yet effective crop options for a quick video cropping on your Mac.
Let it automatically center the video crop for a balanced result.
Supports output tweaking options to enhance the cropped video before exporting it.
Enables you to tweak your video's encoder, sample rate, and bitrate to enhance it.
Secure Download
Secure Download
Step 1.Install and launch the professional AnyRec Video Converter on your Mac. Next, click "Toolbox", search for Video Cropper, and select it. Then, import the video you want to crop.
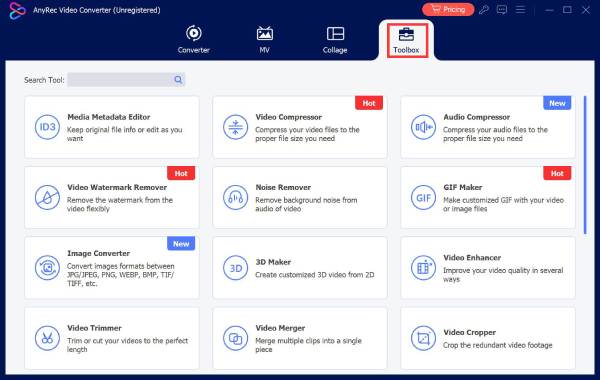
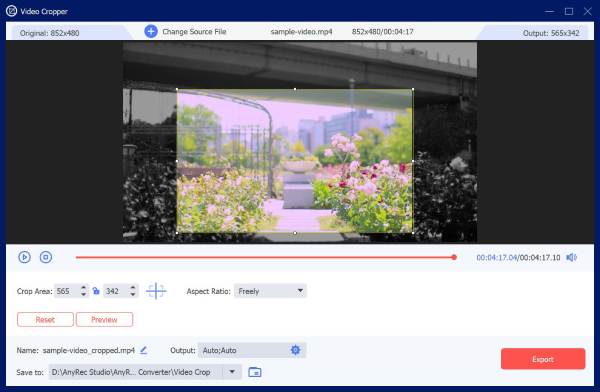
Step 2.Next, drag and adjust the crop borders or frames in the video's preview to manually crop it. For quick video cropping, you can select a specific aspect ratio instead.
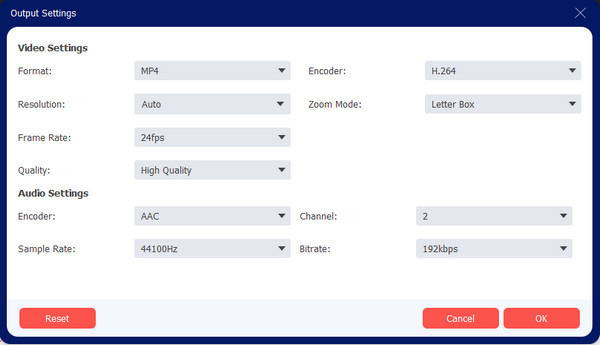
Step 3.To enhance the quality of the cropped video, click the "Output Settings" button, and then you can change the video's resolution, frame rate, encoder, and more. Once done, click "OK".
Step 4.Once done, click the "Export" button in the lower-right corner to save the cropped video on your Mac.
Secure Download
Secure Download
How to Crop Videos on Mac Using QuickTime Player
If you no longer want to install a third-party tool to crop an MP4 video on Mac, you can use your device's QuickTime Player. This built-in, versatile multimedia player by Apple supports extra features that allow you to edit videos. These features include basic rotating, flipping, cropping and trimming, and it also enables you to crop videos through its video recording capability. However, unlike the first featured solution, QuickTime doesn't offer you a usual way of cropping videos. If you want to crop a QuickTime video, you can do as the following steps show.
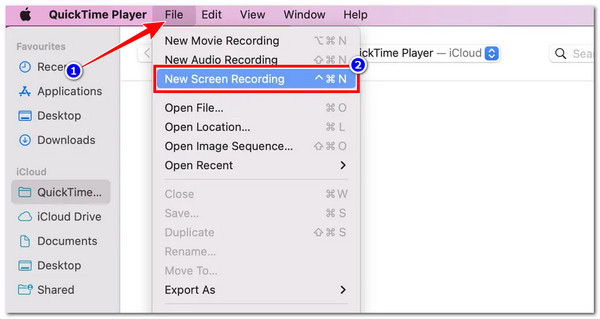
Step 1.Access your Mac's QuickTime player and open the video you wish to crop on it. Then, click "File" and select "New Screen Recording".
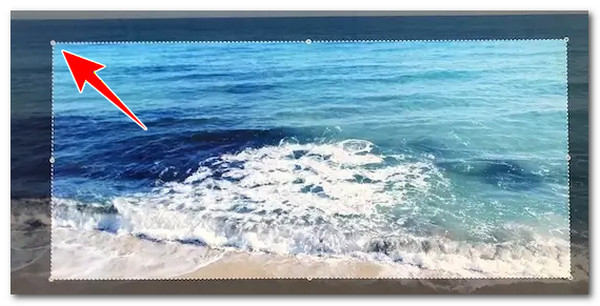
Step 2.Next, a video cropping frame will appear on your Mac's screen. You need to drag it to the part you want to crop the video.
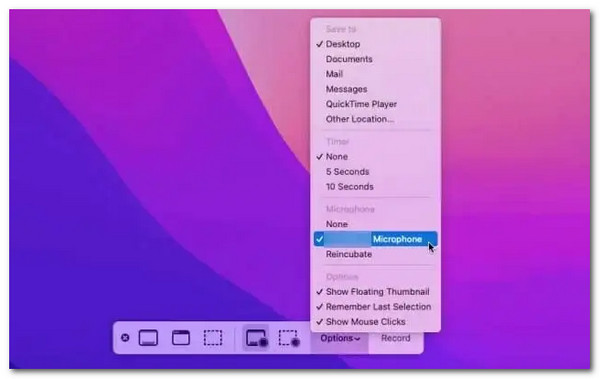
Step 3.After that, access the "Menu" to pick the sound output if you wish to crop your clip and keep its audio. Once done, click "Start Recording" and click the "Play" button immediately. After playing the video's section to crop, click the "Record" button to save your cropped QuickTime video to MP4.
Easily Crop Videos with iMovie on Mac
Aside from QuickTime Player, you can also use your Mac's built-in video editing software, iMovie. Unlike QuickTime Player, iMovie enables you to crop a video on a Mac in a usual way, since it is a video editing platform. Editing videos, including cropping, is made easy on this software due to its simplified interface. You can crop videos in square or vertical to remove those unwanted sections. Unfortunately, cropping videos with iMovie is limited to a 16:9 aspect ratio. That means, it doesn't allow you to do other regular aspect ratio cropping or freeform.
Step 1.Launch the iMovie software on your Mac and import the video you want to crop. You can create a new project or proceed with an existing video.
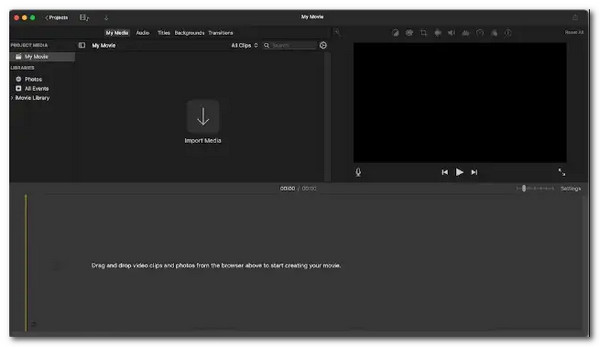
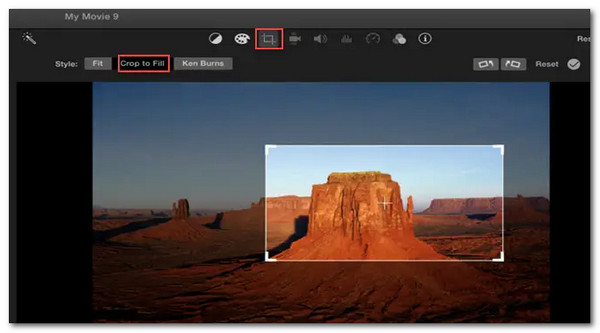
Step 2.Next, click the "Crop" icon at the top of the video's preview. Then, you'll see a draggable frame overlaid on your video, which is usually constrained to an aspect ratio of 16:9.
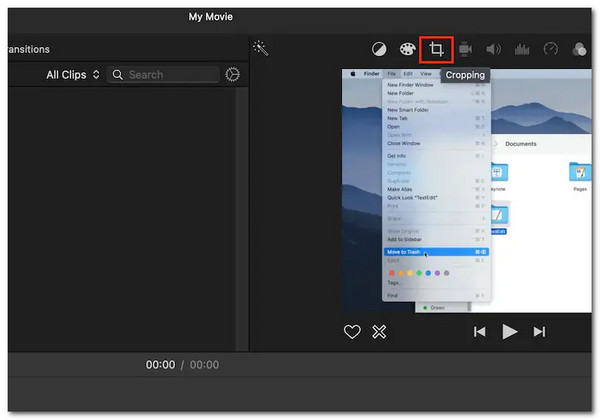
Step 3.Move the frame to the area of the video you wish to be cropped. Once done, click the "Checkmark" icon that is next to the reset button to crop the video. After that, export the cropped video, and that's how you use iMovie as a free video cropping software on Mac.
How to Crop Videos on Mac Using VLC Media Player
The last tool option you can use to crop video on Mac is VLC Media Player. The same goes for the first featured solution; this one is also a third-party solution. However, it is an open-source tool, meaning you can install it on your Mac without paying for anything. But, this is not a video editor, but it is a multimedia player that also supports basic editing features, which include cropping a video. With this solution, you can also eliminate unwanted spaces from your video. Now, how do you crop a video on a Mac using VLC? Here are the steps you need to follow:
Step 1.Install and launch the VLC Media Player on your Mac and launch it afterward. Next, click the "Media" tab and select "Open File" to import the video you want to crop.
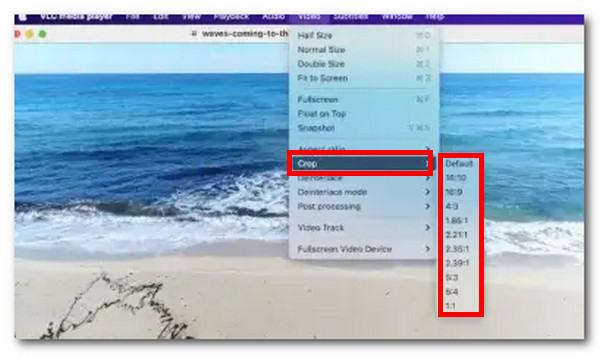
Step 2.Next, under the "Tools" menu, head to the "Effects and Filters" and click "Video Effects". After that, click "Crop" and choose your preferred aspect ratio.
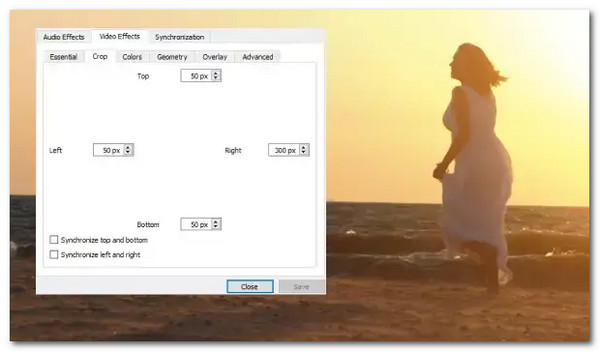
Step 3.After that, enter a specified number of pixels to crop the video. You can preview the video on how it looks after specifying a crop value. Then, you can just repeat the process to crop the video further.
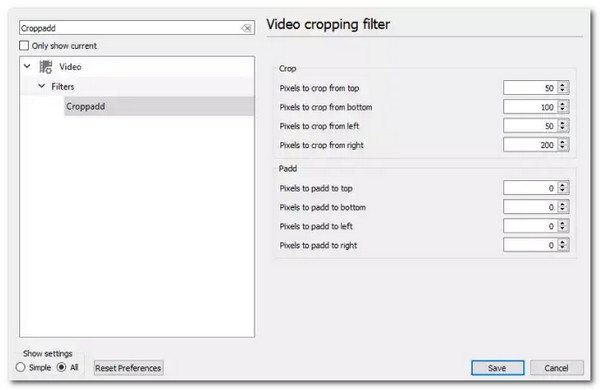
Step 4.Next, click "Preferences", choose "Tools", and click "Show Settings". After that, in the new window, type "Croppadd" in the search bar to access your video.
Step 5.Then, click "Save" and under the "Filter" tab, tick the "video cropping checkbox" option. After that, click the "Save" button, head to the "Media" section, and click "Convert/Save".
Step 6.After that, drag and drop the cropped video to the file box and choose your preferred file codecs and formats. Then, go to "Edit Select Profile" and click "Video Codec". Next, head to "Filters", select "Video Cropping Filter", and then save these settings and save the video.
Conclusion
Now those are the four best tools you can use to crop videos on MacBook. Through those tools, you can easily and quickly achieve your intent in cropping a video. Whether to remove unwanted edges or backgrounds on a video, adjust its size for a social media platform, fix incorrect aspect ratios, or focus attention on its subject. However, if you are looking for the most effective tool from those options, AnyRec Video Converter is a solid choice. You can try this tool today and start your journey of cropping a video on your Mac!
Secure Download
Secure Download
About Our Author