How to Make a Video Collage? 5 Best Tools for Every Creator
You might want to show a before-and-after transformation, or multiple reactions to a gameplay. Learning how to make a video collage is the ultimate way to go! By combining several clips into a single frame, you can deliver more details and higher engagement. But out of so many editors, which ones actually help? From beginner-friendly templates to high-end cinematic grids, today's guide offers the top five tools to help you create a video collage. Find the right one for your workflow!
Guide List
Easily Create Video Collages on Windows and Mac CapCut: Advanced Keyframing and Multi-Track Timeline Filmora: Smart Motion Tracking and Advanced Keyframing Clipchamp: Cloud-Based Editor with Seamless Windows Integration Adobe Premiere Pro: Standard for Editing Timeline and Color GradingEasily Create Video Collages on Windows and Mac
Finding a solution that has both power and a straightforward process is necessary to learn how to make a collage video easily. Luckily, on both Windows and Mac, you have the all-in-one solution that goes beyond basic conversion, the AnyRec Video Converter. This tool has a dedicated, simple, intuitive collage maker that combines up to 13 videos on a single screen. It also utilizes hardware acceleration to make sure that processing your video collage masterpiece is lightning-fast. Aside from making video collages, it serves as a powerful toolbox for enhancing quality, removing noise, and creating polished MVs.
Dozens of split-screen layouts, such as grids, columns, and unique shapes.
Easily drag frames to resize individual windows and change border colors.
Supports more than 1,000 formats, saving your collage for any device and platform.
View before and after details quickly to ensure everything is perfect.
Secure Download
Secure Download
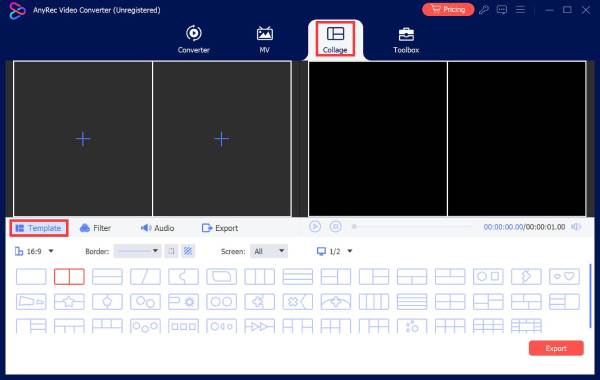
Step 1.Start AnyRec Video Converter on your desktop, and click the "Collage" menu at the top. From the "Template" section, select the split-screen preset that matches your project.
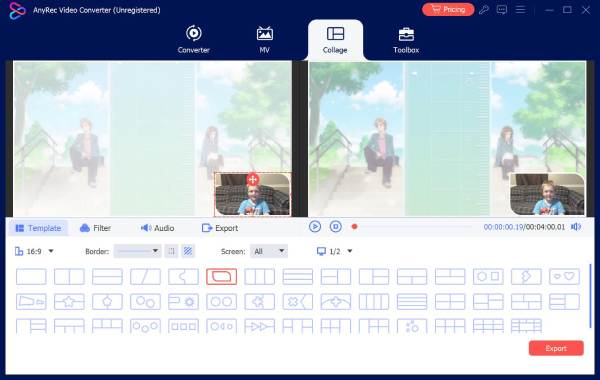
Step 2.Click the "Add" button in each window to upload your media. You can then adjust the framing by dragging the border lines or hovering on each clip to see the "Edit" button.
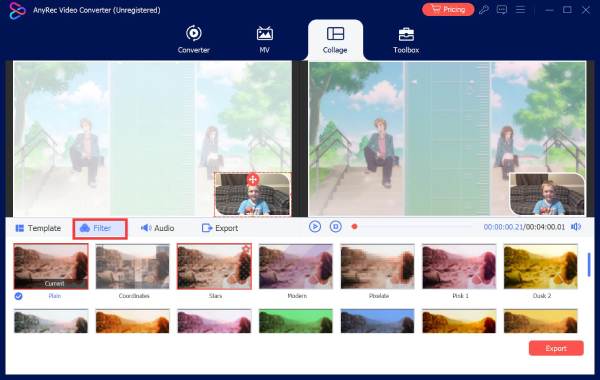
Step 3.Next, navigate to the "Filter" section to apply pre-made effects such as Sketch, Warm, and Orange Dots.
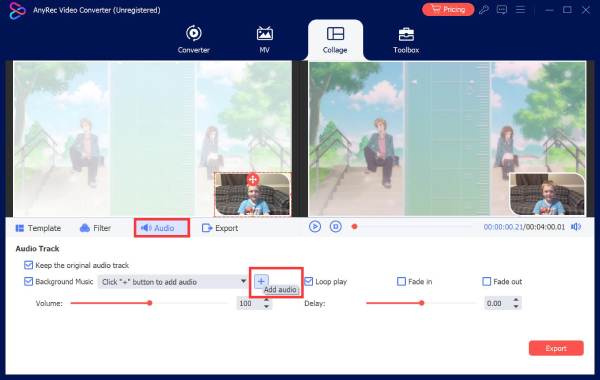
Step 4.Then move to the "Audio" section to add your background music track and apply audio effects, if you wish.
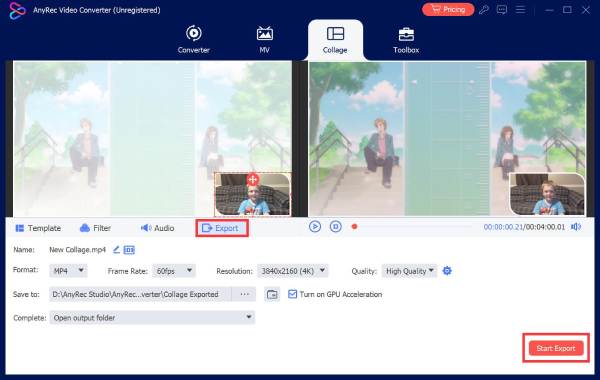
Step 5. If everything is perfect, go to the "Export" tab to customize your output settings. Finally, click the "Start Export" button to save the video collage to your computer.
Secure Download
Secure Download
CapCut: Advanced Keyframing and Multi-Track Timeline
CapCut is a powerful video editor that uses a sophisticated Keyframe Animation system, letting you create smooth movements for text, stickers, and layers. Its desktop version includes an auto-reframe that crops your footage to different aspect ratios, so you can create a video collage. Furthermore, with its pro-level color adjustment tools, you can achieve a cinematic look for your video project that goes far beyond basic filters.
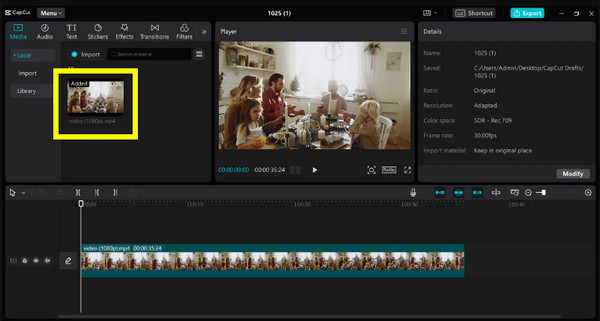
Step 1.Once you have launched CapCut, click "Create Project," then click "Import" to upload all clips you wish to include. Drag the vid onto the timeline, then do the same for the next clips onto separate tracks above the first one.
Step 2.Then, click a clip in the timeline, then head to the "Player" window and click and drag the corners to resize it.
Step 3.Now, use the "Basic" tab from the "Video" panel to position them into a grid layout.
Step 4.Optionally, you can apply masks using the "Mask" tab and select shapes like Heart, Circle, etc., to trim your clips into unique patterns.
Step 5.If the collage is made, click the "Export" button.
Filmora: Smart Motion Tracking and Advanced Keyframing
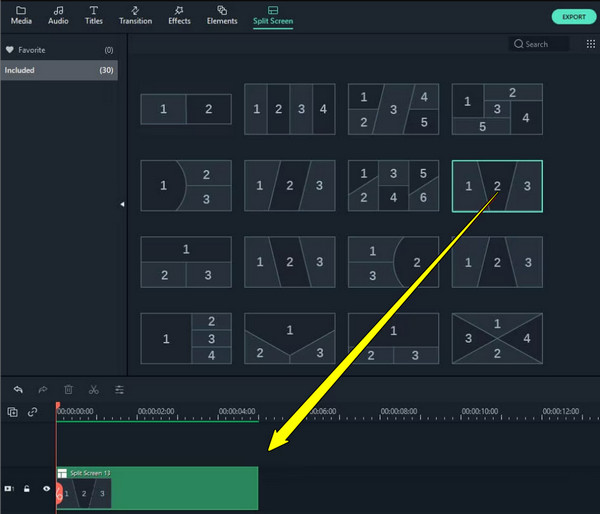
Wishing for ever more built-in automation and specialized presets? Then you might find Wondershare Filmora more appealing for video collage creations! This robust tool includes the Split Screen library, with 30 pre-designed collage layouts you can quickly drag and drop into your timeline. Plus, using its motion tracking, you can attach text or graphics to a specific person within one of the collage windows. If you are out of the free trial, you may need to remove watermark from Filmore videos manually.
Step 1.Open Filmore, then start with the "New Project" and navigate to the "Split Screen" at the top of the screen. Select a layout and drag it onto the track.
Step 2.Next, drag your selected video clips from the Media Library into the specific drop zones within the split-screen window. Adjust each video using the "Pan and Zoom" tool by clicking on each.
Step 3.After everything, add a border color or adjust the "Split Screen Animation" settings, then click the "Export" button to save your file.
Clipchamp: Cloud-Based Editor with Seamless Windows Integration
While the previous tool has a great built-in preset, you might find Clipchamp a convenient solution for Windows users. With its Picture-in-Picture feature, it lets you stack multiple video layers on top of one another, making it essential for making a video collage on a computer. It also has unique collage transitions that let you move from a single clip into multiple layouts with a smooth animation. You can even start doing video collage on a computer and finish it on another device without losing your progress.
Step 1.Upon logging in to Clipchamp, click "Create a new video," then import all clips you wish to use in your video collage. Drag your selected clips onto the timeline, above the others.
Step 2.Then, choose a clip and use the corners in the preview window to shrink it down and place it into your desired position. Otherwise, use the "Picture-in-Picture" floating toolbar.
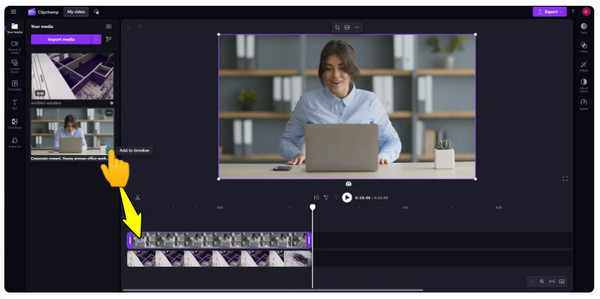
Step 3.Once your grid is aligned perfectly, click the "Export" button and select 1080p HD to save it to your computer or OneDrive.
Adobe Premiere Pro: Standard for Editing Timeline and Color Grading
If you're ready for complete cinematic control, use Adobe Premiere Pro to collage a video! This industry standard for professional video editing offers unparalleled control over effects. Unlike other simple tools, Premiere Pro allows you to use masking and keyframing to create custom-shaped collages that change over time. You can even manage audio levels for multiple clips at once, preventing inconsistent sound effects in complex collages.
Step 1.When you have launched Premiere Pro, create a new project and drag your selected clips onto separate video tracks so they stack on top of each other.
Step 2.Then, highlight a clip and head to "Effects Controls" to manually adjust the position until it fits your desired layout. Apply the "Crop" effect from the Effects panel and drag it onto your clips.
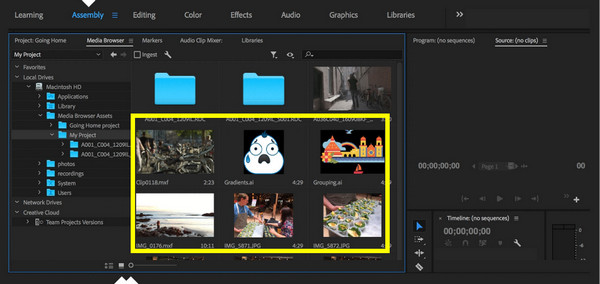
Step 3. After that, sync the audio with the "Audio Track Mixer" to lower the volume of some less important clips or mute them completely. Later, go to "File", then "Export", and select "Media" and choose your desired format to save your project.
Conclusion
Depending on your project needs and editing comfort level, you can use the right tool to create a video collage with the five mentioned tools. But regardless of which tools you choose, the key is to maximize the different grids and filters to find the style that truly fits your brand. And while each tool offers unique strengths, for an all-in-one tool with a balanced, high-performance use, AnyRec Video Converter is the best choice. Its intuitive collage maker lets you use customizable templates, filters, effects, and more, all while ensuring your final export looks polished and cinematic.
Secure Download
Secure Download
About Our Author


