
 Capture everything. Miss nothing. Crystal Clear.
Snipping Tool Problems with Recording Audio - Detailed Steps

Does the Snipping Tool record audio? Many users have similar questions when using Windows' default screen recording tool. After conducting practical tests, this post provides you with the answer. It also offers 6 quick fixes to help you resolve issues recording audio with the Snipping Tool. Start reading now to learn about the Snipping Tool's problems with recording audio.
Guide List
5 Quick Fixes to Snipping Tool Problem with Recording Audio How to Record Audio with Snipping Tool After Fixing Problems A Trustworthy Solution to Any Snipping Tool Problem with Recording Audio5 Quick Fixes to Snipping Tool Problem with Recording Audio
If you have problems with the Snipping Tool when recording audio, there may be an issue with your settings. These mis-settings can occur in various places. This post compiles the most common mis-settings, all of which can cause audio to be missing from your screen recordings. According to these mis-settings, this section lists 5 most common quick fixes for you. You can try these methods one by one. Once you've troubleshot the issue, your Snipping Tool should be able to record a screen with audio normally.
1. Check the Microphone Situation
If you encounter problems with the Snipping Tool when recording audio, the first thing to check is your microphone. You can follow the steps below to quickly test whether your microphone is working properly on your Windows device.
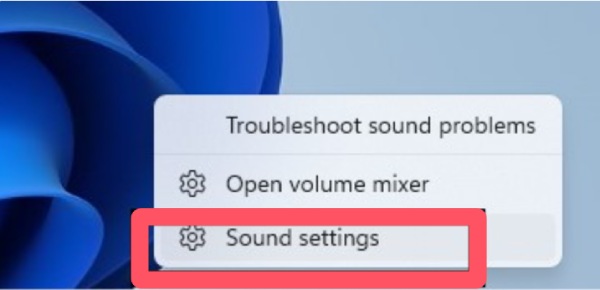
Step 1.On the Taskbar at the bottom right corner, right-click the "Sound" button. Then, click the "Sound settings" button.
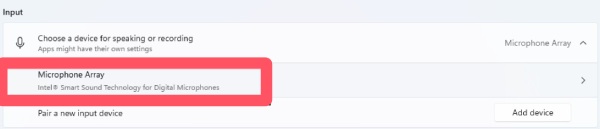
Step 2.Under the "Input" tab, click the "Microphone Array" button to proceed. You can check the microphone for the Snipping Tool’s problem with recording audio.
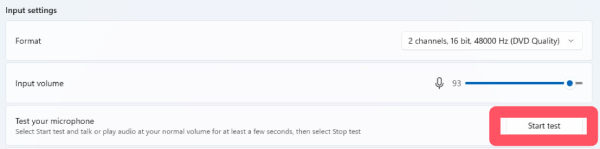
Step 3.Under the "Input settings" tab, click the "Start test" button. Now you can check whether the microphone works properly.
2. Set Default Audio Device
Sometimes, the default audio setting can lead to issues like the Snipping Tool not recording YouTube audio. Simply put, audio recording isn't set as the default option for your recording. You can follow the steps below to adjust the settings within this quick video recorder.
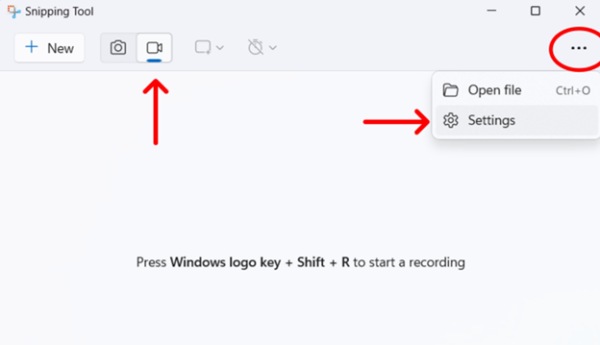
Step 1.Click the "Windows" button at the bottom left corner. Search for "Snipping Tool" and launch it. Click the "Record" button.
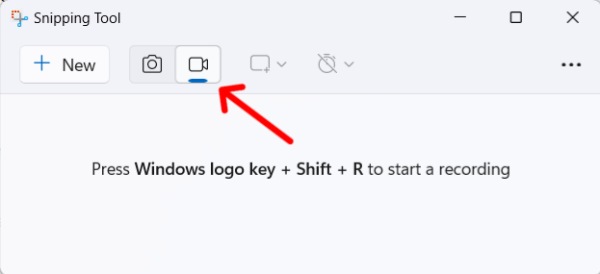
Step 2.In the upper right corner, click the "Options" button. Then click the "Settings" button to fix the Snipping Tool's audio recording issue.
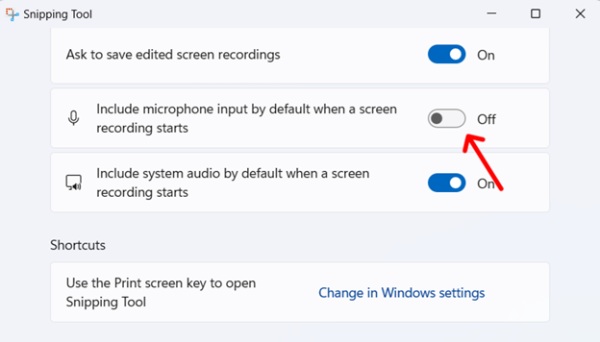
Step 3.Scroll down and find the "Include microphone input by default when a screen recording starts" option. Click the "Off" button to turn it on.
3. Allow Snipping Tool Audio
If you encounter problems with the Snipping Tool when recording audio, try checking its permissions. Perhaps you accidentally turned off its audio recording permissions earlier. The steps below can help you get it back on track.
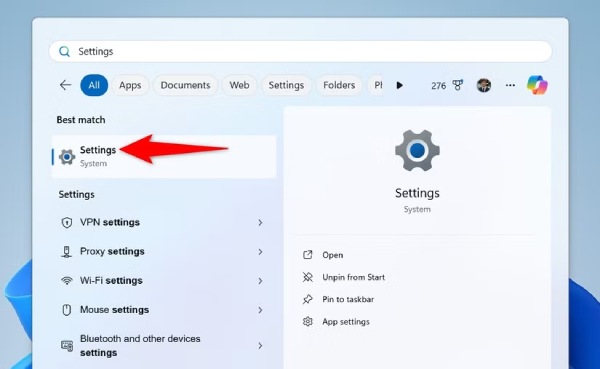
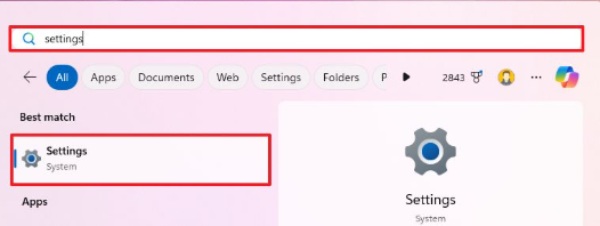
Step 1.Press the "Windows" button and search for "Settings" to open it.
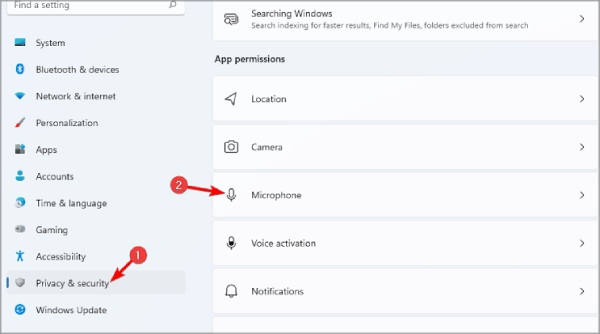
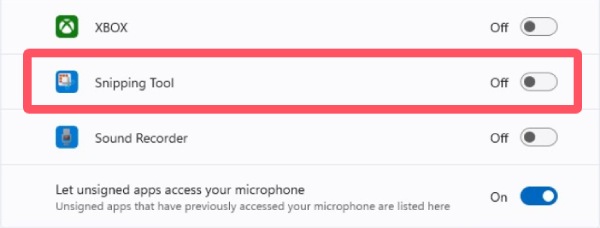
Step 2.Find and click the "Privacy & security" button. Then, click the "Microphone" to fix the Snipping Tool problem with recording audio.
Step 3.To enable microphone access in Snipping Tool, click the "Off" button next to it to enable access.
4. Quick Repair via Windows
If the Snipping Tool's problem with recording audio is caused by a corruption of the tool itself, you can try the Quick Repair. This feature is built into Windows, allowing the system to quickly check and fix any issues with the Snipping Tool.
Step 1.Press the "Windows" button. In the pop-up window, click the "Settings" button. Or you can search for it if it doesn't appear.
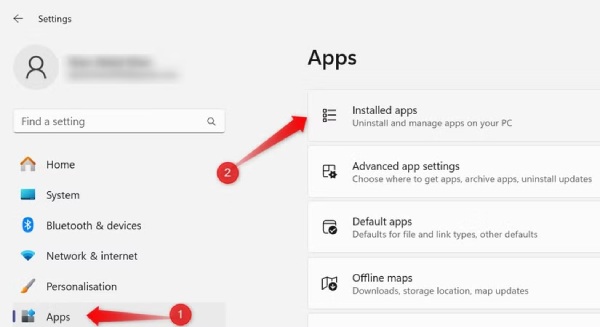
Step 2.In the left panel, click the "Apps" button. Then, click the "Installed apps" button to find this video recorder for Windows 10.
Step 3.Click the "Options" button behind the "Snipping Tool" tab. Then, click the "Advanced options" button.
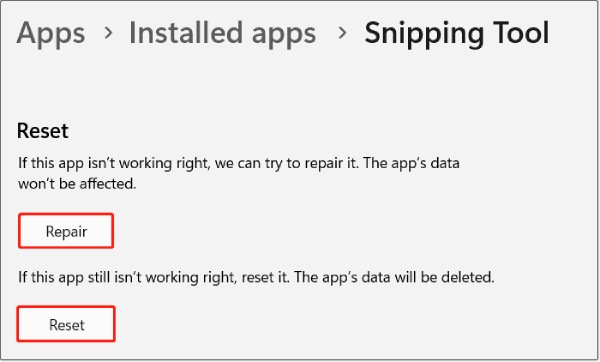
Step 4.In the new window, click the "Repair" button to fix the Snipping Tool problem with recording audio.
5. Update Realtek Audio Driver
You can also try updating the Realtek driver. An outdated audio driver may prevent the Snipping Tool from recording sound properly. If you're having trouble recording audio with the Snipping Tool, try the steps below to resolve the issue.
Step 1.Click the "Search" button on the Taskbar and navigate to the "Device Manager" tab.
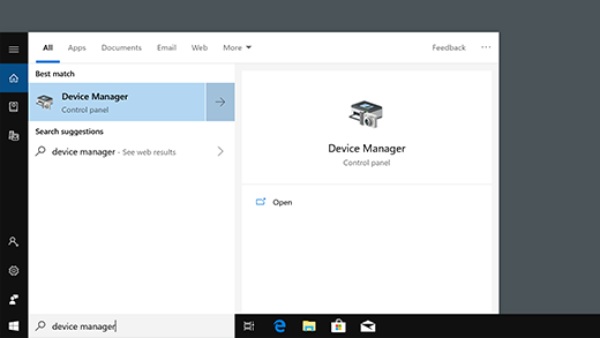
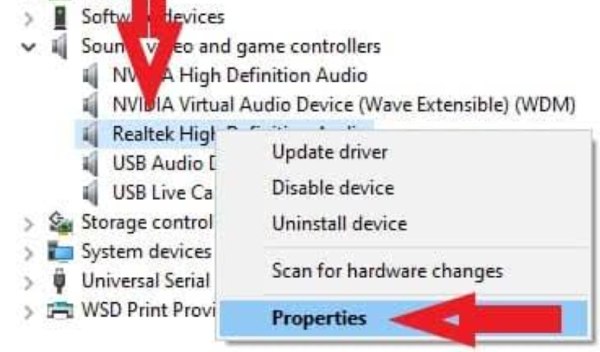
Step 2.In the pop-up window, find and right-click the "Realtek High Definition Audio" button. Then, right-click the "Properties" button.
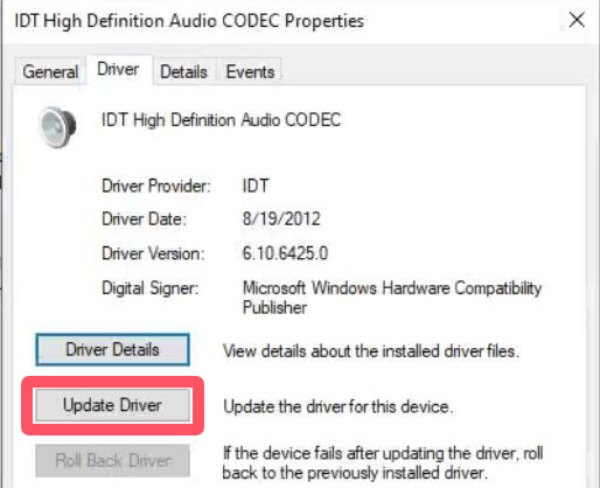
Step 3.Under the "Driver" tab, click the "Update Driver" button to fix the Snipping Tool problem with recording audio.
How to Record Audio with Snipping Tool After Fixing Problems
Does the Snipping Tool record audio? The short answer is YES. You can use this built-in Windows tool to record audio along with videos. So, how can you get started quickly? Don't worry. Even if you're a beginner, you can follow the steps below to get started right away.
Step 1.Press the "Windows + Shift + S" buttons together. It will summon the Snipping Tool on your Windows computer.
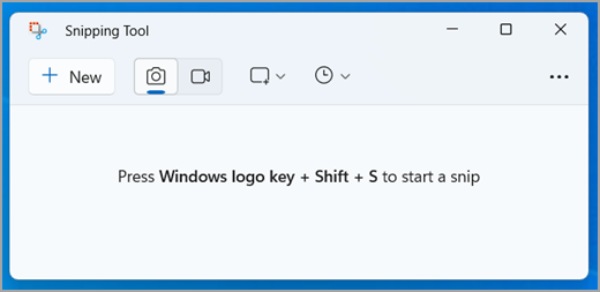
Step 2.To record a video using Snipping Tool, click the "Record" button. After selecting the specific area, the process will start.
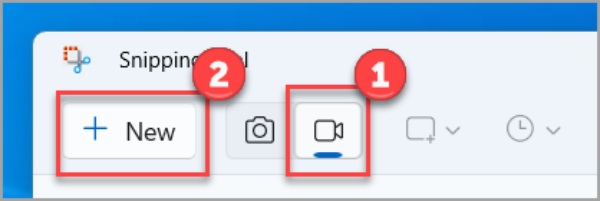
Step 3.Once finished, click the "Stop" button. The recording will be saved automatically in the selected folder.
A Trustworthy Solution to Any Snipping Tool Problem with Recording Audio
Although the quick fixes mentioned above are effective, you'll need to test and adjust them one by one. This whole process can be complicated to many people. Besides, when it comes to deeper and more serious issues, these quick fixes may not help you resolve Snipping Tool problems with audio recording. In that case, you can use a more convenient tool to avoid such issues from the start. AnyRec Screen Recorder is a great option. It allows you to record your screen with audio in its original quality.
Record videos with audio based on your customized settings.
Set all the audio settings before the recording process.
Add different annotations when recording screens with audio.
Customized hotkeys to record screens with audio easily.
Secure Download
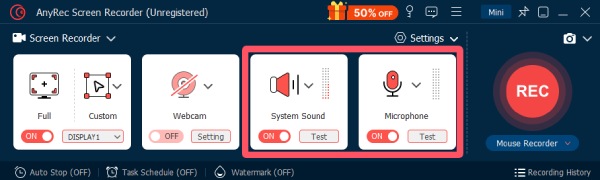
Step 1.Launch AnyRec Screen Recorder on your Windows PC. Click the "Select Area" button to select the recording area.
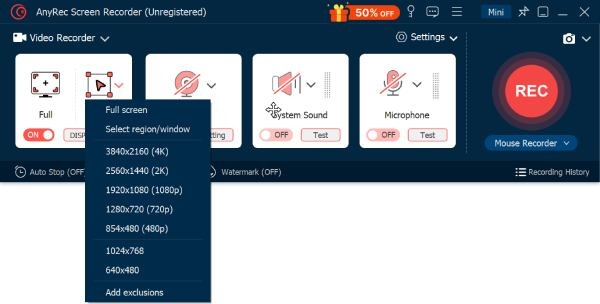
Step 2.Now, you can select the audio settings. These settings allow you to record the screen without the Snipping Tool's problem with recording audio.
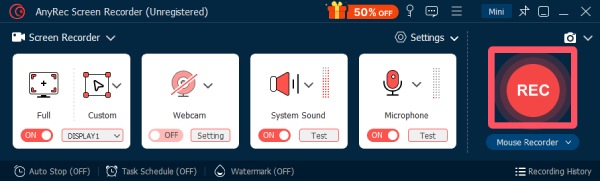
Step 3.Click the "Start" button to start the recording. Once finished, click the "Stop" button.
Conclusion
When you encounter issues such as the Snipping Tool not recording YouTube audio, you can try the quick fixes provided in this post. These simple adjustments can help get the Snipping Tool back on track quickly. If you don't want to try these steps one by one, you can use a reliable screen recording tool. AnyRec Screen Recorder allows you to record any content with audio in its original quality.
Secure Download
Related Articles
About Our Author