How to Restore Faces on Stable Diffusion Step by Step
In recent years, Artificial Intelligence has made progress in any field to increase realistic results, especially for photo generators. But sometimes, you still need to restore faces in Stable Diffusion. Because although it can automatically create pictures from prompts in seconds, the drawback here is the distorted or blurred parts of the faces. This could be improved with different methods. This article will discuss each option, so find the best one to restore faces in Stable Diffusion.
Guide List
Part 1: Why Faces Are Blur in Stable Diffusion Part 2: How to Restore Face in Stable Diffusion with AUTOMATIC1111 Part 3: Use Google Colab to Restore Faces in Stable Diffusion Part 4: FAQs about Restoring Faces in Stable DiffusionPart 1: Why Faces Are Blur in Stable Diffusion
Before you jump to restore faces in Stable Diffusion, let’s answer this related question. A neural network with a massive dataset of pictures trains the AI photo generator. This technique is the core system of the tool, generating high-quality output effortlessly. Unfortunately, it is still not perfect and would sometimes stray the results from the input prompts. This cause the distortion you see in the generated pictures, missing subtle things and variations on the human face, hands, and other parts.
Additionally, some settings need to be accurately tweaked, and one of them is the CFG scale. It is a massive factor for the output as it can align the details to the prompt. Another one is the prompt used. Even if you include all the known words as the prompts, Stable Diffusion will likely give you distorted results if it’s out of prior knowledge. Still, let’s see the methods to fix the distortion on the AI photos.
Part 2: How to Restore Face in Stable Diffusion with AUTOMATIC1111
You can consider all the possible causes of distorted human faces in the generated pictures. But fortunately, you can still fix it on Stable Diffusion with the two methods below.
1. Restore Faces with AUTOMATIC1111 stable-diffusion-WebUI
A1111 is an additional solution for advanced users. It offers the most new features, but remember that it is not the most accessible platform since it needs more documentation. Also, it has a very intimidating list of features that makes the setup more complicated. Still, consider A1111's advantages in filling distorted parts, color correction, and image enhancement. See the demonstration below on how to use AUTOMATIC1111 stable-diffusion-WebUI to restore faces on Stable Diffusion:
Step 1.After generating a picture on the tool, navigate to the menu and locate the "Restore Faces" option. Click on it to apply the solution.
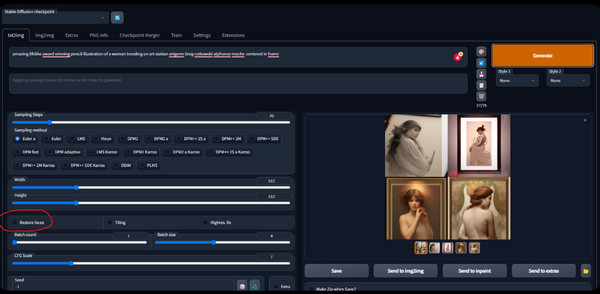
Step 2.If you wish to fix the eyes or other parts, upload a new picture to the Extra Tab menu. Ensure to put the impact of Code Former or GFPGAN and more configurations if needed.
2. Inpainting with AUTOMATIC1111 stable-diffusion-webui
Inpainting is another feature you can find in AUTOMATIC1111 stable-diffusion-webui. One of its functions is to fill in the missing details of the generated picture, as a powerful image upscaler for Stable Diffusion. The best part is that the user can manually select the image parts to edit, and the tool automatically generates new details. Follow the demonstration below to use Inpainting:
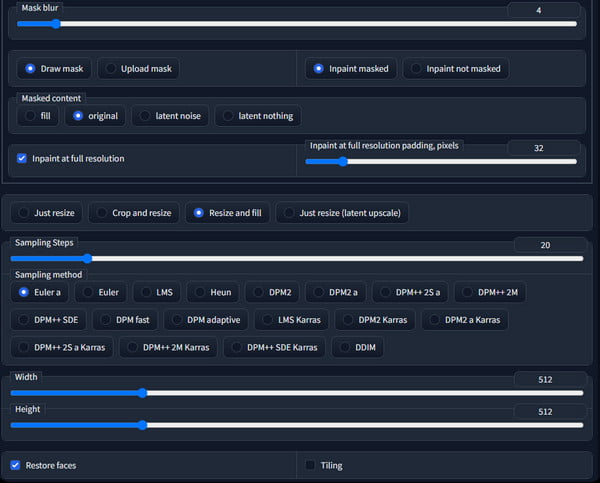
Step 1.Navigate to the img2img menu and select the Inpaint option. Choose the part you want to fix; it can be the human face or parts like eyes, ears, etc.
Step 2.Configure the settings according to your needs. If you are unfamiliar with the options, try applying the settings from the picture below.
Part 3: Use Google Colab to Restore Faces in Stable Diffusion
Since Stable Diffusion is made out to the public, even for the paid version, configuring can be done with Hugging Face Spaces via Google Colab. This face editing app is also free, and you only need a few clicks to restore the faces in the pictures. Google Colab is a cloud-based platform so you might get intimidated by the codes around it. In contrast, you don’t have to learn coding to run this program; instead, follow the simple steps below.
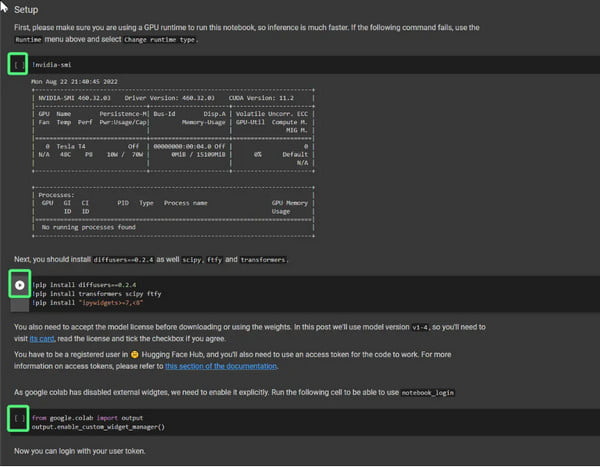
Step 1.Download Stable Diffusion from Hugging Face and create an account. Then, copy Stable Diffusion Colab Notebook saved from your drive. At this step, ensure you use Google Colab on GPU. You can change this from the Runtime menu under Change Runtime Type.
Step 2.Run the first cells by hovering your mouse over each cell on the platform. Click the "Play" button and wait for the green checkmark when it is finished. You also must run the fifth cell to download all necessary files. Generate the first image with the restoration process by entering the appropriate prompts.
Bonus Tips: Shrink Stable Diffusion Restore Face Images
Suppose you are good with restoring faces in Stable Diffusion, but you want to reduce the file size of the pictures. In this case, you can use AnyRec Free Image Compressor Online for the easiest method. It can reduce the file size by up to 80% while keeping the original image quality. This tool provides 40 free slots for uploads with a maximum of 5MB for each picture to compress to KB.
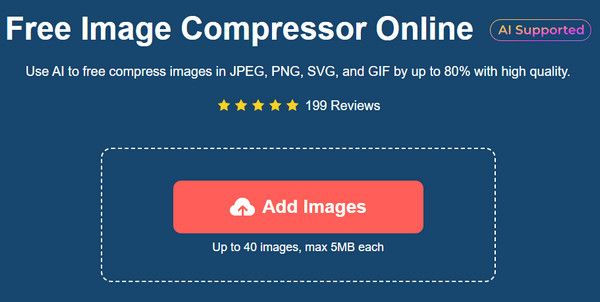
- Compress images to keep the original image quality and data.
- Shrink batch of Stable Diffusion generated images in one click.
- Support image types, including JPEG, PNG, SVG, and GIF.
- No need to create an account, and no watermark is applied.
Part 4: FAQs about Restoring Faces in Stable Diffusion
-
1. Which settings should I configure on A1111?
With its extensive list of settings, you can configure these options for restoring faces. Check for the CodeFormer, Quick Settings from the Settings page, and select VAE released by Stability after downloading it.
-
2. Can I restore faces in Stable Diffusion using the CFG scale?
No. Although the option will create a closeness to the prompt and the generated images, there is still no guarantee that it will fix the human faces. Moreover, the best option for the CFG scale is between 7 to 10, limiting you from further configuration.
-
3. What is the disadvantage of generating a full-body image with an AI tool?
The distorted parts are the main disadvantage of a full-body generation in Stable Diffusion. It could be the whole face, legs, extra limbs, etc. It can get worse when you create it with a small resolution of around 1024px or lower.
-
4. What is an alternative method to get a good face in Stable Diffusion?
Prompts play a massive role in the AI generator. It is suggested to include keywords of a particular artist and a specific description, such as facial details and negative prompts.
-
5. Is it an error to have duplicates in Stable Diffusion?
Yes. When you see two faces after generating a photo, you must fix it with the solutions mentioned in this article. However, the error usually occurs when using portrait image size, so it can be fixed by changing the image size.
Conclusion
While receiving a distorted photo from Stable Diffusion is disappointing, you can still restore faces in Stable Diffusion using A1111, Inpainting, and Google Colab. For effective image compressing, it is recommended to use AnyRec Free Image Compressor Online. Visit the official website and see the best solution!
Related Articles:
About Our Author