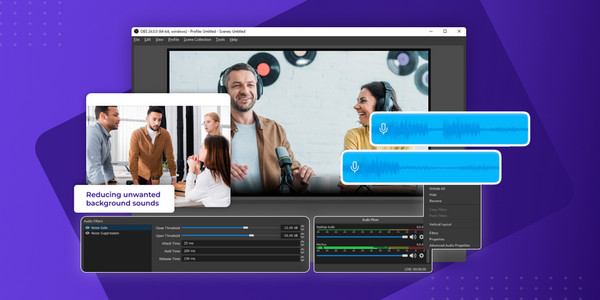
How to Use OBS Noise Gate to Remove Background Noise
Among the most satisfactory features of OBS Studio is the Noise Gate, which is used to reduce the background noise or completely get rid of it if you want to. However, many users have felt challenged as they have no idea about using this feature properly. Thus, this entire post will explore the OBS Noise Gate settings for you to learn how to optimize them to get crystal-clear audio, alongside valuable tips and an alternative. So, stop wasting any time, and begin reading now!
Guide List
What is the Noise Gate on OBS Studio How to Remove Background Noise with Noise Gate on OBS More Tips on How to Improve the Mic and Audio Quality Best Alternative to OBS Noise Gate to Record High-quality Audio FAQs about OBS Noise Gate FilterWhat is the Noise Gate on OBS Studio
You know how frustrating the unwanted background noise in your video can be; thus, streamers concentrate on reducing these noises. The Noise Gate OBS won’t just eliminate extreme noises like clicks or traffic but also prevents any unintended sounds you might make in near proximity to your microphone. Also, the feature assesses audio levels, specifying whether they gain an adequate threshold to start and let audio passage.
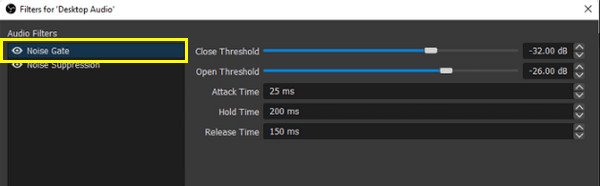
Once you have configured the OBS Noise Gate settings correctly, there should be no input detected by your microphone during your silence. When this occurs, it implies that the closing threshold is activated. Therefore, to acquire the best noise gate settings, you must modify parameters such as closed and open thresholds, hold and release times, and attack. These settings can help you achieve an apparent noise reduction in your video projects. Here are the features you can use:
1. Close Threshold
The level that indicates no audio will pass through. When the input falls under this threshold, the gate is closed, meaning no audio is permitted to pass.
2. Open Threshold
This OBS Noise Gate feature lets audio pass through. Once the signal goes beyond this threshold, the gate is opened, allowing audio to pass.
3. Attack Time
The duration in which the gate takes to be completely accessible once the input travels the open threshold. The shorter it takes, the more quickly the gate will open, letting audio pass through instantly, while the longer the attack time, the more natural the sound will be.
4. Hold Time
This time determines how long the OBS Noise Gate will remain open after the signal exceeds the open threshold. It can be helpful in saving a sound level in possibilities where rapid changes in audio are unwelcome.
5. Release Time
It is the duration for the gate to utterly close once the input signal falls under the closed threshold. The shorter it takes, the quicker the gate closes, which can lead to abrupt cutoffs. Meanwhile, the longer the time, the more natural the sound will be.
How to Remove Background Noise with Noise Gate on OBS
After knowing how the Noise Gate OBS works together with its functions, understanding how to use it to reduce noises will be much more painless now. The built-in audio filter in OSB Studio can be found straight on the main screen; make sure to use the OBS Noise Gate filter in a noisy environment where you need to remove unwanted sounds. Here are the steps to follow:
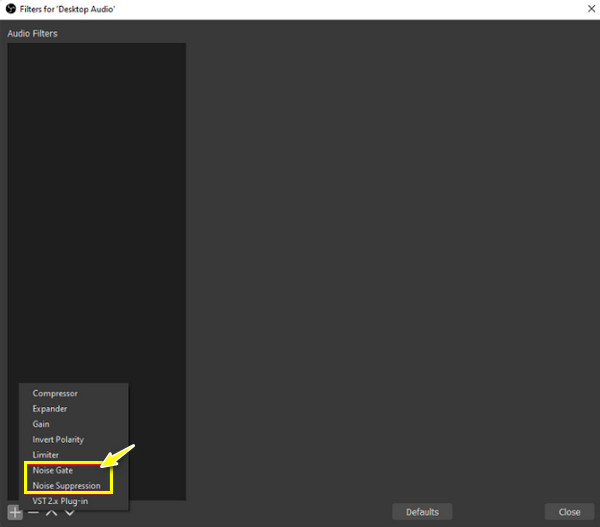
Step 1.When you have launched the OBS Studio, locate the "Audio Mixer" from the main interface and click the "Settings" button to change the audio settings. Later, select the "Filters" option from the list and choose the desired audio filter you wish to use.
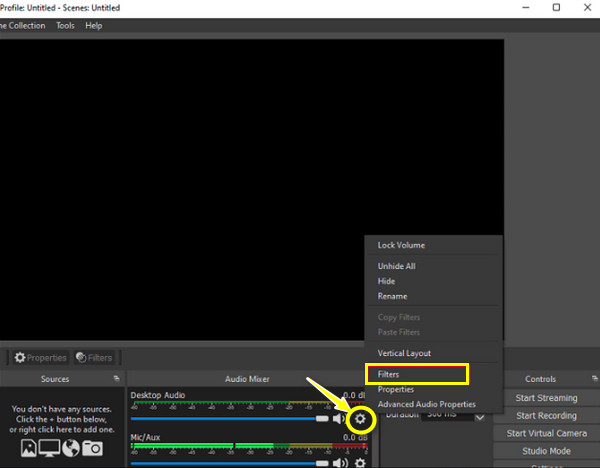
Step 2.Proceed to click the "Add" button and decide on one filter from the list. Ensure you choose the "Noise Gate" option and set its settings correctly to filter out entirely any sound that doesn't belong to the volume range.
Step 3.After that, click the "Close" button to apply changes. Now, check if the OBS "Noise Gate" filter has been applied correctly to your video.
More Tips on How to Improve the Mic and Audio Quality
Are you done understanding how to use the OBS Noise Gate feature to reduce background noises? If so, it’s nice if you’re confident about the audio quality you have. Besides modifying audio settings correctly within OBS, many settings are related to your microphone. Hence, here are some quick tips to ensure that your audio quality won’t let your viewers down.
1. Get the Best Streaming Equipment
A great choice of microphone brings quality audio sound. Consider looking for a mic with the correct polar pattern, which is more susceptible to picking up noises. You can also think of investing in accessories, like shock mounts and pop shields, to improve sound.
2. Have a Correct Microphone Distance
Position your microphone at the proper distance away from you. People would get the highest outcomes if the mic is between 6 and 12 inches away.
3. Use the OBS Noise Gate
This feature is handy for removing unwanted sounds, such as noise from keyboard clicks, traffic, conversations, etc. You can start with the -26.00dB open and 32.00dB close threshold.
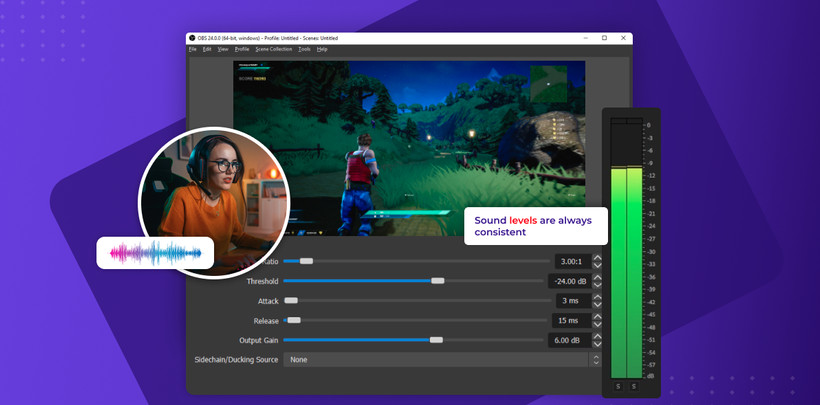
4. Modify the OBS Compressor
An essential microphone filter that will give you a more consistent and professional-sounding video broadcast.
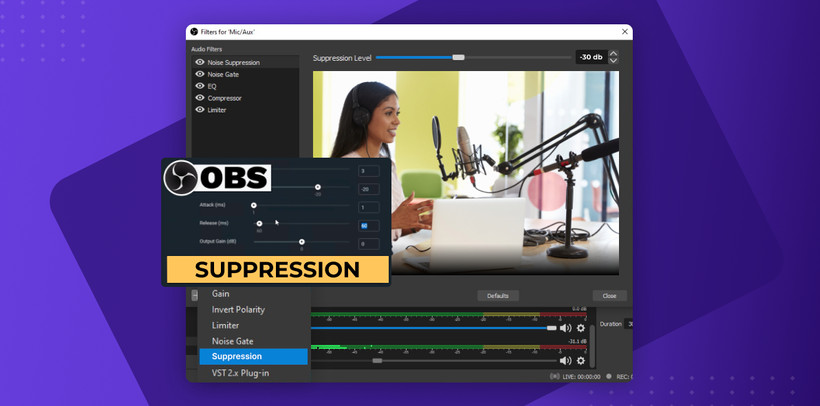
5. Make use of the OBS Noise Suppression
Together with the Noise Gate OBS, the noise suppression enables you to eliminate the background sounds even more. The suggested start settings will be around -30 dB.
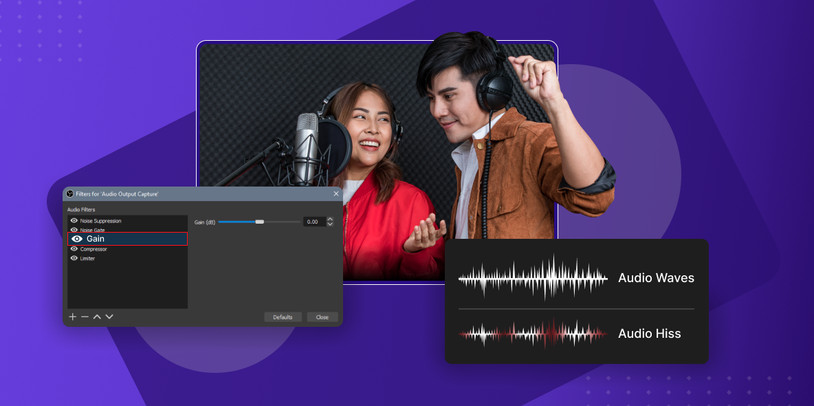
6. Add the OBS Gain
This OBS recording setting won’t demand much tweaking, as it either boosts your microphone's audio volume or decreases it.
Best Alternative to OBS Noise Gate to Record High-quality Audio
Are you having fun learning all the stuff about the OBS Noise Gate? Then you’ll surely enjoy the alternative AnyRec Screen Recorder offers in reducing background noises effectively. No steep learning curve will be experienced in this program throughout the process of getting rid of noises from your video. Whether it is unwanted sounds from traffic, near conversations, mouse and keyboard clicks, etc., the noise cancellation feature will easily remove those and will offer you crystal clear audio. Aside from offering an alternative to OBS Noise Gate, altering audio settings is also supported based on your requirements for System Sound and Microphone options.

Record audio only or capture screen with the microphone and system sound.
Noise cancellation and microphone enhancement to improve audio sound.
Adjust the volume, format, quality, and more settings to export high-quality audio.
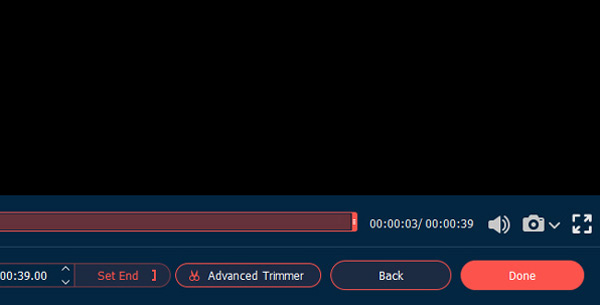
Best OBS Noise Gate alternative to trim the unwanted parts with noises.
Secure Download
Secure Download
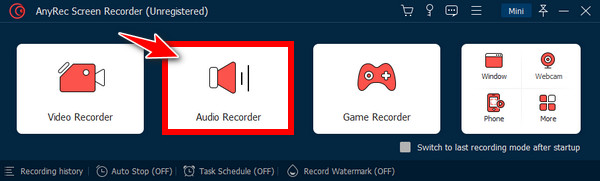
Step 1.Let’s commence with opening the AnyRec Screen Recorder first, then go to the "Audio Recorder" to record audio from a computer or microphone.
Step 2.Enable "Audio" options, like the "System Sound" to capture computer audio or the "Microphone" option to do voice narrations. Activate them based on your demands.
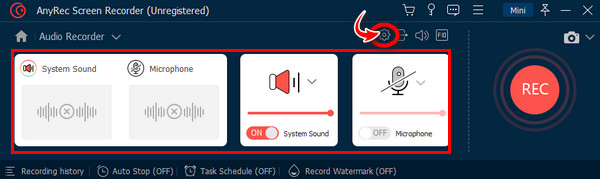
Step 3.Later, hover your mouse over the "Settings" button and click on it to open a window where you can adjust the "Audio" settings. Here you can enable the "Noise Cancellation" and "Microphone Enhancement" features.

Step 4.Returning to the "Audio Recorder" main screen; once ready, click the "REC" button to begin. At last, click the "Stop" button to save the recordings.
FAQs about OBS Noise Gate Filter
-
What are the best threshold settings for the OBS Noise Gate?
The suggested threshold settings are just beyond the ambient sound and below the breaths; the best setting for vocals is 1-3ms, which engages the gate very quickly, yet the sound will sound natural.
-
Do I need the shock mounts and pop shields before recording in OBS?
Although both aren’t required before recording, if you desire to reduce the unnecessary noise that your mic might receive, a shock mount and pop shield are safer to use. But you can also use the OBS Noise Gate to reduce unwanted noises without needing to use this equipment.
-
How can I use the OBS background noise removal correctly?
After locating the "Audio Mixer" on the main screen, adjust the audio settings for the system and microphone. Then, go to "Filters" by clicking the "Setting" button and select the filters you want to add.
-
How effective is the OBS Noise Suppression?
It is not effective for large amounts of noise but in reducing mild background noise only, including noise from fans or other environmental noises.
-
Should I use OBS Noise Gate or OBS Noise Suppression to reduce noise?
It is up to you since it goes down to what kind of audio you’re aiming for. If the noise is blocking the sound the way you don’t want to, then go for the Noise Gate filter.
Conclusion
Although facing background noises can be distracting and lessen the content quality, with the Noise Gate OBS Studio, you can eliminate those unwanted noises quickly and have crystal-clear audio. Now, you have a broad understanding of how Noise Gate OBS works alongside other filters within the program. However, if you still hesitate to use the program OBS, try its alternative, AnyRec Screen Recorder, which offers noise cancellation and enhancement features for your audio recordings. Try it today and achieve the audio you wanted!
Secure Download
Secure Download
Related Articles:
About Our Author


