Recommended iPhone Video Stabilizer Before/After Shooting
Many people are looking for a way to stabilize iPhone video. This is because during the video shooting process, shaking often has a significant impact on the clarity of the video, making it impossible for the subject to be presented clearly. So, is there any way to solve this video problem? This post provides you with methods to help you during the three stages: before shooting the video, during the shooting process, and after the shooting. You can read this post to learn how to stabilize videos on your iPhone at different stages.
Guide List
Preset: Enhanced Stabilization for Video on an iPhone A Built-in iPhone Video Stabilizer During Shooting A Powerful iPhone Video Stabilizer After ShootingPreset: Enhanced Stabilization for Video on an iPhone
If you want to ensure that the video remains stable throughout the entire process after shooting, you can achieve this by making some adjustments in the settings. This will provide some preset guarantees for the stability of the video. Once you have completed this setting, it will be automatically applied to stabilize your video every time you shoot a video in the future. However, this setting is placed quite deep, which makes many users unaware of its existence. You can follow the following steps to learn how to turn on video stabilization on an iPhone.
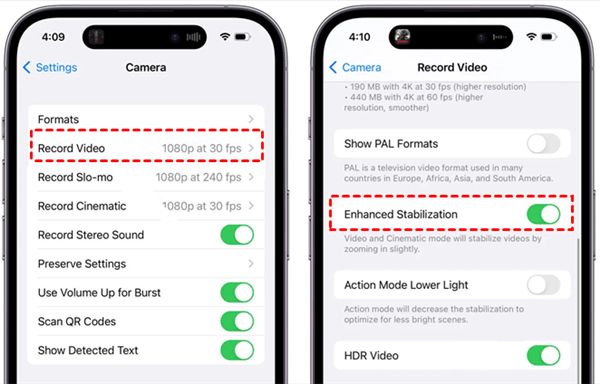
Step 1.Launch Settings, scroll down to locate and tap the "Camera" button to enter a new page.
Step 2.Under the "App Settings" tab, tap the "Record Video" button to adjust the presets for turning on this video stabilizer.
Step 3.Scroll down to find and tap the "Enhanced Stabilization" button. The Video and Cinematic mode will stabilize videos directly.
A Built-in iPhone Video Stabilizer During Shooting
Can you stabilize the video on iPhone during the shooting? If you are going to capture scenes with significant movements, such as running or jumping, the Camera app offers a dedicated mode to assist you in achieving better results. After enabling this mode, even if you are taking pictures while in motion using your iPhone, your video will largely focus on the subject being captured and will stabilize the screen as much as possible based on it. To apply this function during shooting, all you need to do is turn on the Action mode in the camera settings. Your iPhone can shoot video like an action camera. If you don't know how to operate, you can refer to the specific steps below.
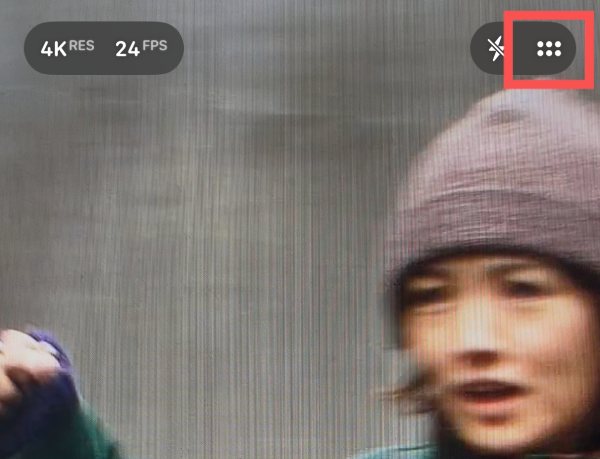
Step 1.When you open the Camera app and try to record a video using your iPhone, tap the "Options" button in the upper-right corner.
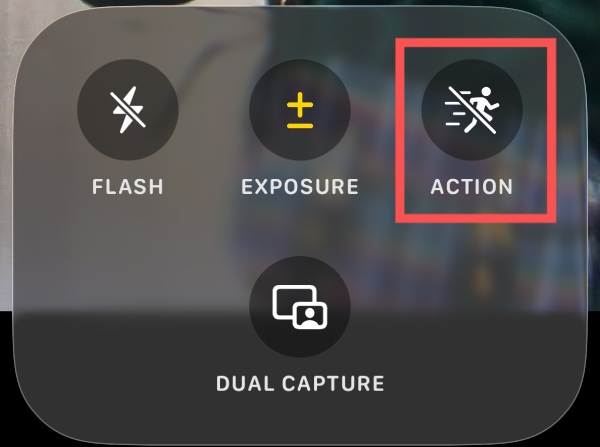
Step 2.A window will pop up at the bottom of your iPhone. Tap the "ACTION" button to proceed.
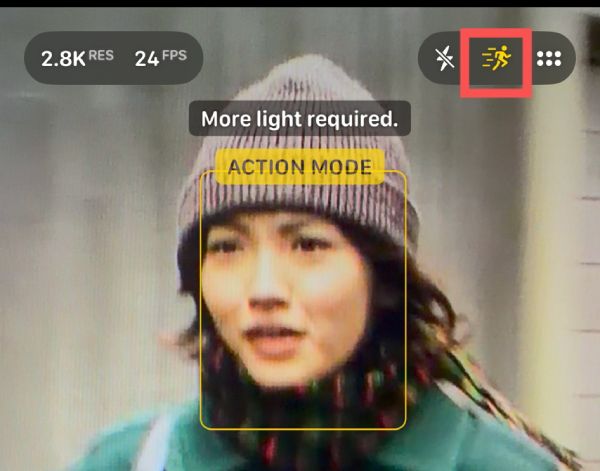
Step 3.Now, you will see the "ACTION" button is activated at the top. You can shoot the video with this iPhone video stabilizer.
A Powerful iPhone Video Stabilizer After Shooting
There are many times when you are trying to figure out how to stabilize the videos on your iPhone because you noticed screen jitter when you rewatched them some time after shooting them. In these videos, the images are often not clear enough. As the screen shakes, the camera loses focus, and the shaking makes the video unstable. At this point, you will need a professional tool to significantly reduce this kind of jitter through post-production, so as to make your video look better. AnyRec Video Converter can help you restore the stability of the video.
Effectively reduce the amplitude of video shaking for a better visual effect.
Stabilize the focus of the video from your iPhone through enhancement.
Provide a variety of other editing tools to assist you in polishing your video.
Support multiple common video formats, including MKV, MP4, etc.
Secure Download
Secure Download
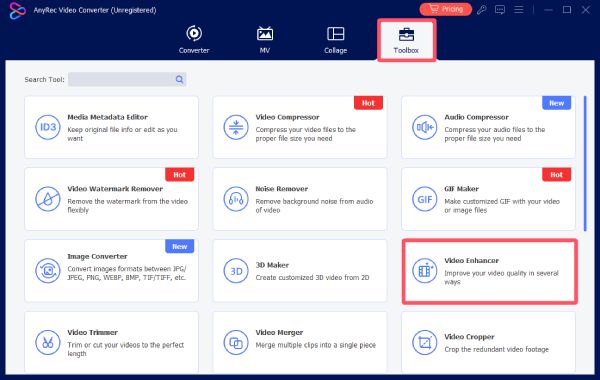
Step 1.After getting the video from your iPhone, launch AnyRec Video Converter and click the "Video Enhancer" button under the "Toolbox" tab.
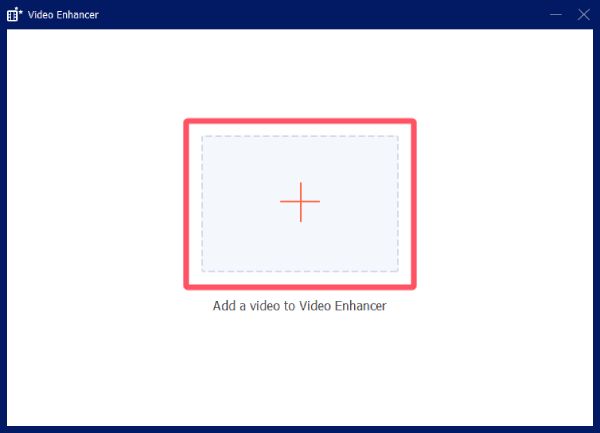
Step 2.In the new pop-up window, click the "Add Files" button to upload the shaking video to this iPhone video stabilizer.
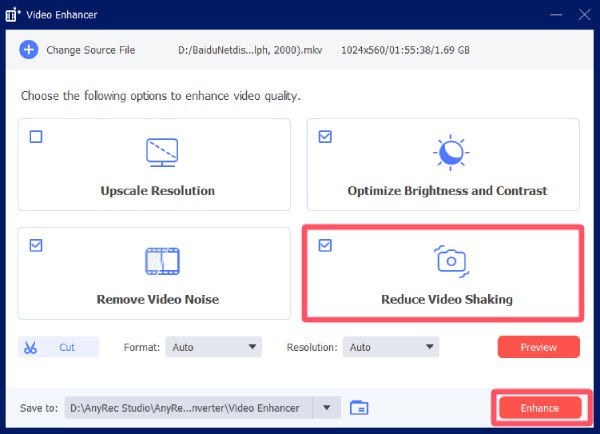
Step 3.Click the "Reduce Video Shaking" button to apply the effect. Finally, click the "Enhance" button.
Conclusion
This post offers you three different iPhone video stabilizers to suit various usage scenarios. For the preparation stage before shooting, you can open the settings to make presets to stabilize the video in advance. When shooting, turning on the Action mode can effectively reduce the shaking in the video. If you notice that the shaking in the video affects its clarity after the shooting is completed, you can use AnyRec Video Converter to enhance the video and make it clearer and more stable.
Secure Download
Secure Download
Related Articles
About Our Author


