6 Ways to Record Screen on iPad Air/Pro/Mini [Quick & Easy]
Knowing how to screen record on an iPad is a useful skill for capturing tutorials, gameplay, presentations, or important on-screen activities. Whether you are using an iPad Air, Pro, or Mini, Apple provides several ways to record your screen efficiently. However, beginners may not be familiar with all the available methods or which one best suits their needs. In this guide, you will explore multiple ways to screen record on an iPad, along with practical tips to achieve smooth and high-quality recordings.
Guide List
The Default Way to Screen Record on iPad Directly How to Record iPad Screen with the Help of Mac A Flexible Solution for Recording Screen on iPad Alternative Options for Screen Recording on iPad Tips for a Smooth Screen Recording on Any iPad FAQs About How to Screen Record on iPadThe Default Way to Screen Record on iPad Directly
If you want a quick and easy way to record your iPad screen, the built-in screen recording feature is the most convenient option. Apple has integrated this function into iPadOS, allowing users to start recording directly from the Control Center without installing any third-party apps. In this section, you will learn how to enable and use the default screen recording feature on your iPad.
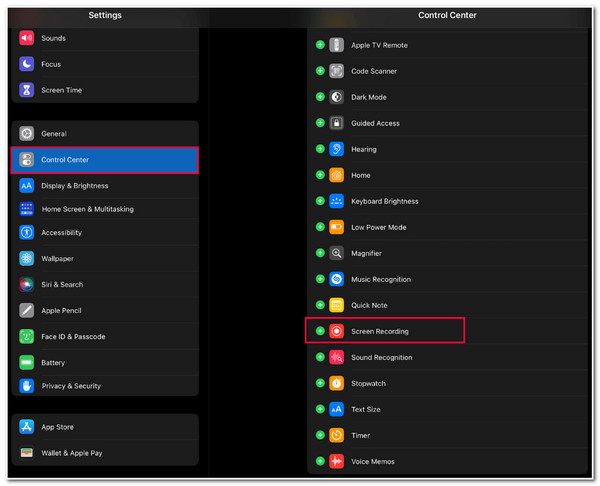
Step 1. To add the screen recording to the Control Center, tap the "Control Center" button in "Settings". Then, tap the "Add" button near the "Screen Recording".
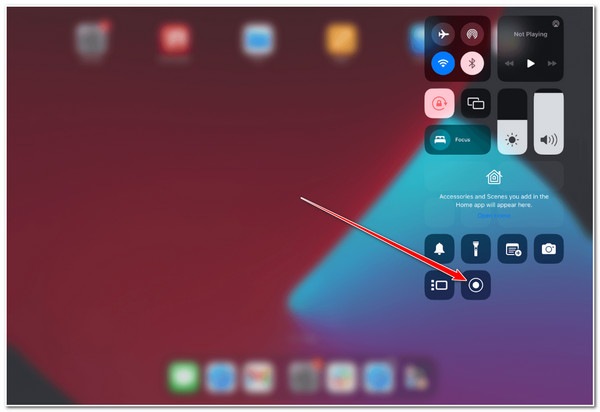
Step 2. Navigate to where you want to screen record on your iPad, scroll down from the top of your iPad, and find the "Record" button.
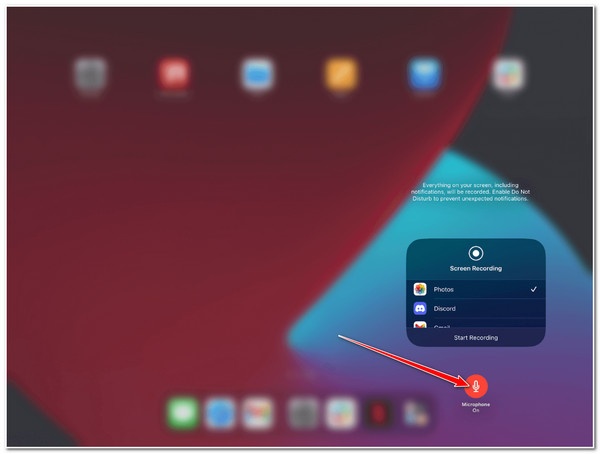
Step 3. Long-press the "Record" button and decide whether you like to record with your microphone or not.
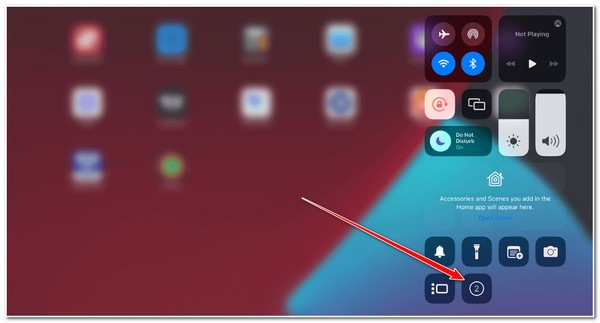
Step 4. Now, tap the "Record" button to start recording the screen on your iPad. Once finished, tap the "Stop" button.
How to Record iPad Screen with the Help of Mac
For users who want more control over recording settings or need to capture higher-quality videos, using a Mac and its default app as a quick video recorder can be a helpful solution. By connecting your iPad to a Mac, you can record the iPad screen using QuickTime Player. You can follow the steps below for longer recordings or professional purposes.
Step 1. Connect your iPad to your Mac using a USB cable. Then, tap the "Trust" button on your iPad and enter your passcode if required.
Step 2. Launch "QuickTime" on your Mac. Then, click the "File" button under the "Menu" tab. Click the "New Movie Recording" button.
Step 3. Click the "Red" button as soon as you click the "dropdown" button. Click the "iPad" button under the "Screen" tab.
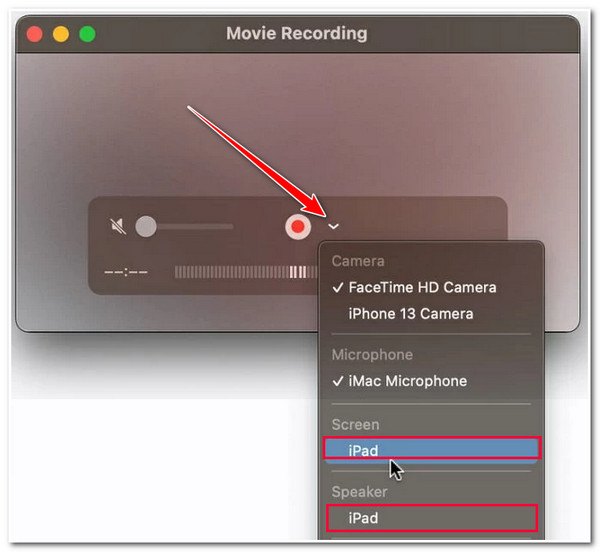
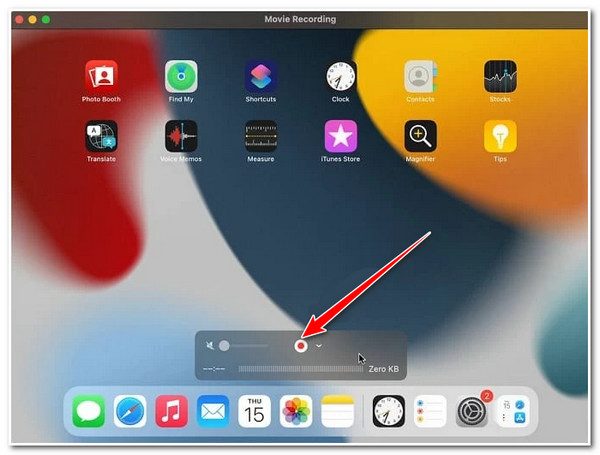
Step 4. Once your iPad's screen appears on your Mac, click the "Record" button to record the screen on your iPad. Once finished, click the "Stop" button.
A Flexible Solution for Recording Screen on iPad
If you are looking for a more powerful and flexible way to record your iPad screen, AnyRec Screen Recorder is a great option. It allows you to mirror your iPad screen to a computer and record it with high quality and stability. With features such as customizable recording area, system sound capture, and real-time editing, it provides a more advanced recording experience. This makes it ideal for users who need better quality and more control over their recordings.

Support recording iPad screens regardless of the model and iOS versions.
Record the screen on an iPad with no maximum time limit or watermark.
Record your iPad’s on-screen activities with 4K resolution, 60 fps, and no lag.
Allow you to take a screenshot while recording your iPad’s screen.
Secure Download
Secure Download
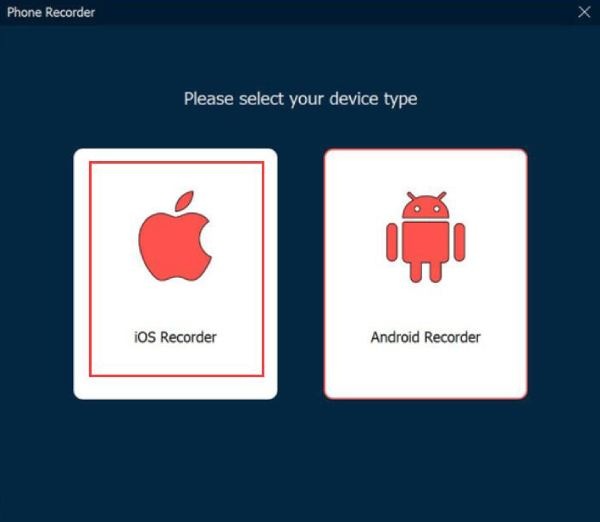
Step 1. Launch AnyRec Screen Recorder and click the "Phone Recorder" button in the main interface. Then, click the "iOS Recorder" button.
Step 2. From the Control Center of your iPad, tap the "Screen Mirroring" button and then the "AnyRec Screen Recorder (name of your computer)" button.

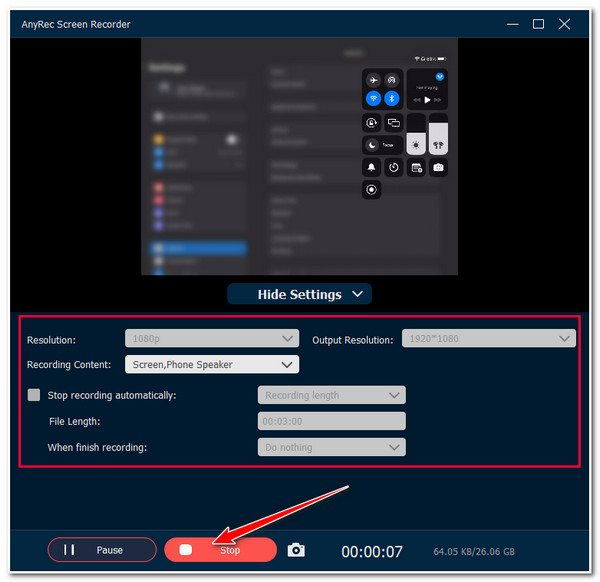
Step 3. Click to set the Resolution to "4K" and Output to "500*1080" to record the screen on the iPad. Then, click to select the "Recording Content" that you want.
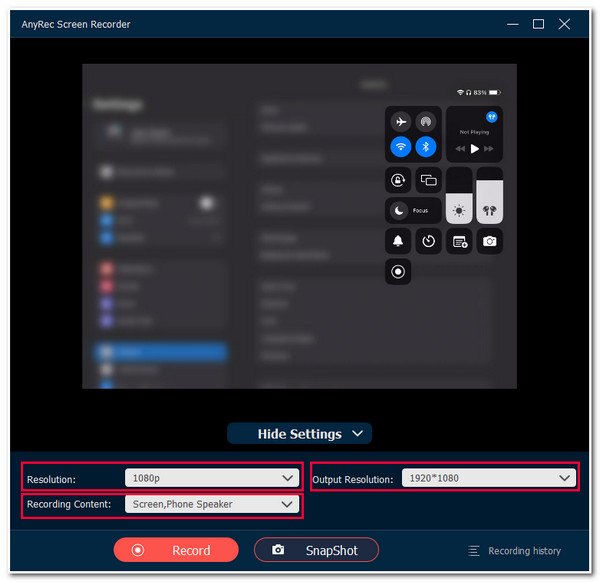
Step 4. Now, click the "Record" button to start recording the screen on the iPad. Finally, click the "Stop" button and save it by clicking the "Done/Save" button.
Alternative Options for Screen Recording on iPad
If the built-in feature or Mac solution does not fully meet your needs, there are also several alternative tools available. These free screen recorders with no watermark offer different features that you can select according to your requirements. Below are three popular choices for recording your iPad screen.
Option 1: Go Record
As a free and open-source recording software, Go Record can be used with screen mirroring to capture iPad content. It is widely used for recording due to its powerful customization options. Users can adjust resolution, frame rate, and audio settings to achieve professional-level screen recordings on their iPad.
- Pros
- Free and open-source with no limitations
- Highly customizable recording settings
- Support high-quality recording and streaming
- Cons
- Not many modes for various scenarios
- Complex interface for beginners
- No direct iPad app support
Option 2: DU Recorder
DU Recorder is a simple iOS screen recorder. This allows you to record your iPad screen easily. It provides a smooth and stable process without consuming too many resources on your iPad, making it suitable for presentations and demonstrations.
- Pros
- Easy to set up, even for beginners
- Add subtitles to your recordings
- Clean and user-friendly interface
- Cons
- Paid software after free trial
- Require a stable Wi-Fi connection
- Limited editing features
Option 3: Record it!
Record it! and similar apps are designed for mobile screen recording. It means you can record the screen on your iPad using it with no effort. Besides the basic recording feature, the tool also provides many features beyond the default iPad tool. They often include options like live streaming, video editing, and customizable recording settings, making them useful for casual content creators.
- Pros
- Easy to use with built-in tools
- Support capturing gameplay on iPad
- Suitable for beginners
- Cons
- May include ads or in-app purchases
- Limited advanced features
- Output quality may vary
Tips for a Smooth Screen Recording on Any iPad
To achieve the best screen recordings on your iPad, it is important to optimize your settings and environment before starting. A smooth recording not only improves video quality but also ensures a better playback and sharing experience.
- Ensure your iPad has enough storage space before recording.
- Turn on Do Not Disturb mode to avoid interruptions.
- Close unnecessary background apps to improve performance.
- Use a stable internet connection if recording online content.
- Adjust microphone and system audio settings for clear sound.
- Keep your device fully charged or connected to power.
FAQs About How to Screen Record on iPad
-
1. Why can’t I find the screen recording option on my iPad?
If the screen recording feature is not visible, it may not be added to the Control Center. You need to go to Settings > Control Center and add "Screen Recording." Once enabled, you can access it quickly from the Control Center.
-
2. Can I record sound while screen recording on iPad?
Yes. The built-in screen recorder allows you to capture system audio, and you can also enable the microphone to record your voice. Long-press the record button in Control Center and turn on the microphone option before recording.
-
3. Does screen recording on iPad reduce video quality?
Generally, the built-in solution provides original video quality during the recording process. But it also means that you cannot decide the file size and other detailed parameters. You can use professional software to gain full control over your results.
Conclusion
In conclusion, there are multiple ways to screen record on an iPad, each suited to different needs. While many options are available, most of them have some limitations. With AnyRec Screen Recorder, you can create smooth and effective screen recordings on any iPad.
Secure Download
Secure Download
About Our Author


