A Comprehensive Guide: How to Take Screenshots Within VLC
How do you take screenshots in VLC Media Player? You often want to record wonderful moments when you use VLC to watch videos. Fortunately, it allows you to take high-quality screenshots directly within the program. This guide will show you different methods of taking snapshots in VLC and explore additional options for customizing or enhancing the screenshot effect.
Guide List
How to Take Screenshots Using VLC How to Preset Screenshots Within VLC A Quick Solution to Enable Screenshots in VLC [Bonus] How to Take Screenshots Outside of VLCHow to Take Screenshots Using VLC
VLC Media Player has a built-in snapshot feature that lets you capture still images from any video you watch. It's simple to use and works across different platforms, making it a handy tool for saving specific frames without relying on third-party software.
Solution 1: Default Hotkey
If you want to take a screenshot within VLC Media Player, using the default hotkey to accomplish this task quickly is the easiest way. You can take screenshots in the following unrestricted manner:Simply press the "Shift" button and the "S" button together.
Solution 2: Video Menu
By manually selecting the option to take a screenshot through the menu bar, you can also quickly accomplish this task within VLC:
Click the "Snapshot" button under the "Video" tab to take the screenshot.
Solution 3: Advanced Control
If you are accustomed to bringing up the advanced control panel while watching, then it is also a very convenient option for taking VLC snapshots:
Click the "Advanced Controls" button under the "View" tab. Then, click the "Take a snapshot" button.
How to Preset Screenshots Within VLC
VLC doesn't just let you capture frames - it also allows you to preset how those screenshots are saved. From choosing the image format and storage location to customizing hotkeys for quicker access, these settings make taking snapshots more efficient and personalized.
Set Formats of VLC Screenshots
Suppose the default PNG format of VLC screenshots is unsuitable for your daily use or not convenient enough. In that case, you can also customize the image format of screenshots obtained in VLC Media Player according to your needs:
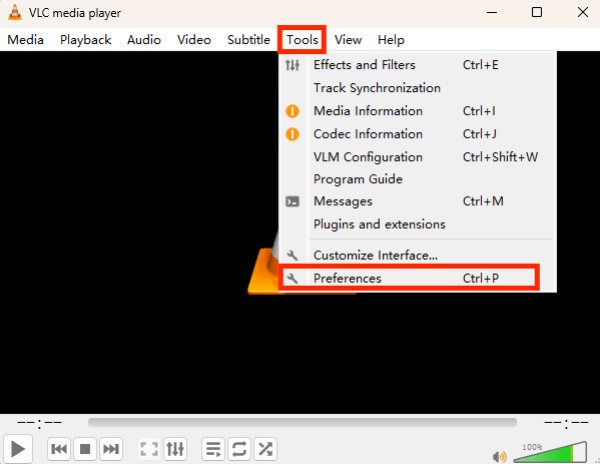
Step 1.Launch VLC Media Player and click the "Preferences" button under the "Tools" tab.
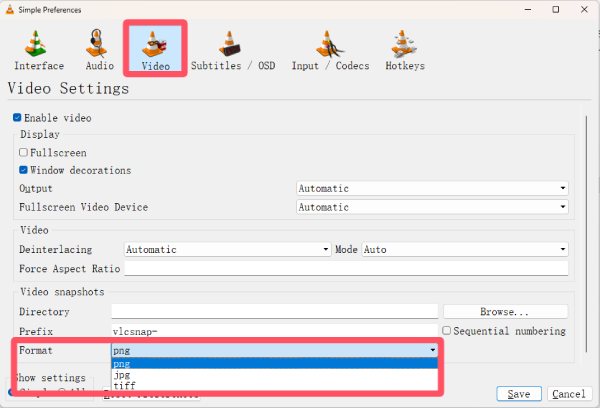
Step 2.Under the "Video" tab, click the "Format" button and click to choose the desired format for your VLC screenshots.
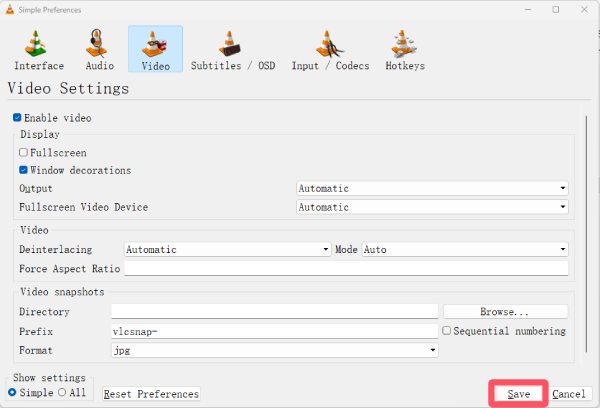
Step 3.Once the file format is determined, click the "Save" button to apply the changes.
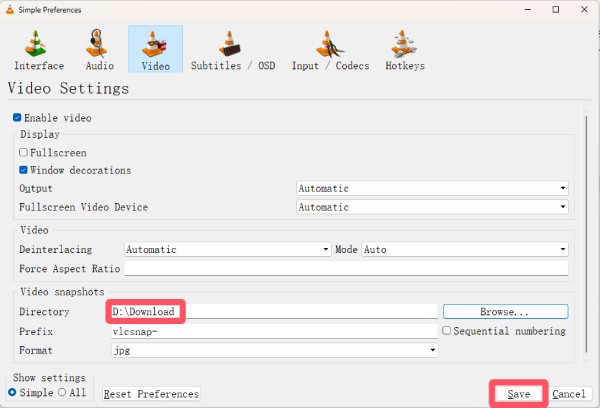
Set Destination of VLC Screenshots
If you're confused about where your screenshots are saved after taking them, it's essential to preset their storage location before using VLC to take screenshots. You can quickly customize VLC's screenshot storage location by following the simple steps provided below:
Step 1.Launch VLC Media Player and click the "Preferences" button under the "Tools" tab.
Step 2.Under the "Video Snapshots" tab, click the "Browse..." button to select the fold for saving your VLC screenshots.
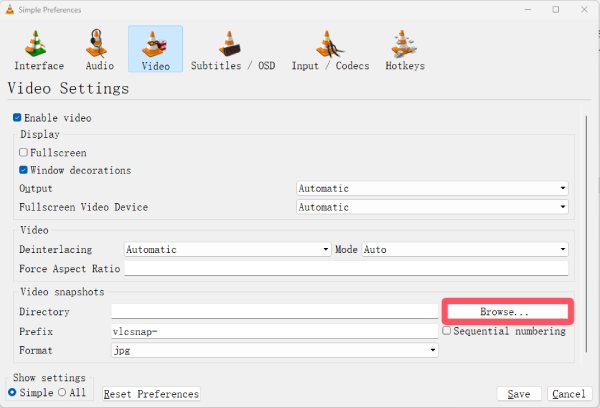
Step 3.You can check the folder under the "Directory" tab. Finally, click the "Save" button to apply the changes.
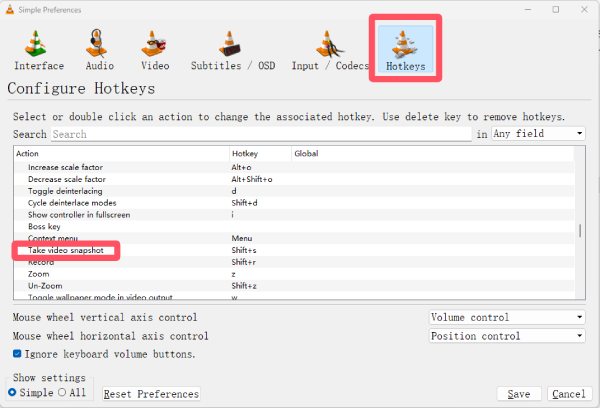
Set Hotkeys for VLC Screenshots
Although VLC Media Player provides convenient hotkeys for taking screenshots to handle this task when you encounter a favorite scene quickly, it may conflict with some of your software hotkeys, resulting in screenshot failure or opening other software. In this case, you can customize VLC's screenshot hotkeys to change to a more convenient and conflict-free screenshot method:
Step 1.Open "Preferences" window as before, click the "Hotkeys" button. Locate where the "Take video snapshot" button is.
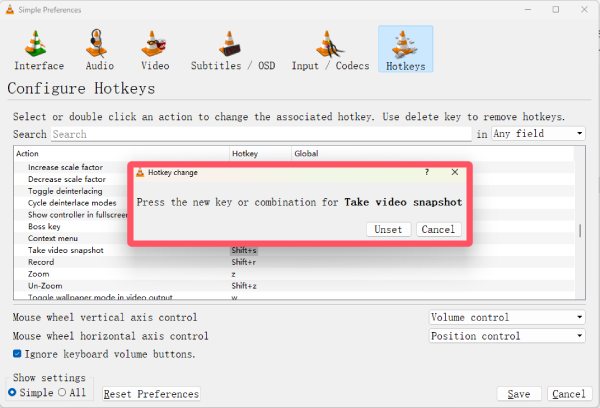
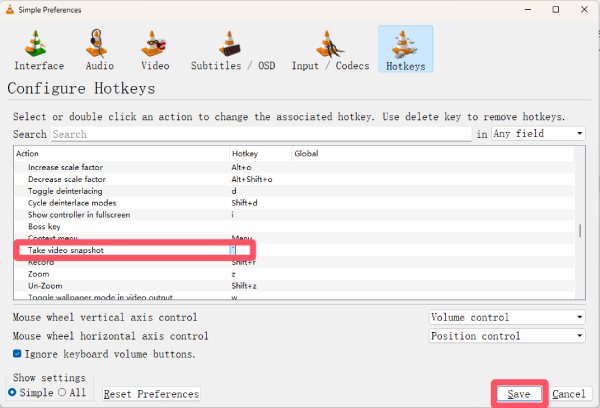
Step 2.Double-click the "Shift" and "S" button and type the new hotkeys to change the hotkey for VLC screenshot.
Step 3.Once the hotkey for screenshot is changed, click the "Save" button to apply the adjustment.
A Quick Solution to Enable Screenshots in VLC
Although it is a convenient screenshot option, you may occasionally encounter situations where the screenshot function in VLC stops working, resulting in blank or distorted images. Generally speaking, the cause of this problem is interference from hardware acceleration. By adjusting this setting, you can quickly restore the screenshot function or screenshot not working on Mac and capture the screen again smoothly.
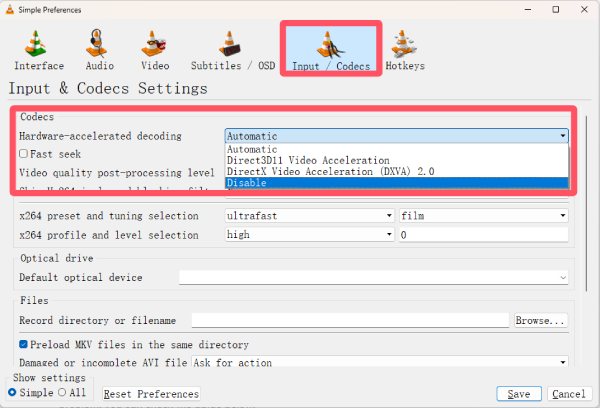
Step 1.Launch VLC Media Player and click the "Preferences" button under the "Tools" tab.
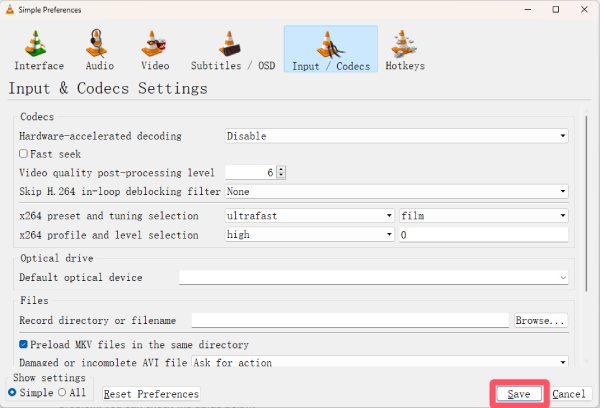
Step 2.Under the "Input / Codecs" tab, click the "Hardware-accelerated decoding" button. Then, click the "Disable" button.
Step 3.Finally, when the situation of codecs is reset, click the "Save" button to apply the effect of new codecs.
[Bonus] How to Take Screenshots Outside of VLC
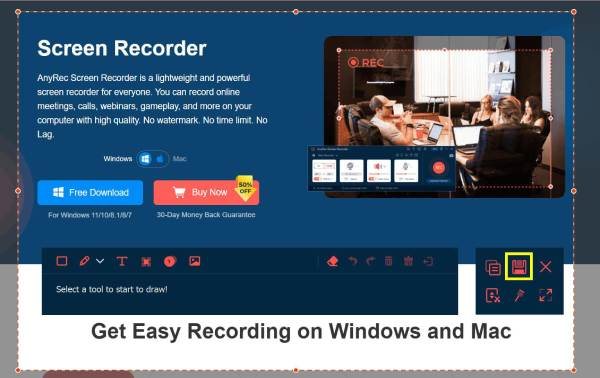
While VLC's snapshot feature is handy, it only works with the media content you're playing. You'll need a third-party tool if you want more flexibility, like capturing menus, playlists, or even other applications. AnyRec Screen Recorder is an excellent choice to be your VLC alternative to take screenshots.
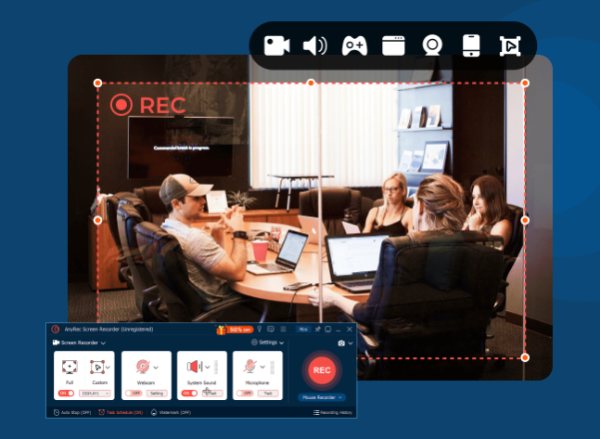
AnyRec Screen Recorder lets you take screenshots anywhere on your screen, not just inside VLC. You can select a full screen, a specific window, or a custom region, making it useful for tutorials, presentations, or saving content outside of the video player. In addition, it offers editing options such as annotations, shapes, and highlights so that you can customize your snapshots instantly. With its lightweight design and intuitive interface, AnyRec Screen Recorder provides more control and versatility than VLC's built-in snapshot function.

The custom screenshot area is available both within and outside VLC.
Obtain screenshots of the same quality as the original image.
Edit your screenshot immediately after obtaining the content.
Save the screenshots in the format and folder you prefer.
Secure Download
Secure Download
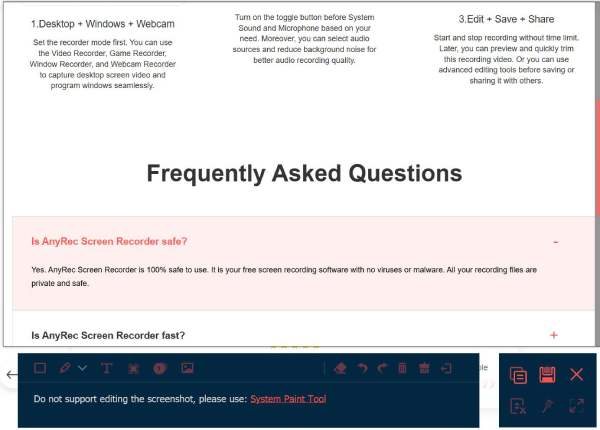
Step 1.Launch AnyRec Screen Recorder. Once you encounter the part you want to capture, click the "Screen Capture" button.
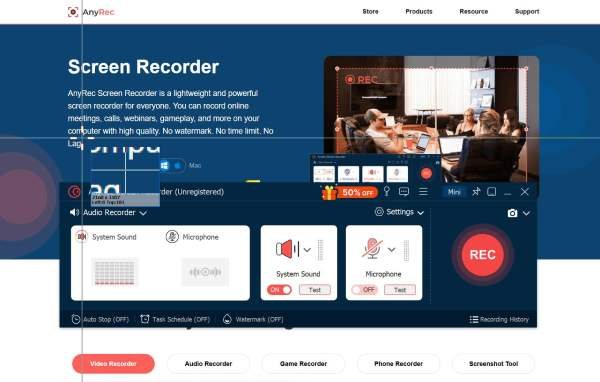
Step 2.The screen will pause. Click to choose a desired area outside of VLC to take partial screenshots or a full one.
Step 3.You can edit the screenshot captured directly. Once finished, click the "Save" button to save the screenshot.
Conclusion
In conclusion, taking screenshots with VLC is an easy option when you watch videos within the program. However, if you need more flexibility, such as taking screenshots outside of VLC or customizing the screenshot area, a professional tool like AnyRec Screen Recorder would be a great alternative.
Secure Download
Secure Download