Screenshot Part of Screen Like a Pro - 7 Ways for Windows
While taking a full screenshot is easy, what if you only need to screenshot part of screen? It could be a snippet of a webpage, a section of an article, or an image from a video; partial screenshots are more efficient. Luckily, Windows has several tools that make this task simple. From built-in options to powerful third-party tools, this article has 7 reliable ways to take partial screenshots on Windows, no cropping needed, and grabbing only what you need.
Guide List
How to Take a Partial Screenshot on Windows with AnyRec Screen Recorder How to Screenshot Part of Screen on Windows with Hotkeys How to Take a Partial Screenshot on Windows with Snipping Tool How to Screenshot a Specific Area on Windows with Snip & Sketch 3 More Choices to Take Partial Screenshots on WindowsHow to Take a Partial Screenshot on Windows with AnyRec Screen Recorder
Despite being known as a screen recording tool, AnyRec Screen Recorder also offers a flexible snapshot feature that lets you screenshot part of the screen, just the things you need. You don’t need advanced skills, just open the app, choose the screenshot option, and determine the area you want to capture on your Windows screen. Furthermore, it offers a built-in editor, so you can crop, rotate, and annotate your image immediately after taking it. Thus, if you wish for a tool that holds both recording and screenshots in one package, without degrading the quality, AnyRec is an excellent all-in-one solution to get. Use it to screenshot on Windows 11/10 now!

Can take partial screenshots, selected window, scrolling, and full-screen.
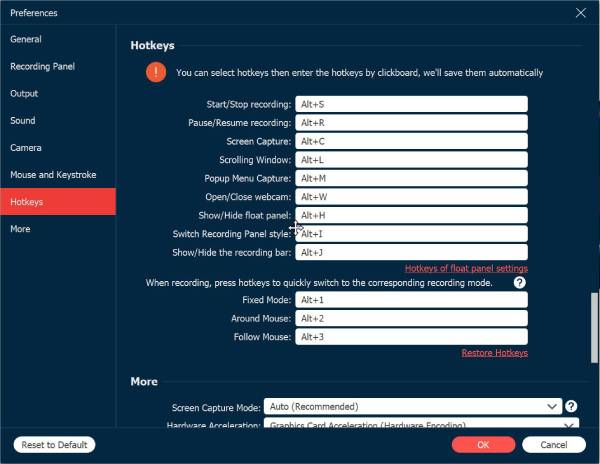
Let you set your hotkeys for screenshotting part of screen as well as output settings.
Save your captured image quickly in formats like JPG, PNG, and more.
Preview the image and make edits within the program as needed.
Secure Download
Secure Download
Step 1. Start by launching AnyRec Screen Recorder and look for the "Screen Capture" option from the recording menu. Once you click on it, your cursor will change into a crosshair—just click and drag over the exact part of your screen you want to capture.
Step 2. Next, you can partially screenshot on Windows appears in the editor. Here, you can add annotations, shapes, and more, which is perfect for notes and enhancing visuals for your presentations.

Step 3. nce you have made all edits, click the "Save" button from the toolbar. Select your location and format. And that’s it! You have made screenshotting part of screen as quickly as you need.
How to Screenshot Part of Screen on Windows with Hotkeys
Fortunately, Windows does not just offer one; there are two handy hotkey combinations you can use to take partial screenshots. This method is the most used and probably the easiest for capturing part of screen. Below, you can see how to use each shortcut and where you can find your captured images:
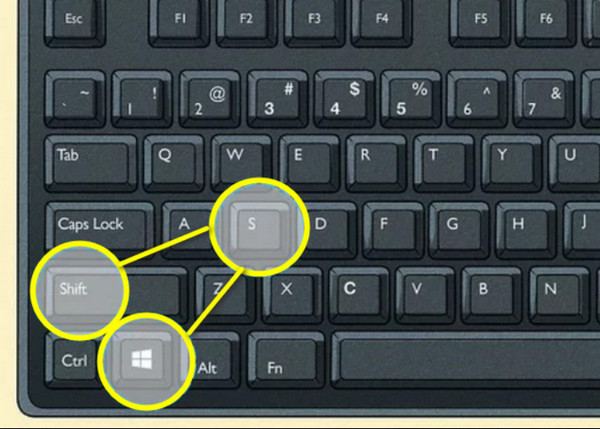
• Windows + Shift + S. This shortcut runs the built-in Snipping features. Once pressed, your screen will dim slightly, and your cursor will turn into a crosshair. Just click, then drag to select the portion of your screen you want to capture.
The image is instantly copied to your clipboard and ready to be pasted anywhere using the "Ctrl + V" keys, whether that is into an email, image editor, etc.
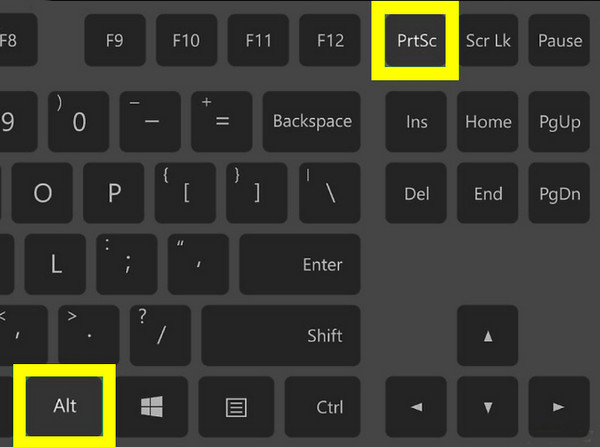
• Alt + PrtSc. If you’re looking to grab just the active window instead of a free-form, use this shortcut. After pressing the keys at the same time, it copies the selected window to your clipboard, and you can paste it into an app like Paint or any image editor.
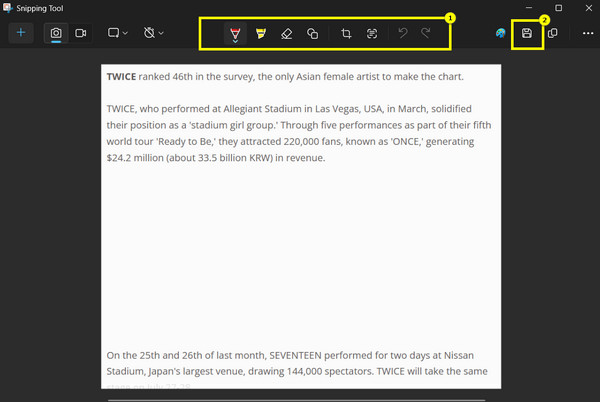
How to Take a Partial Screenshot on Windows with Snipping Tool
The Snipping Tool is a simple yet robust screenshot app that is built right into Windows. It is convenient when you want more control in capturing only a portion of your screen. If you haven’t used it before, here’s a quick guide to help you screenshot part of screen using Snipping Tool:
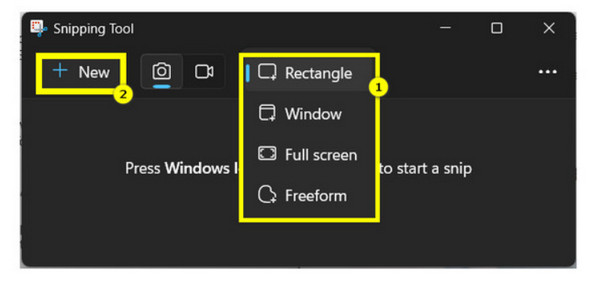
Step 1. First, press the "Windows" key and search for "Snipping Tool" in the search bar. Once it appears in the results, click to open it.
Step 2. Next, select the type of snip you’d like to take in the "Snip" dropdown. For capturing a specific area, select "Rectangular Snip", then click the "New" button and drag your mouse to determine the part of your screen you want to capture.
Step 3. After you have made your selection, the image will open inside the Snipping Tool window, and here you can make edits to the screenshot if needed. Click the "Save" button on the right to conclude the operation.
How to Screenshot a Specific Area on Windows with Snip & Sketch
Meanwhile, Snip & Sketch here is a built-in Windows solution that works like the prior screenshot tool. It is made for quick and precise captures, especially now that you want to take a screenshot of part of your screen. Using it, you can snip a custom area, annotate, and save the image with ease. Here’s how it works:
Step 1. Launch the Snip & Sketch by clicking the "Windows: menu and typing the screenshot tool; select it from the search results. Now, in the window, click the "New" button, and your screen will be dimmed.
Step 2. The default snipping tool is the "Rectangular Snip"; click and drag your mouse to choose the area you want to capture. After capturing, the image will be opened in the Snip & Sketch window.
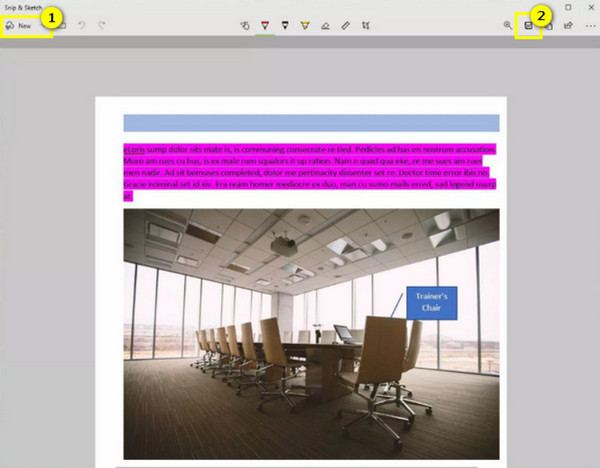
Step 3. Use the built-in editing tools here as needed. Lastly, click the "Save" button to export the image to your computer. You can also click the "Share" button to send it directly via email or other apps.
3 More Choices to Take Partial Screenshots on Windows
While Windows has a lot to offer for screenshotting part of screen, third-party software can offer even more features and efficiency, especially if you take a cropped screenshot all the time. Do you need scrolling pictures or image editing? The tools below are excellent working alternatives!
Here’s a quick comparison of the three popular screenshot tools for Windows:
| Tool | Best For | Custom Region | Customizable Output | Annotation Tools | Output Format |
| ShareX | Power users and developers | rectangle, window, and more | Yes | basic | PNG, JPEG, GIF, BMP, and TIFF |
| FastStone Capture | Professional and tutorial creators | rectangle, window, scrolling | Yes | rich | BMP, GIF, JPEG, PCX, PNG, TGA, TIFF, WEBP, FSC and PDF |
| Greenshot | Casual users and quick screenshots | rectangle, window, full | Yes | good | PNG, JPEG, GIF, BMP, and TIFF |
Conclusion
Taking partial screenshots on Windows saves time, since you don’t need to crop them to highlight a particular detail or information. From hotkeys and built-in tools to powerful third-party software, you can screenshot part of screen based on your needs and preferences. While each has strengths, for an all-in-one recording and screenshotting solution, AnyRec Screen Recorder is a wise choice. It is friendly, has support for custom area capturing, a built-in editor, and, more importantly, a high-quality output, making it perfect for everyone who wants more control and flexibility in one place. See how it works today and take your partial screenshots to the next level!
Secure Download
Secure Download