Hot
AnyRec Screen Recorder
Capture every moment. Record like a pro.
Secure Download
VLC Record Screen - Is It Really Good? [Ways and More]
VLC Media Player is famous for its versatility. Surprisingly, it can also be used to record the screen. Whether you want to capture a live stream or a tutorial, you can use VLC to record screen. How? This guide will walk you through the three easy steps, not only to screen record with VLC, but also to record audio and webcam. Further, you’ll know more about VLC skills and the best alternative for screen recording.
Guide List
How to Record Screen with VLC on Windows and Mac Is VLC Really Good for Recording? Get VLC Alternative for Better Screen RecordingHow to Record Screen with VLC on Windows and Mac
To know how powerful VLC is for recording your screen, webcam, and audio with ease, this section will share the steps to do so. Also, you will learn some tips for optimizing your recordings. So, whether you’re using Windows or Mac, here’s how to use VLC screen recorder to capture screen, audio, and webcam on both platforms:
Record Video with VLC:
- 1. Launch VLC Media Player on your computer. Then, go to "Media" to "Open Capture Device" (Mac: File > Open Capture Device).
- 2. Next, from the "Capture Mode" dropdown, select "Desktop" (Mac: Screen). Then, to have a smooth recording, don’t forget to set the frame rate to 30 fps or higher in the "Options" section.

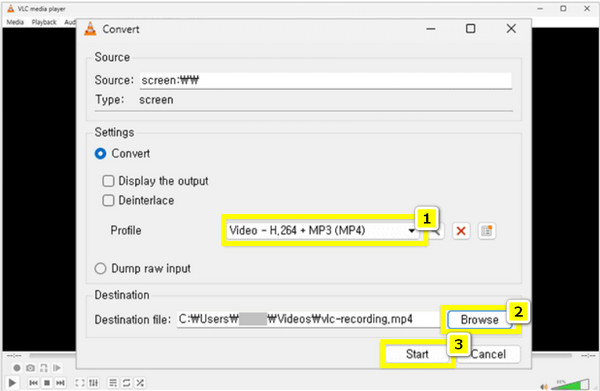
- 3. Now, click the "Convert" button to select an output format and its destination, then click the "Start" button to start capturing your screen. Later, click the "Stop" button once done.
Record Screen with Audio with VLC:
- 1. Open VLC on your computer. Click the "Media" menu, then the "Open Capture Device" option (Mac: File > Open Capture Device). For Windows, choose "DirectShow"; for Mac, choose "Screen" as your capture mode.
- 2. Following that, select your audio input device in the "Audio device name" dropdown (Mac: ensure the "Audio Device" is set to "Built-in Input" or your external mic). Set the frame rate depending on the quality you want.
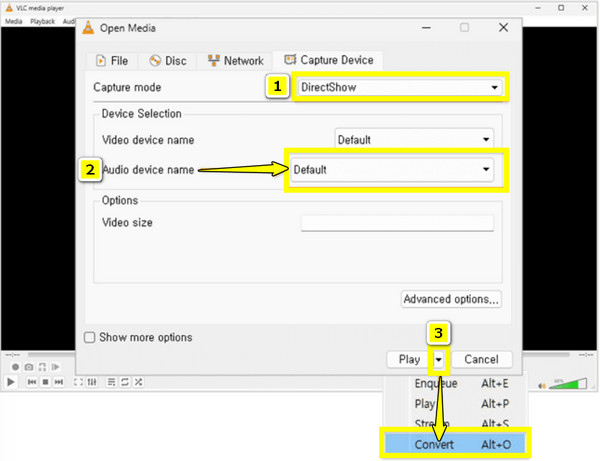
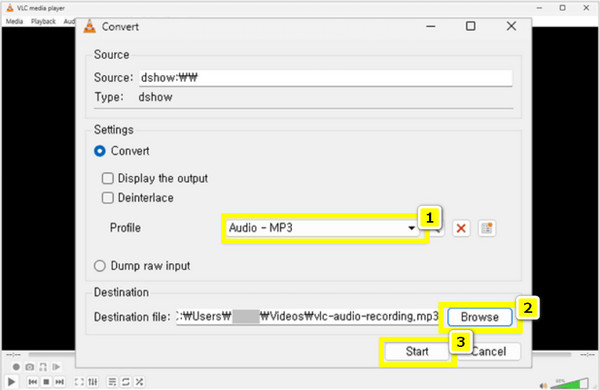
- 3. Click the "Convert" button, then choose your format and location. Finally, click the "Start" button to record the screen and audio.
Record Webcam with VLC:
- 1. Upon starting the VLC Media Player on your screen, click "Media" and then the "Open Capture Device" option (Mac: File > Open Capture Device).
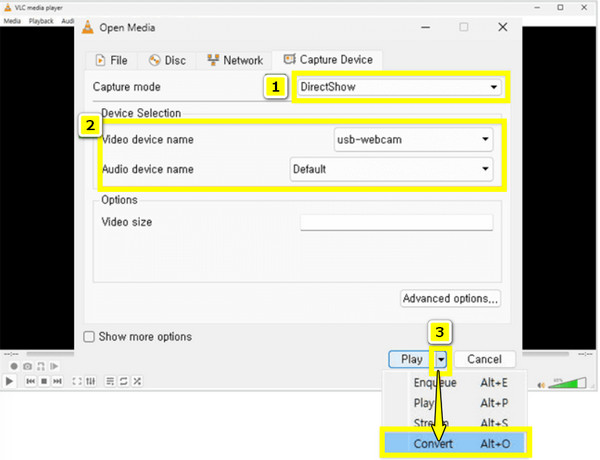
- 2. After that, in the "Capture Mode" dropdown, choose "DirectShow". Meanwhile, for Mac, select "Video Device" and then select your webcam from the device list.
- 3. Please adjust the output format of your choice for webcam recording by clicking the "Convert" button. Once ready, click the "Start" button to start capturing the webcam.
Recommended Output Settings for VLC Recording
Now that you know how to record screen with VLC, to ensure all of your recordings come out with the best possible quality, here are some of the suggested output settings you can follow:
| Setting | Recommended |
| Format | MP4, MKV, or AVI |
| Video Codec | H.264 |
| Audio Codec | MP3, AAC |
| Resolution | 1280×720 (HD) or 1920×1080 (Full HD) |
| Frame Rate | 30 fps or 60 fps for a smoother recording |
| Bitrate | 1500 kbps to 5000 kbps |
| Audio Bitrate | 128 kbps to 192 kbps |
Is VLC Really Good for Recording?
While VLC is a well-known free and open-source software for a media player, you’ve learned that it can serve as a recording tool. But, does it stand out as a reliable option for screen, audio, and webcam recording?
After exploring the ways for VLC screen recording, this section will share the limitations of VLC’s recording before relying on it for your future recording needs.
- 1. No Video and Webcam Recording Simultaneously. While you can do VLC screen capture, the player can’t record video and webcam at the same time. So, if you’re aiming to capture a video call with both webcam and screen feed, you may need another software for such action.
- 2. No Default Audio Capture. The VLC Media Player does not automatically capture system audio during screen recordings. Though it lets you manually select it, this process may be time-consuming and may not work smoothly on all systems.
- 3. No Area Selection. Unlike other dedicated recording software, VLC does not have the option to select the area for recording. It only records the entire screen, which is a downside if you want to capture just a part of your screen or window.
- 4. Limited Editing Features. After VLC player screen recording, you may want to enhance your footage before saving; however, the player does not offer any built–in editing tools. You will need an extra step to achieve it.
- 5. Not Great for Game Recording. You can use VLC to record screen, but it is not optimized for fast-moving gaming footage, so it is not ideal for gameplay recording. It often struggles with keeping high-quality visuals during fast-paced actions.
Get VLC Alternative for Better Screen Recording
Why do you need a VLC screen recorder alternative? For basic recording tasks, VLC can do the job, but it lacks advanced functionality and friendliness for high-quality recordings. So, for the best way to record screen on Windows and Mac, you have the AnyRec Screen Recorder here, offering a much smoother and complete recording experience. With this recording software, you can select recording areas, capture system, and mic audio at once, even webcam, all without sacrificing the video quality. Plus, you can take advantage of built-in features like real-time annotations and editing tools of the program.

Record screen in 1080p up to 4K with a smooth frame rate.
Area selection for recording, to record the entire screen, a window, or just a portion.
Built-in preview and editing tools to further enhance before saving.
Customizable recording settings to get the results you’re aiming for.
Secure Download
Secure Download
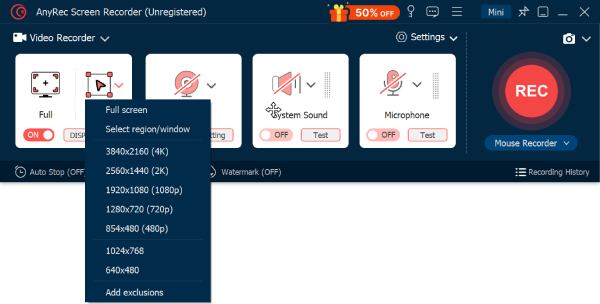
Step 1.Launch AnyRec Screen Recorder, then click the "Video Recorder" option. Now, decide whether to record your entire screen (Full) or just a specific section or window (Custom).
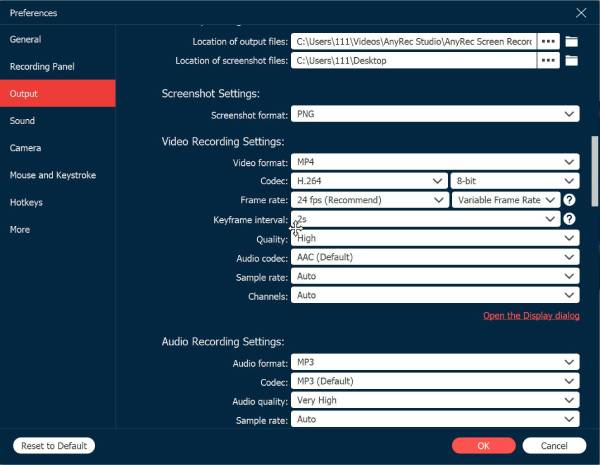
Click the "Settings" button and then head to the "Output tab to adjust things like resolution, frame rate, and format to match your needs.
Step 2.Next, decide what sounds to include in the recording. Toggle on "System Sound" to capture system audio; turn on the "Microphone" option as well for voiceover. Don’t forget to tweak the volume of each option to get the levels just right.
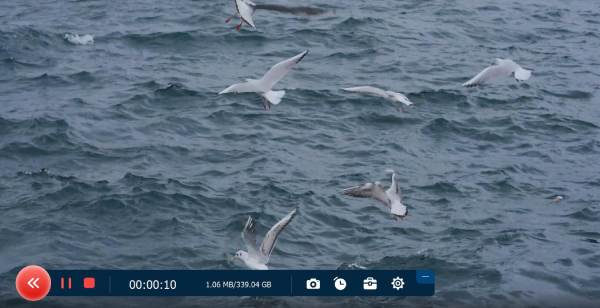
Step 3.Once you’ve set everything up, click the "REC" button. During recording, there’s a small floating bar you can use to pause, stop, take screenshots, and even draw on your screen.
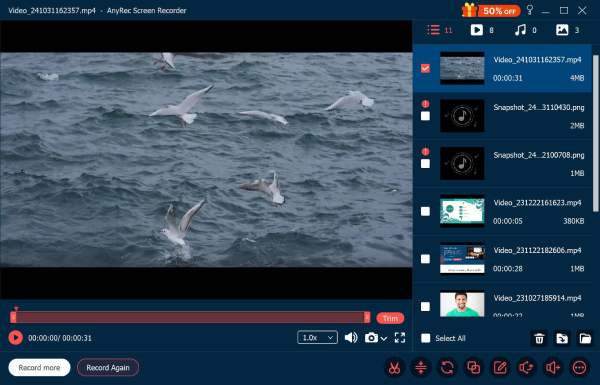
Step 4.When you’re finished, click the "Stop" button. In the preview window, review what you captured. If needed, trim off any extra parts and edit the screen recordings before clicking the "Save" button.
VLC vs. AnyRec Screen Recorder: Comparison Table
| Feature | VLC Media Player | AnyRec Screen Recorder |
| Ease of Use | Moderate | Very Easy |
| Area Selection | No | Yes |
| System and Mic Audio Capture | Limited | Fully supported |
| Webcam + Screen | No | Yes |
| Annotation | No | Yes |
| Output Formats | MP4, AVI, MKV | MP4, MOV, AVI, MKV, and more |
| Game Recording Mode | No | Yes |
Conclusion
VLC offers surprising power, working like your recording software. Whether you want to capture screen, audio, or webcam, VLC holds a basic solution. However, it’s clear that VLC can record screen, but its functionalities are limited, leading you to look for the perfect alternative, the AnyRec Screen Recorder. If you want a smoother experience, more control, and useful tools like real-time drawing, editing tools, etc, this software holds all of them in one clean interface. Save time and deliver better outcomes now by recording with AnyRec Screen Recorder.
Secure Download
Secure Download
Related Article
About Our Author


