How to Take a FaceTime Screenshot Quickly [2025 Steps]
FaceTime is a great way to connect with friends, family, or coworkers, and capturing a special moment during your call is a memory to keep. Whether it is a funny expression or an important detail, taking a FaceTime screenshot is quick and easy. Does FaceTime notify screenshots? Fortunately, unlike others, it does not inform the other person. So, without further ado, scroll down now to see the four ways to screenshot on your Apple devices. Save every moment now!
Guide List
How to Screenshot FaceTime on iPhone and iPad How to Take Screenshots While FaceTime on Mac Better Way to Screenshot and Screen Record FaceTimeHow to Screenshot FaceTime on iPhone and iPad
Start with taking a FaceTime call screenshot on your iPhone and iPad! The process is quick and straightforward, whether you’re calling in portrait or landscape mode. With just a few taps, you can have the FaceTime moment saved instantly. Here’s how to do it:
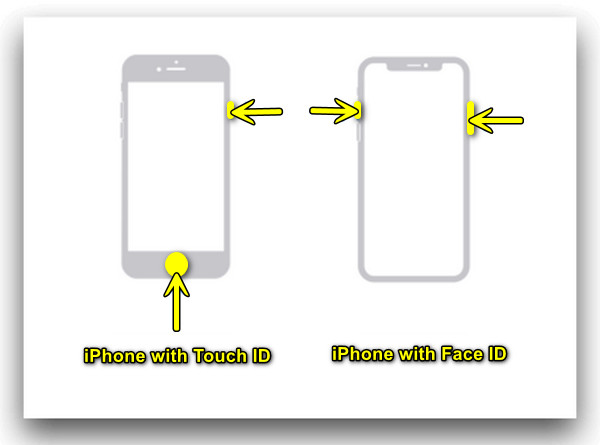
Step 1.Fix the position of your FaceTime call so that the image you want or your facecam is clearly visible. Once ready, press the "Side" and "Volume Up" buttons for iOS devices with Face ID. For older ones, use the "Home" + "Power" buttons.
Step 2. Upon releasing the buttons, you will see that your screen has a brief flash or makes a shutter sound, indicating that the screenshot has been taken successfully.
Step 3. All your FaceTime screenshots are saved to the "Photos" app. Here, you can view them and make further edits such as crop, rotate, add effects, draw, and more.
How to Take Screenshots While FaceTime on Mac
Using FaceTime on a Mac? Taking a screen is just as easy, and macOS allows you to take a FaceTime screenshot in a few different ways. You can use a keyboard shortcut or built-in tools to achieve the screenshot without interrupting your FaceTime call.
1. Take FaceTime Screenshot via a Keyboard Shortcut
Ensure the FaceTime window is positioned correctly. To take a FaceTime screenshot, follow the keyboard shortcut below, depending on what you need:
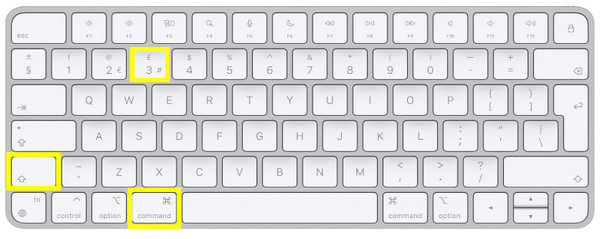
- • Press Shift + Command + 3 for an entire screen screenshot.
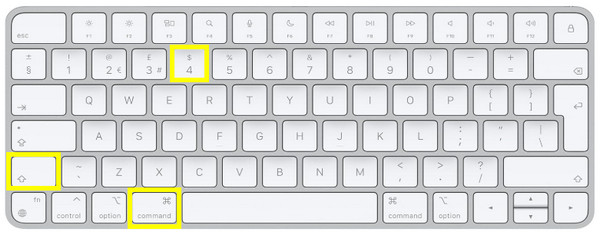
- • Press Shift + Command + 4 for a specific portion screenshot.
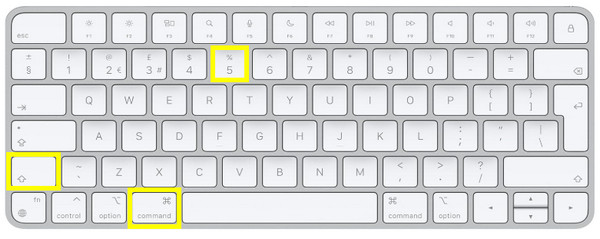
- • Press Shift + Command + 5 to access the toolbar with more options.
2. Take a FaceTime Photo via Screenshot App
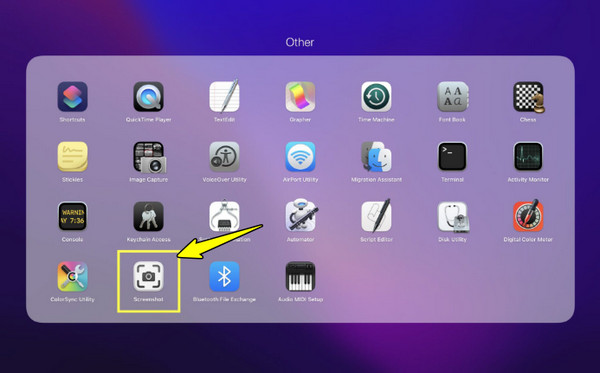
Go to the Launchpad or Spotlight Search to open the "Screenshot" app. Here, select full screen, window, or selection capture by clicking the "File" menu. Upon selecting, click the "Capture" button when you’re ready to take the FaceTime screenshot.
3. Where Do FaceTime Screenshots Go
All screenshots taken are saved to your desktop. However, if you have changed the default location, you can locate the FaceTime screenshots in that chosen folder. If you have problems like Mac not saving screenshots, you can read the best way in the following.
Better Way to Screenshot and Screen Record FaceTime
While taking a FaceTime screenshot on Apple devices can be quick, what if it is not working, or you need more than a single image? For this, screen recording is the ideal solution. Instead of missing a moment, you can capture the entire call and take screenshots from the video later with AnyRec Screen Recorder. This program is beneficial for tutorials, interviews, or special moments with loved ones. It is designed with high-quality video output in mind and no lag, regardless of your system level. Not only does it capture whatever is on your screen, but it also covers system sound, mic, and webcam. Plus, it includes editing tools to trim, rotate, convert, and do more enhancements to your recordings. So, if FaceTime screenshotting fails, AnyRec Screen Recorder ensures you never lose the moment.

Can capture FaceTime calls with high-quality in up to 4K resolution.
Take instant FaceTime screenshots during recording via hotkeys or the toolbar.
Give you complete control over what and how you capture FaceTime.
Save recordings and screenshots in popular formats like JPG, PNG, etc.
Secure Download
Secure Download
How to Screenshot During Screen Record FaceTime on Mac?
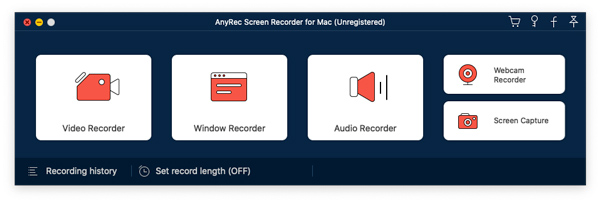
Step 1. Launch AnyRec Screen Recorder on your Mac and choose the "Video Recorder" option to get started. Here, choose whether to capture the entire screen (Full) or just a specific FaceTime window (Custom).
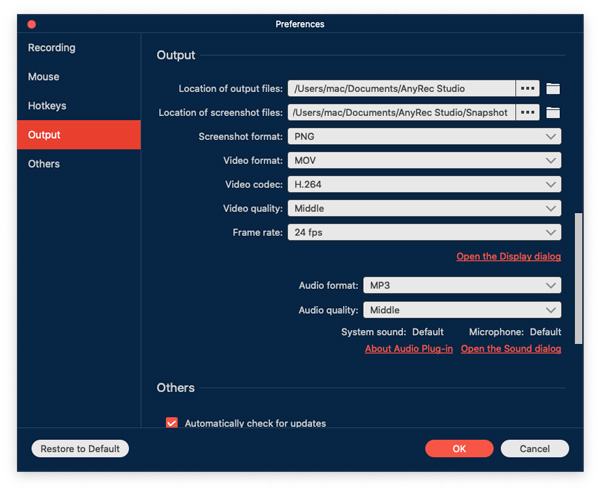
Don’t forget that you can tweak details like resolution in the "Settings", then "Output".
Step 2. Before you hit record, ensure the "System Sound" is switched on so the other person’s voice is captured. To add your side of the conversation, switch on the "Microphone" as well. Adjust the level so everything is clear.
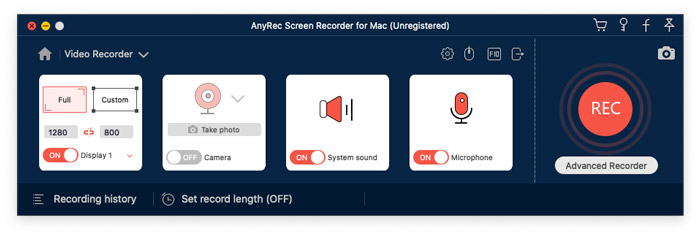
Step 3. Click the "REC" button on the right side, and hop into your FaceTime call. To highlight something during the call, you can use the drawing tools from the toolbar. Take FaceTime screenshot by clicking the "Snapshot" button.
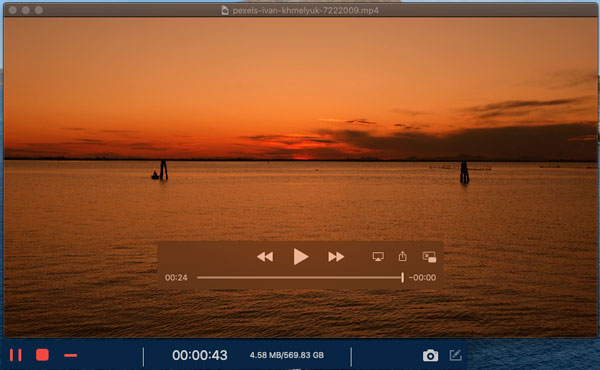
Step 4. Once your FaceTime call is over, click the "Stop" button. In the preview, watch the recording and trim out any pauses or extra parts. You can also pause at any moment and take a screenshot via the "Camera" button. Click the "Save" button to export your FaceTime recording.
How to Screenshot During Screen Record FaceTime on iPhone?
Step 1. Run AnyRec Screen Recorder. Select the "Phone Recorder" option from the main dropdown menu in the home screen. When asked to choose your device type, go with "iOS Recorder".
Step 2. Now, it’s time to mirror your iPhone screen! Swipe down on your iDevice to open the "Control Center", tap "Screen Mirroring", and pick "AnyRec Screen Recorder" from the list. This lets your iPhone screen display on your computer.
Step 3. Once it links successfully, you will see your iPhone screen on your monitor. From here, click the "REC" button. You can adjust the inputs if needed, and take FaceTime screenshot during the call with the "Snapshot" button. Later, the images are saved successfully to your chosen folder.
Conclusion
Capturing moments in a FaceTime call has reliable ways to do so. You can take a FaceTime screenshot of a funny reaction or something important via shortcuts on your iPhone, iPad, and Mac. But when it stops working, using the AnyRec Screen Recorder is the smarter solution. It lets you save the entire conversation and extract any FaceTime screenshots you captured. It is friendly and gives you complete flexibility and control to record, capture, and edit effortlessly. This amazing program is a tool worth having on your Windows and Mac systems.
Secure Download
Secure Download