Download Photos from Google Photos to iPhone [All/Multiple]
If you’ve been storing your pictures in Google Photos but now want them on your iPhone, you might be wondering exactly how to transfer photos from Google Photos to iPhone without losing quality or making the process too complicated. The good news is, whether you just need to save one special shot, move entire albums, or transfer multiple photos in bulk, there are simple methods you can follow. In this guide, we’ll walk you through three easy ways: first, how to transfer an individual picture from Google Drive to iPhone, then how to move albums or selected photos, and finally, how to transfer multiple photos using Google Drive.
Part 1. Transfer One Picture from Google Drive to iPhone
Sometimes, you just need to transfer a selfie or a funny meme you saved earlier from Google Photos to iPhone. It is easy to do. Just download the selected picture and send a copy to your iPhone. Later, you can move a photo out of Google Photos successfully.
- 1. Open Google Drive on your iPhone and sign in with your Google account.
- 2. Find the picture you want to download.
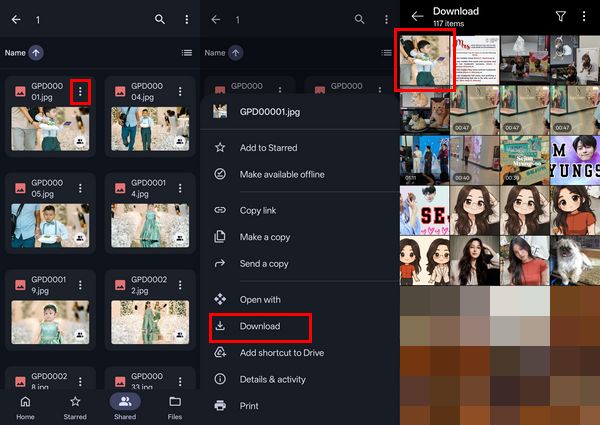
- 3. Click the three-dot menu next to the photo.
- 4. Select "Open in" or "Send a Copy", then choose "Save Image".
- 5. Your photo will now appear in your iPhone’s Photos app.
- Pros
- No need of extra apps or complicated settings. Totally free to try.
- It is perfect for one-time use when you just need a single file.
- Cons
- Not ideal for albums or bulk photo transfers.
- Requires internet connection since you need to access Google Drive online.
Part 2. Transfer Albums or Selected Photos to iPhone
Now, if you’re looking to move not just one photo but whole albums or hand-picked collections, doing it manually from Google Drive can get overwhelming. AnyRec PhoneMover really shines. It’s designed to make transfers fast, smooth, and hassle-free. With just a few clicks, you can move hundreds of images at once. It is time-saving to get hundreds of thousands of photos to iPhone Camera Roll, Gallery and more.
Transfer photos, videos, music, and 20+ file types to iPhone.
Move entire albums or selected pictures from/to iPhone.
Detect and remove duplicated photos smartly.
Add, delete, preview, and organize all iPhone files.
Secure Download
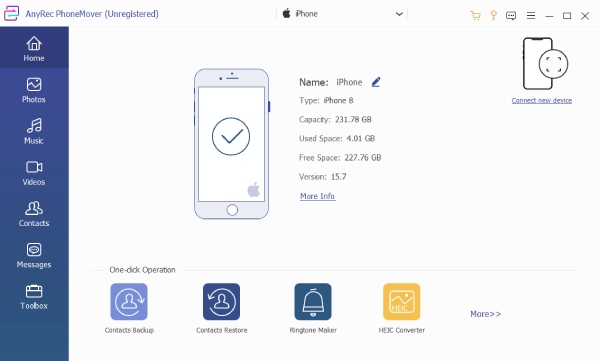
Step 1.Open AnyRec PhoneMover. Connect your iPhone to the computer using a USB cable. For iPhone users, ensure that you trust the computer when prompted. Once connected, the main screen will display your device name, system version, and available storage.
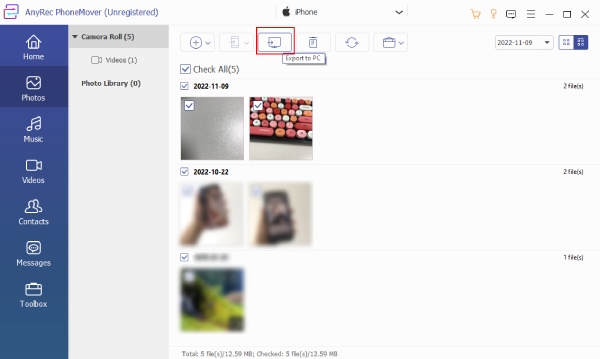
Step 2.Click on the "Photos" button, then select the images you want to transfer. You can also check the "Select All" button if you wish to move every photo. After making your selection, click the "Transfer to PC" button at the top.
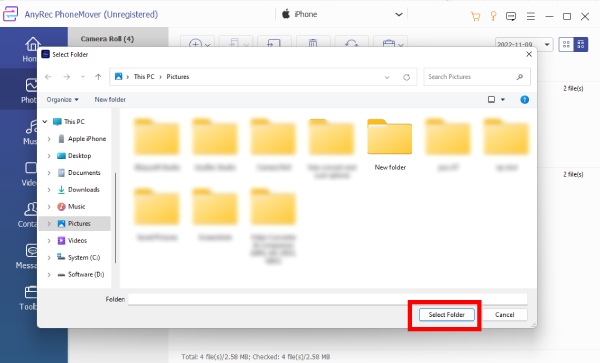
Step 3.Pick or create a folder on your PC to save the photos, then click the "Select Folder" button to confirm. The iPhone to PC photo transferring process can be completed in a short time.
Secure Download
Part 3. Transfer Multiple Photos from Google Photos to iPhone Using Google Drive
If you only want a handful of photos from your Google Photos library, using Google Drive can be a convenient option. It’s not as fast as using the Google Photos app (especially if you do this often), but it works great for selected photos or when you just want to grab a few at a time. Now, let's follow steps to download photos from Google Drive to iPhone.
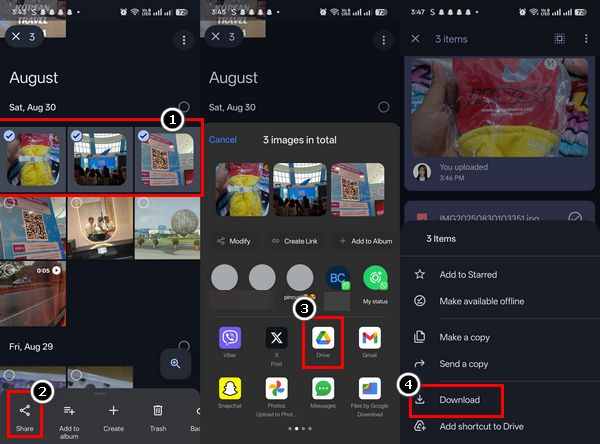
- 1. Open Google Photos on your computer or browser and select the pictures you want to move.
- 2. Click the "Share" or "Download" button, then save them to your Google Drive.
- 3. On your iPhone, open the Google Drive app and log in with the same account.
- 4. Locate the folder where you saved your photos.
- 5. Tap on each photo, choose the "Open in" or "Send a Copy" button, then tap the "Save Image" button to add them to your iPhone’s Photos app.
- Pros
- Perfect for transferring a few selected photos rather than your entire library.
- Save photos from Google Drive to iPhone without complicated setup.
- Cons
- Slower than using the Google Photos app if you transfer photos often.
- Requires you to manually move the photos to Google Drive first before downloading.
Conclusion
Transferring photos from Google Drive or Google Photos to an iPhone doesn’t have to be complicated. There are ways to transfer a single image, select albums, and multiple photos, so you can find a transfer method that suits your needs. However, for the quickest and most reliable method, use AnyRec PhoneMover. It saves you time, puts all your photos in the right place, and you don’t even need to be connected to the internet. Moreover, you can resize photos, remove duplicates and manage iPhone photos within the program. So the next time you ask yourself how to save photos from Google Photos to iPhone, you’ll know that there is a more innovative and quicker way to do it. Click the Free Download button below and start your free trial today!
Secure Download


