Windows 11에서 전체/부분/긴 스크린샷을 찍는 방법
Windows 11에서 스크린샷을 찍는 다음 6가지 효율적인 방법을 알아보세요. 전체 화면, 부분 영역 또는 스크롤 페이지를 캡처하려는 경우 적합한 방법을 찾을 수 있습니다.
- AnyRec 스크린 레코더: Windows에서 모든 종류의 스크린샷을 고품질로 캡처합니다.
- Windows + Shift + S: 클립보드에 스크린샷을 찍고 더 많은 편집 작업을 수행합니다.
- PrtSc: Windows 11에서 전체 화면으로 스크린샷을 찍기만 하면 됩니다.
- Alt + PrtSc: 편집 기능 없이 현재 창을 빠르게 캡처합니다.
- Ctrl + Alt + PrintScreen: Windows 11에서 웹페이지의 스크롤 스크린샷을 찍을 수 있습니다.
- 캡처 도구: Windows 11의 기본 캡처 프로그램으로 3가지 모드로 스크린샷을 찍습니다.
안전한 다운로드
안전한 다운로드
때로는 다음을 원할 수도 있습니다. Windows 11에서 스크린샷 찍기 좋아하는 영화 대사, 가사, 대화, 영상 채팅, 밈 등을 즐겨보세요. 다행히 기본 화면 캡처를 사용하면 정말 쉽습니다. 전체 화면, 창 화면, 특정 영역에서 캡처할 수 있습니다. 자세한 단계를 통해 Windows 11에서 스크린샷을 찍는 6가지 효율적인 방법을 알아보려면 계속 읽어보세요.
가이드 목록
Windows 11에서 원하는 영역의 스크린샷을 찍는 가장 좋은 방법 바로가기를 통해 Windows 11에서 스크린샷을 찍는 4가지 방법 Windows 11에서 캡처 도구를 사용하여 스크린샷 찍기 Windows 11에서 스크린샷 찍기에 대한 FAQWindows 11에서 원하는 영역의 스크린샷을 찍는 가장 좋은 방법
전체 화면, 창 화면 또는 화면 일부에서 Windows 11 OS의 스크린샷을 찍는 데 도움이 되는 도구를 찾고 있다고 가정해 보겠습니다. 그 경우, AnyRec Screen Recorder 당신에게 가장 추천되는 앱입니다. 또한 원할 경우 스크린샷에 그림, 텍스트, 화살표 및 선을 추가할 수 있습니다. 사용자 정의 가능한 출력 설정도 제공하므로 스크린샷 품질에 대해 걱정할 필요가 없습니다.
전체 화면, 창 또는 화면의 일부로 Windows 11에서 스크린샷을 찍습니다.
스크린샷을 JPG, BMP, GIF, PNG 또는 TIFF와 같은 다양한 형식으로 저장합니다.
스크린샷에 그림, 화살표, 텍스트, 선, 모양 등을 추가합니다.
Windows 11/10/8/7에서 빠르게 스크린샷을 찍을 수 있는 사용자 지정 단축키를 제공합니다.
안전한 다운로드
안전한 다운로드
1 단계.시작하려면 AnyRec Screen Recorder Windows 11에서. 그런 다음 메인 인터페이스에서 "SnapShot" 버튼을 클릭하세요.
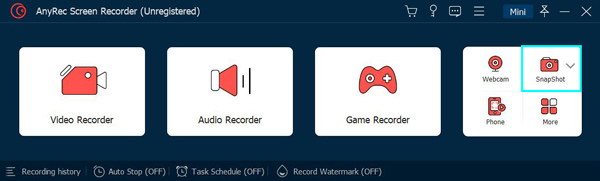
2 단계.Windows 11에서 스크린샷을 찍고 싶은 위치로 마우스를 이동한 다음 마우스 왼쪽 버튼을 클릭하면 스크린샷이 찍힙니다. 전체 화면을 캡처하거나 선택한 영역.
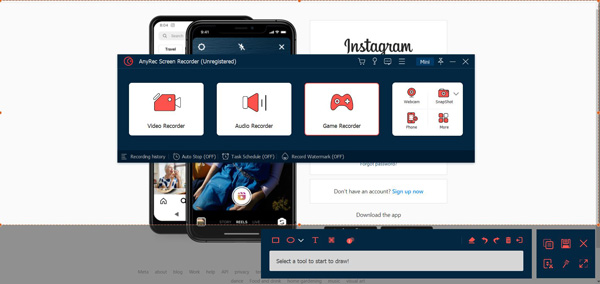
3단계.클릭하면 캡처 영역을 추가로 설정하고 추가 편집을 수행할 수 있습니다. 마지막으로 "저장" 버튼을 클릭하여 로컬 폴더에 저장합니다.

안전한 다운로드
안전한 다운로드
바로가기를 통해 Windows 11에서 스크린샷을 찍는 3가지 방법
Windows 11에 스크린샷을 찍을 수 있는 기본 단축키도 있다는 것을 알고 계셨나요? 그러나 이러한 도구는 고급 편집 기능 없이 컴퓨터의 고정 화면만 캡처할 수 있다는 점에 유의해야 합니다. 계속해서 읽어보시고 더 많은 정보를 알아가시기 바랍니다.
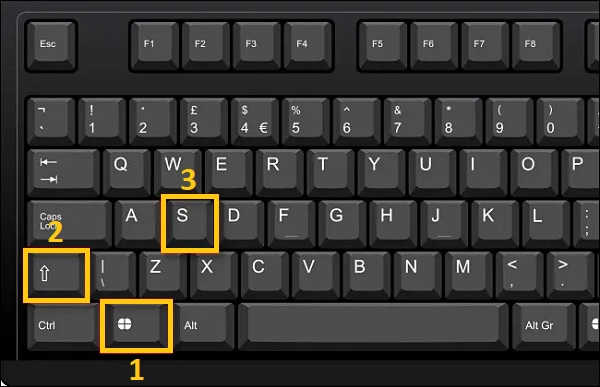
1. Windows + Shift + S를 누릅니다.
Windows 11에서 스크린샷을 찍을 때 가장 먼저 알아야 할 단축키는 "Windows + Shift + S"입니다. 이 방법을 사용하면 Windows 11에서 마우스를 커서로 사용하여 화면을 잡아 스크린샷을 찍을 수 있습니다. Freeform Snip, Window Snip 및 Fullscreen Snip에서도 스크린샷을 찍을 수 있습니다.
스크린샷은 클립보드에 저장되며 그림판과 같은 도구를 열어 복사할 수 있습니다. 소셜 앱을 통해 친구에게 스크린샷을 직접 보낼 수도 있습니다.
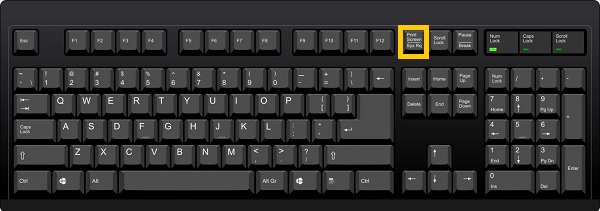
2. PrintScreen(PrtSc)을 누릅니다.
스크린샷을 찍는 가장 빠른 방법 중 하나는 키보드에서 "PrintScreen(PrtSc)"을 누르는 것입니다. Windows 11에서 전체 화면으로 스크린샷을 찍을 수 있습니다. 즉, 편집하고 자르지 않는 한 화면의 일부를 선택할 수 없습니다. 하지만 스크린샷은 Windows에서 어디로 이동합니까?? 이 방법을 통해 클립보드에서만 찾은 다음 저장하도록 선택할 수 있습니다.
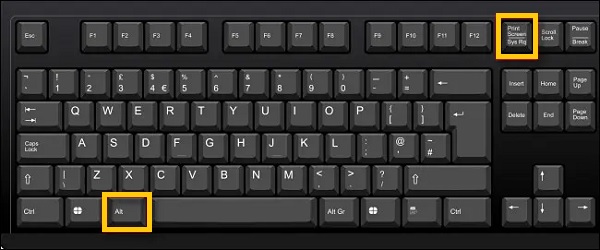
3. Alt + PrintScreen(PrtSc)을 누릅니다.
"Alt + PrintScreen"(PrtSc) 키보드에서 현재 창의 Windows 11에서 스크린샷을 찍을 수 있습니다. 따라서 이 방법은 많은 창을 열고 현재 창을 빠르게 캡처하려는 사용자에게 적합합니다.
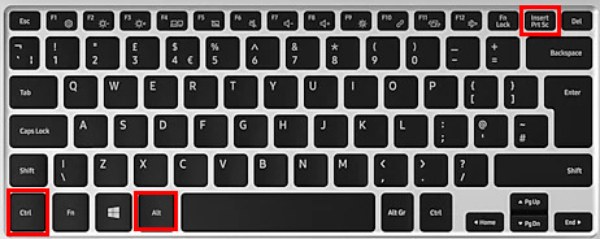
4. Ctrl + Alt + PrintScreen(PrtSc)을 누릅니다.
Windows 11에서는 웹페이지의 스크롤 스크린샷을 캡처할 수도 있습니다. "Ctrl + Alt" 버튼을 누른 상태에서 "PrtSn" 버튼을 누르면 전체 화면으로 전환됩니다. 이제 왼쪽 마우스를 길게 눌러 긴 스크린샷을 캡처할 수 있습니다.
메모: Windows 11에서 스크린샷을 찍으면 스크린샷이 PC에 자동으로 저장됩니다. "이 PC", "그림", "스크린샷" 폴더에서 찾으세요.
캡처 도구를 사용하여 Windows 11에서 스크린샷을 찍는 세부 단계
캡처 도구 은 Windows 11에 내장된 스크린샷 앱입니다. 이 도구를 사용하면 자유형 캡처, 직사각형 캡처, 창 캡처 또는 전체 화면 캡처를 사용하여 스크린샷을 찍을 수 있습니다. 또한 타이머 후 Windows 11에서 자동으로 스크린샷을 찍는 지연 기능이 있습니다. 따라서 더 이상 고민하지 않고 아래 단계를 따르십시오.
따라야 할 단계:
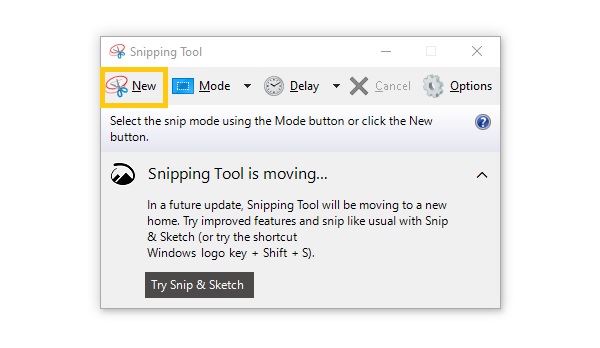
1 단계.먼저, 검색 캡처 도구 Windows 11의 경우. 그런 다음 도구를 열고 "새로 만들기" 버튼을 클릭하세요. 아니면 당신은 사용할 수 있습니다 Windows 캡처 도구 바로 가기 또한
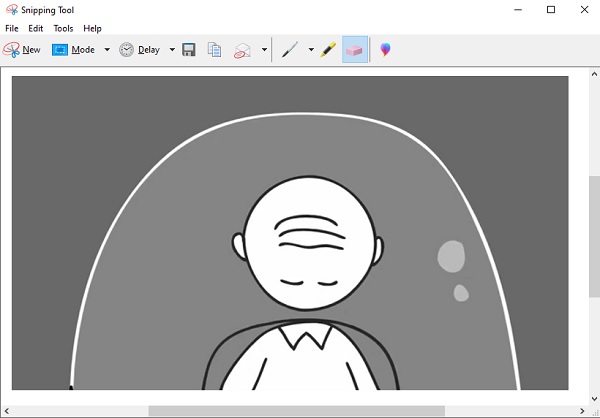
2 단계.그런 다음 원하는 화면을 선택하십시오. Windows 11에서 스크린샷 자르기. 그런 다음 도면을 추가하도록 선택할 수 있습니다.
3단계.마지막으로, 사진 편집이 완료되면 이제 "파일" 섹션으로 이동하여 "다른 이름으로 저장" 버튼을 선택하여 파일에 저장할 수 있습니다.

안전한 다운로드
안전한 다운로드
Windows 11에서 스크린샷 찍기에 대한 FAQ
-
1. Xbox Game Bar를 사용하여 Windows 11에서 스크린샷을 찍는 방법은 무엇입니까?
Xbox 게임 바 게임 플레이를 캡처하기 위해 특별히 제작된 Windows 11 OS의 또 다른 내장 스크린샷 도구입니다. 그러나 화면의 모든 부분을 캡처하는 데 사용할 수도 있습니다. 사용하려면 Windows에서 Xbox Game Bar를 검색하거나 키보드에서 Windows + G를 누르기만 하면 됩니다. 그런 다음 카메라 버튼을 클릭하여 Windows 11에서 스크린샷을 찍습니다.
-
2. Windows 11/10/8/7에서 스크린샷을 자르는 방법은 무엇입니까?
Windows 11/10/8/7에서 스크린샷을 찍기 위해 키보드에 내장된 PrtSc 버튼을 누르면 스크린샷이 전체 화면으로 표시됩니다. 너가 ~ 한 뒤로 스크린샷을 찾을 수 없습니다 로컬 폴더에서 그림판 앱을 열고 붙여넣어 원하는 크기로 자르기를 시작해야 합니다.
-
2. Windows 11 노트북에서 스크린샷을 찍는 방법은 무엇입니까?
다행히도 Windows 11 컴퓨터와 랩톱에는 화면을 캡처하는 동일한 방법이 있습니다. 따라서 Windows 11에서 스크린샷을 찍는 방법에 대해 위에서 설명한 단계를 따르면 노트북에서 스냅샷을 찍을 수 있습니다.
결론
당신은 그것을 가지고 있습니다! 이것이 Windows 11에서 스크린샷을 찍는 방법에 대한 논의의 전부입니다. 기본 바로 가기 또는 캡처 도구를 직접 사용하여 화면을 쉽게 캡처할 수 있습니다. 그러나 대부분은 선택된 영역을 포함하여 많은 편집 기능을 제공하지 않습니다. 이 경우, 당신은 더 나은 의존 AnyRec Screen Recorder Windows 11/10/8/7에서 스크린샷을 찍는 데 사용합니다. 여전히 질문이 있는 경우 메시지를 보내주시기 바랍니다.
안전한 다운로드
안전한 다운로드
더 많은 관련 기사
작가 소개