PNG ファイルのサイズを必要に応じて 20、50、100、200KB に縮小します
PNG は、ハード エッジのグラフィックス、透明な背景、テキストを含む画像形式です。非常に多くのデータが保存されるため、多くの人が PNG ファイルのサイズを小さくする 20/50/100KBまで。これは、JPEG と同様に 1,600 万色も処理できる圧縮可能なファイル タイプです。ただし、PNG には多くの画像情報が含まれるため、通常、デバイス上のスペースを大量に消費する大きなファイルになります。この問題を解決するために、この投稿は、最適な PNG ファイル サイズ削減ツールのガイドラインとなります。
ガイドリスト
パート 1: AnyRec を使用して PNG サイズを 20/50/100KB に削減する [オンライン] パート 2: PNG ファイルサイズを 20/50/100KB に縮小する 3 つの方法 [Windows/Mac] パート 3: PNG ファイル サイズの削減に関する FAQパート 1: AnyRec を使用して PNG サイズを 20/50/100KB に削減する [オンライン]
AnyRec Free Image Compressor Online は、さまざまな画像を圧縮する無料サービスを提供する Web ベースのプログラムです。この PNG ファイル サイズ縮小ツールは、JPEG、BMP、TIFF、GIF などの一般的な画像タイプをサポートしています。初心者でもプロでも簡単に操作できるわかりやすいインターフェイスを備えています。また、異なる形式の複数のファイルをアップロードして、それらを迅速なプロセスで圧縮することもできます。 AnyRec Free Image Compressor Online は、プロモーション、ポップアップ、広告による中断なしで PNG を作成できる便利なツールです。
特徴:
- PNG 画像サイズを削減して高品質にするための堅牢な圧縮アルゴリズムを備えています。
- オリジナルと視覚的な違いを持たせることなく、最大 80% までの画像を圧縮します。
- 圧縮画像ファイルに透かしを適用せずに写真を最適化します。
- ユーザーのプライバシーを保護するために、アップロードされたファイルは自動的に削除されます。
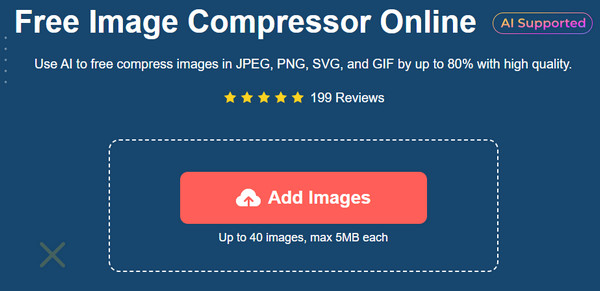
ステップ1。AnyRec の公式 Web サイトにアクセスし、製品リストから Free Image Compressor を探します。 「画像を追加」ボタンをクリックしてPNGファイルを選択し、選択します。
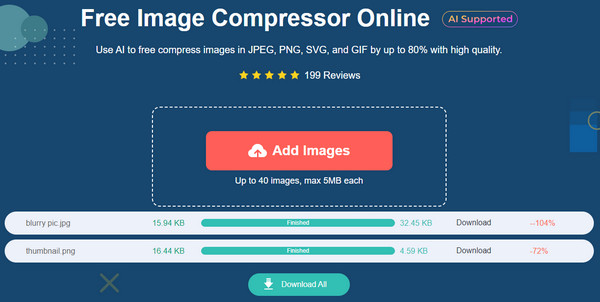
ステップ2。オンライン ツールは、アップロードされた画像の圧縮を自動的に開始します。時間を節約するために、フォルダーからさらに多くのファイルをインポートします。各画像の横には読み込みプロセスがあります。
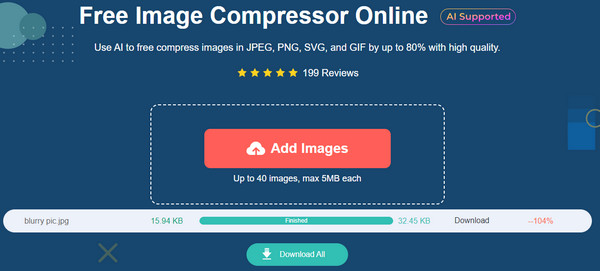
ステップ 3。すべての PNG をコンピューターからインポートしたら、「すべてダウンロード」ボタンをクリックして圧縮ファイルをフォルダーに保存します。それぞれ 5MB のファイルを最大 40 個までアップロードできるようにします。
パート 2: PNG ファイルサイズを 20/50/100KB に縮小する 3 つの方法 [Windows/Mac]
ご存知ないかもしれませんが、コンピューター上のいくつかのツールは PNG 画像を 20/50/100KB に圧縮でき、単純な圧縮には効果的です。このパートでは、Windows と Mac で人気のあるソフトウェアの 3 つの異なる圧縮方法を紹介します。
1. Windows および Mac 上の Photoshop
Photoshop は、PNG ファイル サイズを 20/50/100 KB などのサイズに縮小する Windows および Mac 用の完璧なサードパーティ アプリです。解像度、品質、その他の設定を調整するためのより優れたコントロールを備えた強力な画像圧縮機能を備えています。 Adobe Photoshop には、多くのプロフェッショナルな編集機能が備わっています。まず、Photoshop は無料ではありません。ナビゲートの練習を最大限にするには、プロ バージョンを購入する必要があります。
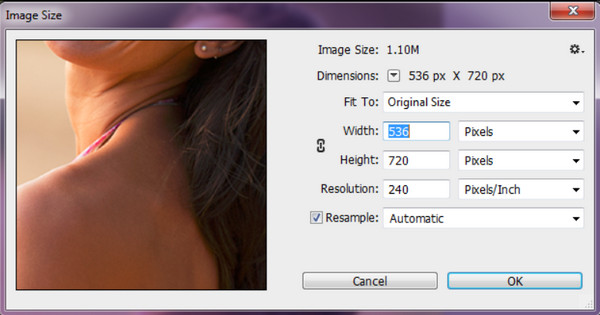
ステップ1。アプリを起動し、インターフェイスの上部にある [ファイル] メニューに移動します。 「開く」オプションから、PNG ファイルを参照して選択します。アップロードしたら、[画像] メニューに移動し、[画像サイズ] オプションを選択します。または、Ctrl+Alt+I を押して関数を開きます。
ステップ2。ダイアログボックスで、「高さ」と「幅」の値を調整します。 「縦横比を固定する」のチェックボックスにチェックを入れます。 [再サンプル] を選択し、[バイキュービック シャープ] オプションを選択して、圧縮中に写真の鮮明さを維持します。 「OK」ボタンをクリックして変更を保存します。
2. Windows 上の Microsoft ペイント
ペイント アプリは Windows のデフォルト ツールです。サイズ変更、描画、反転、ミラーリング、および作成のための多くの機能のホームです。画像を簡単に圧縮できる PNG ファイル サイズ縮小ツールのほかに、ペイントには多くの編集機能があります。ペイント アプリは、次のようなさまざまなエクスポート形式も提供します。 PNG から BMP、TIFF、および HEIC は、大きなファイルのイメージ ファイルを圧縮するもう 1 つの方法です。次に、Windows でペイント アプリを使用して PNG ファイル サイズを縮小する方法のデモを見てみましょう。
ステップ1。ローカル フォルダー内の画像を参照し、右クリックします。メニューから、「プログラムから開く」タブの上にカーソルを置き、サブメニューを開きます。ペイント アプリを選択します。 PNG ファイルをアップロードするもう 1 つの方法は、まずアプリを開いて [ファイル] メニューに移動して PNG ファイルを選択することです。
ステップ2。画像がインターフェースに表示されたら、ツールバーの「サイズ変更」ボタンをクリックします。キーボードの「Ctrl」キーと「W」キーを押してこの機能を有効にすることもできます。ピクセルとパーセンテージで寸法を変更して、画像のサイズを変更します。完了したら、「OK」ボタンをクリックします。
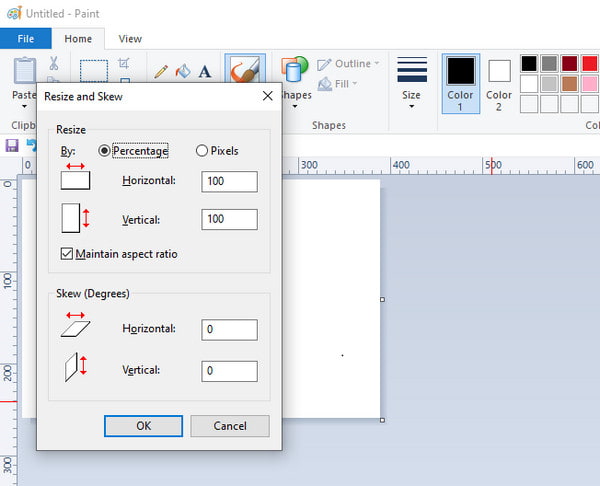
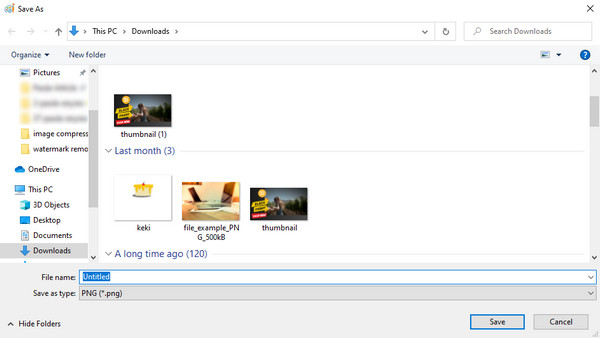
ステップ 3。編集後、「ファイル」メニューに移動し、「名前を付けて保存」ボタンをクリックします。出力形式を選択するか、サイズ変更された画像の名前を変更します。 「保存」ボタンをクリックしてタスクを終了します。新しいファイル サイズを確認するには、ファイルの情報を確認してください。
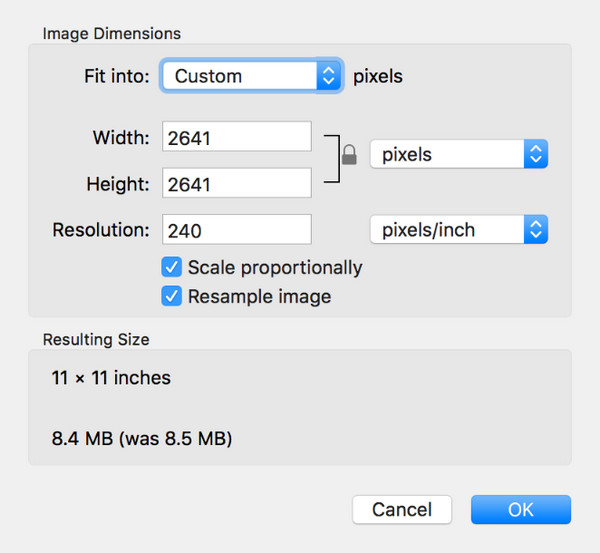
3. Mac でプレビューする
プレビューは Mac の組み込み機能で、すべての写真を表示および編集できます。フォト ビューアには、品質を損なうことなく写真のトリミング、結合、描画、カット、反転、回転を行う編集ツールが備わっています。などにも使えます PNG圧縮。 PNG ファイル サイズ縮小機能は、画像のサイズを寸法ごとに変更するシンプルな機能です。アスペクト比はパーセンテージ、幅、高さで変更でき、ファイル サイズを正確に最小化するのに役立ちます。さらに、複数の写真を編集して Mac 上のファイル サイズを調整することもできます。
ステップ1。Finder に移動し、圧縮したい写真を参照します。それを右クリックしてドロップダウン メニューを開きます。 [プログラムから開く] タブから [プレビュー] アプリを選択し、フォト ビューアーで画像を開きます。
ステップ2。ファイルを開いたら、インターフェイスの上部にある [ツール] メニューに移動します。リストから「サイズを調整」ボタンをクリックし、「画像の再サンプル」を選択します。 「解像度」ボックスに希望の小さい値を入力します。
パート 3: PNG ファイル サイズの削減に関する FAQ
-
1. iPhone で PNG ファイルのサイズを減らすにはどうすればよいですか?
写真アプリを開き、ファイルサイズを変更したい写真を選択します。共有メニューから、 をタップします。 郵便。自分のメールアドレスを入力し、「送信」をタップします。ポップアップウィンドウが表示されます。画像の希望のサイズを選択します。メールアプリを起動し、写真付きのメールをダウンロードします。
-
2. PNG ファイルのサイズをどれくらい削減する必要がありますか?
ほとんどの場合、圧縮レベルを目的のファイル サイズに制御することはできません。ただし、ファイル サイズを減らすための他のオプションとしては、色の深さを 24 ビットまたは 8 ビットに減らすか、透明度を削除するという方法があります。品質を落とさずに PNG を小さくしたい場合は、非可逆圧縮ツールを使用して画像のサイズを縮小することに重点を置いた方がよいでしょう。
-
3. PNG ファイルのサイズを小さくするのに最適な形式は何ですか?
画質の良い圧縮に基づいている場合は、PNG を WEBP に変換します。 41% の圧縮効率があるため、ロスレス写真に適しています。また、さまざまな Web ブラウザーやソフトウェアでも広くサポートされています。ただし、WEBP はより高い CPU 使用率を必要とするため、デコードする場合には欠点となります。
結論
Windows と Mac 向けの推奨ツールがすべて揃っているので、 PNG ファイルのサイズを削減する Windows または macOS を所有している場合でも問題ありません。このような場合には、コンピュータ上のデフォルトのツールが役に立ちますが、Photoshop を使用すると、画像の寸法をより細かく調整できます。 写真をHDにする。残念ながら、サードパーティ製アプリは学習が難しく、インターフェースに慣れるまでに時間がかかります。したがって、AnyRec Free Image Compressor Online は、簡単なナビゲーションで無料で PNG ファイルのサイズを削減します。公式ウェブサイトにアクセスして、AnyRec のその他の便利な機能をご覧ください。
関連記事:
著者について


